62 Chapter 7: Setting Up The System
PRO6 Control Centre
Quick Reference Guide
Switching the PRO6 Control Centre on/off
Carry out the following to switch the PRO6 Control Centre on or off in a safe manner,
observing all WARNINGS and Cautions.
>> To switch on the PRO6 Control Centre
Caution!
Before switching on, check that all monitor loudspeaker power
amplifiers are turned off or muted.
Caution!
A minimum of two power supply modules must be supplying power
to the PRO6 Control Centre for correct operation.
After connecting up the audio cables, carry out the following:
>> To switch off the PRO6 Control Centre
1 Make sure you have saved any shows, scenes or settings you require (see
“Saving your show files to USB memory stick” on page 56).
2 At the GUI, choose homeShutdown System.
3 At the Shutdown ENTIRE system? prompt, click OK.
4 After the shutdown sequence has finished, switch off the D.C. POWER switch
(rear of control centre).
5 Disconnect the mains cables from the rear of the PRO6.
Mains
plug
Mains
outlet
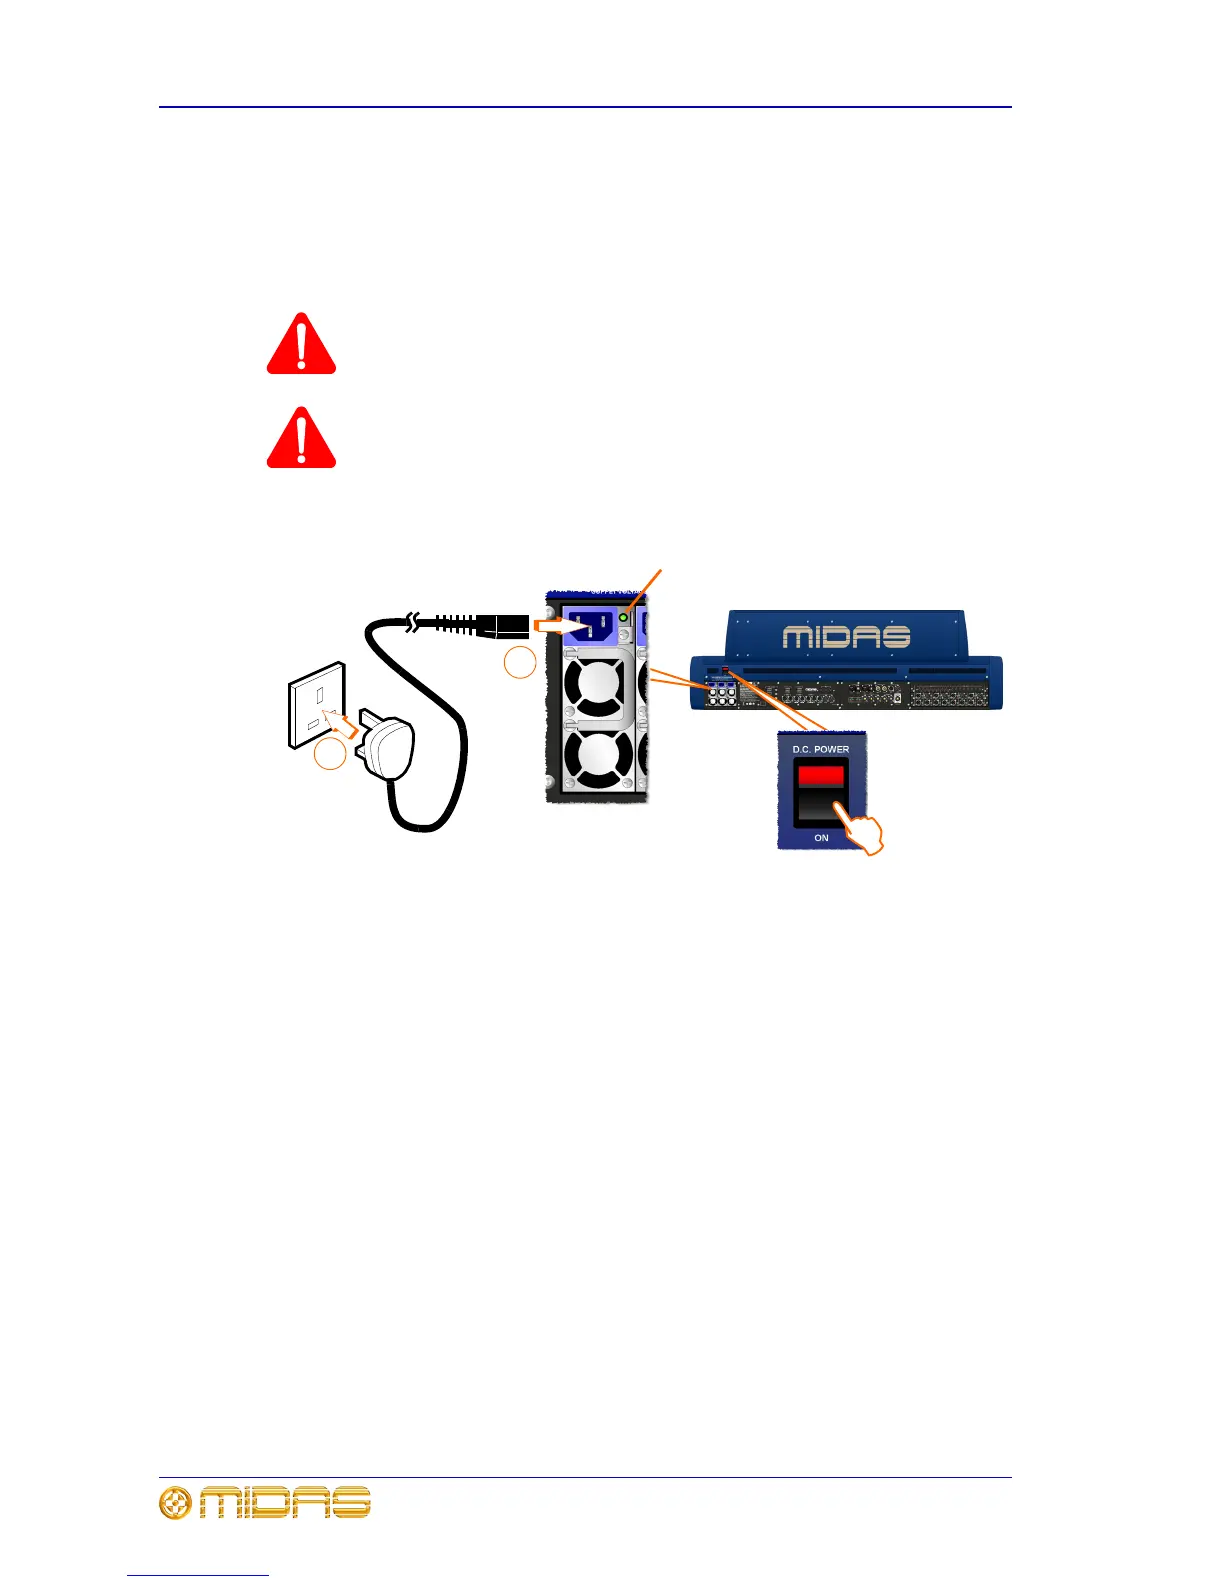
Rear of PRO6 Control Centre
1 Plug the three mains cables into the mains
power outlets.
2 Plug the IEC connectors of the three mains
cables into the mains sockets on the rear of
the control centre. (The green LED next to
each mains socket will illuminate if its
mains supply is on.)
3 Observing the Cautions above, apply
power to the PRO6 Control Centre by
switching the D.C. POWER switch on. The
PRO6 Control Centre will boot up (see
“Booting up” on page 63) and, when the
default GUI screens are displayed, it is
ready for use.
1
2
3
Mains power on/off
LED indicator

 Loading...

