32 Chapter 6: Basic Operation
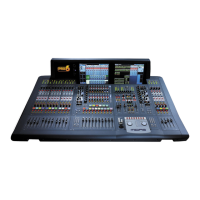
PRO6 Control Centre
Quick Reference Guide
Operating the top output fast strips from the master bay
During normal operation, both rows of output fast strips — which are always
independent from each other — are operated using the controls in the mix bay.
However, you can assign the master bay to control the top row of output strips.
>> To switch control of the output strips to the master bay
Press the right arrow (to right channel) button (see Figure 7 “Location of the
navigational controls on the control surface” on page 20).
Controlling the mix buses in flip mode
Flip provides a more global approach to mix bus level control. Normally, you can only
use the level control knobs in the channel strips to adjust the signal level of the
aux/matrix mix buses going to the masters. However, by using flip you have the option
of controlling them from either the pan control knobs or the faders in the input fast
strips.
In flip mode the channel select (upper) section scrolls across the input fast strips.
>> To configure the PRO6 for pan or fader flip
1 At the GUI, choose homePreferencesGeneral.
2 Depending on which option you require, click the option button of one of the
following in the Fader flip section. When an option is selected, it will contain a
red circle:
• “Flip to faders”.
• “Flip to Pans”.
>> To flip mixes to input pan/fader control
With an output selected on the control surface, press FLIP (see Figure 7 “Location of
the navigational controls on the control surface” on page 20). The button will illuminate
to show you are in ‘flip’ mode. The currently selected mix bus in the input channels will
change to AuxS1 and, on the GUI, the background of the pans and faders will change
accordingly. Also, the LCD select buttons in the input fast strips will display the current
bus mode, for example, “MONO AUX”.
Hints and tips
• Check what is hidden: On the PRO6, unlike on an analogue control surface, some
of the settings and parameters will be hidden from view (stored in the computer
memory of the PRO6). At various times during a mix we recommend that you select
and view unused parameters to make sure there are no hidden surprises, for
example, a reverb send left from a previous mix.
• Check the Meters screen: It is a good idea to frequently monitor the Meters
screen (default display of the master bay GUI), which provides at a glance an
overview of the console’s status and operation. It shows all the meters and the
status condition of faders and some switches, such as solos and mutes. However,
some things will still remain hidden.
 Loading...

