21
VStabi NEO
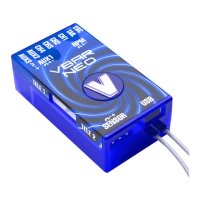
VBasic Receiver
Included with the VBasic Receiver (depending on what
product you did order) comes a Quick Start Guide.
More information can be found at www.vstabi.info/vbasic.
Information about how to get started with Macrocells can
be found at www.vstabi.info/mc.
Please also take note of the Video sections for VBar NEO
and VBar Control, where you will nd many sample appli-
cations, explained step by step.
Apart from its wide range of features as a receiver, each
VBar NEO VBasic can be updated to be a full blown VBar
NEO with Pro and Rescue feature.
To do this, please connect your VBasic Receiver to your
computer, start the VBar Control Manager software and go
to our App Store via the ‘Applications’ Buton.
Prices for the different possible updates will be shown
there. The purchase is processed via our online shop, and
after payment has been received, your update will be en-
abled automatically.
VStabi NEO
non VLink Conversion
When switching to VBar Control, from a different radio sys-
tem, you can even update VBar NEO devices of the 2nd
Generation to full blown VBar NEO VLink devices, with
built-in receiver.
This is possible for devices which show the extension (non
VLink) in your device list, on www.vstabi.info/devices, and
if you have the VBar NEO VLink Crossgrade available as
an option in our App Store.
You will need antenna wires of course, which we offer to-
gether with a new case for your VBar NEO, with the anten-
na grommet. Please use our Item No. 05062 (Conversion
Kit VBar NEO to VBar NEO VLink).
In case the App Store does not offer the update, you have
a VBar of the 1st Generation, where the receiver board
was built in separately. These devices can not be updated.
In this case, please use a VBar Control RX Satellite Item
No. 04882 together with the Connecting cable VBar NEO /
RX-Sat Item No. 04977.
More information about options can be found in our online
shop at shop.mikado-heli.de, on the main page, right hand
side navigation, please check out ‘Updates for your VBar
NEO’
During Initialization, the VBar goes through a self-test. The
helicopter must be at rest during this test.
» Note for Mini VBar: During the self-test, the V ashes
(blinks). When the test is nished, you will see a brief
twitching (jump) of the swash plate. Also the V stops
blinking and will be lit up continuously.
» Note for VBar with external sensor: The V starts ashing
blue-green-red in a sequence.
Before each ight you must double-check the active
direction of the swash plate and the tail rotor. To do so, lift
the helicopter up and move it along the three axis. The
swashplate must tilt noticeably against the movement. The
tail rotor must create thrust against the direction of rotation
on the yaw axis.
» Note for VBar with external sensor: The sensor LED will
show it’s activity in three different colors: red for aileron,
green for elevator, blue for tail.
Mikado does not assume liability for completeness or cor-
rectness of the content of this manual and of the software
provided.
The user assumes all liability for all potential damages or
claims that might arise from the operation of the VBar and
his helicopter.
You will nd accessories to be used with VBar on Mikado’s
website www.mikado-heli.de

 Loading...