22
Setup of a New Model
If you start a new model with VBar Control, or if you are
new to VBar Control, these are the steps required:
■ Set up your radio (Transmitter Settings).
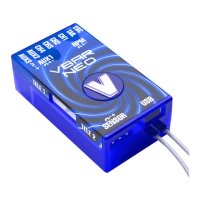
■ Bind the VBar NEO or legacy VBar with RX Satellite to
your VBar Control, without the servos connected yet.
■ Go to Model Setup/New Model and select the model
type and/or size to start with, to load factory defaults
into your VBar.
■ Follow the Setup Wizard from top to bottom and make
the required adjustments. The Wizard will guide you
through the whole setup, show you the numbers or
names of the physical connectors where to connect
servos etc., and the (?) Online Help will always be
available right on screen.
■ Once the Model Setup is done, do a test run on the
ground (without rotor blades/propellers/wheels etc. to
avoid damage or injury), then you are good to go.
⚠ Important Before you begin to set up a VBar equipped
model, you must adjust at least basic settings such as
Stick
Mode
and
Switch Assignment
. You may also have to remove
the stepped brake plate from the collective stick gimbal and
possibly change the collective stick to match your preferred
stick mode.
☠ Danger When setting up your radio, make sure you do not
assign two vital functions to the same switch, e.g. Motor
Switch, Safety Switch (optional) and Throttle Cut (Motor Off
on IC powered models). They must be set to independent
switches.
☝ Attention Familiarize yourself with the switch assignment,
especially with Motor Off, so you ip the proper switch even
in case of an emergency (e.g. loss of control). Do a test run
on the ground, without main and tail rotor blades, and
check the action of the ESC. If your are setting up an IC
powered model, check the action of the throttle servo and
the carb when switching the several states of the Motor
Switch and when actuating the Throttle Cut switch.
☝ Hint When you install additional Apps, which can be oper-
ated by Option Switches, make sure you set them up prop-
erly. For example, it makes no sense to have the function
Screenshot on the same switch as e.g. the Motor Switch or
the Bank Switch, this way you would create a Screenshot
on every operation of the corresponding switch.
-
☝ Attention Do not connect the VBar Control Receiver Satel-
lite yet. You may either connect the USB wire or a device to
the Bluetooth/Control Panel connector, but not both.
■ Log in to www.vstabi.info using your MikadoID (please
check out our video tutorials on www.vstabi.info if you
are not yet familiar with registration and online update
of VBar Flybarless Controllers).
■ Navigate to ‘My VBars’, check the list of devices
registered to your MikadoID.
■ If needed, register a new or used device to your
MikadoID rst.
■ Click on the magnifying glass in the column ‘Options’
for the VBar in question. Click ‘Add VBar Control
Version’ to enable the required rmware.
■ Click on the globe icon below ‘License’ to get a license
key for the device in question. You will receive an
e-mail with a one-time link shortly.
■ Click the link in the e-mail and follow the instructions on
the screen.
■ Use PC software 5.3+ (download available on www.
vstabi.info) to perform File/Online Update for the
device.
■ Select 6.x rmware, click ‘Load’. Wait for the update to
install, do not disconnect the VBar during the process.
Make sure your receiver power supply is sufcient and
that the USB lead is rmly plugged into the VBar (mind
the rubber protector especially on a Mini VBar).
■ Turn off your VBar, disconnect the USB lead.
☝ Only now connect the VBar Control Receiver Satellite.
■ Turn on your VBar again (wait for 10 seconds: this will
bring the VBar Control Receiver Satellite into Bind
Mode).
■ Turn on your VBar Control Transmitter.
■ Select
,
from the menu.
■ Select the VBar (serial number) of the VBar you are
about to set up.

 Loading...