52
Pellerin Milnor Corporation
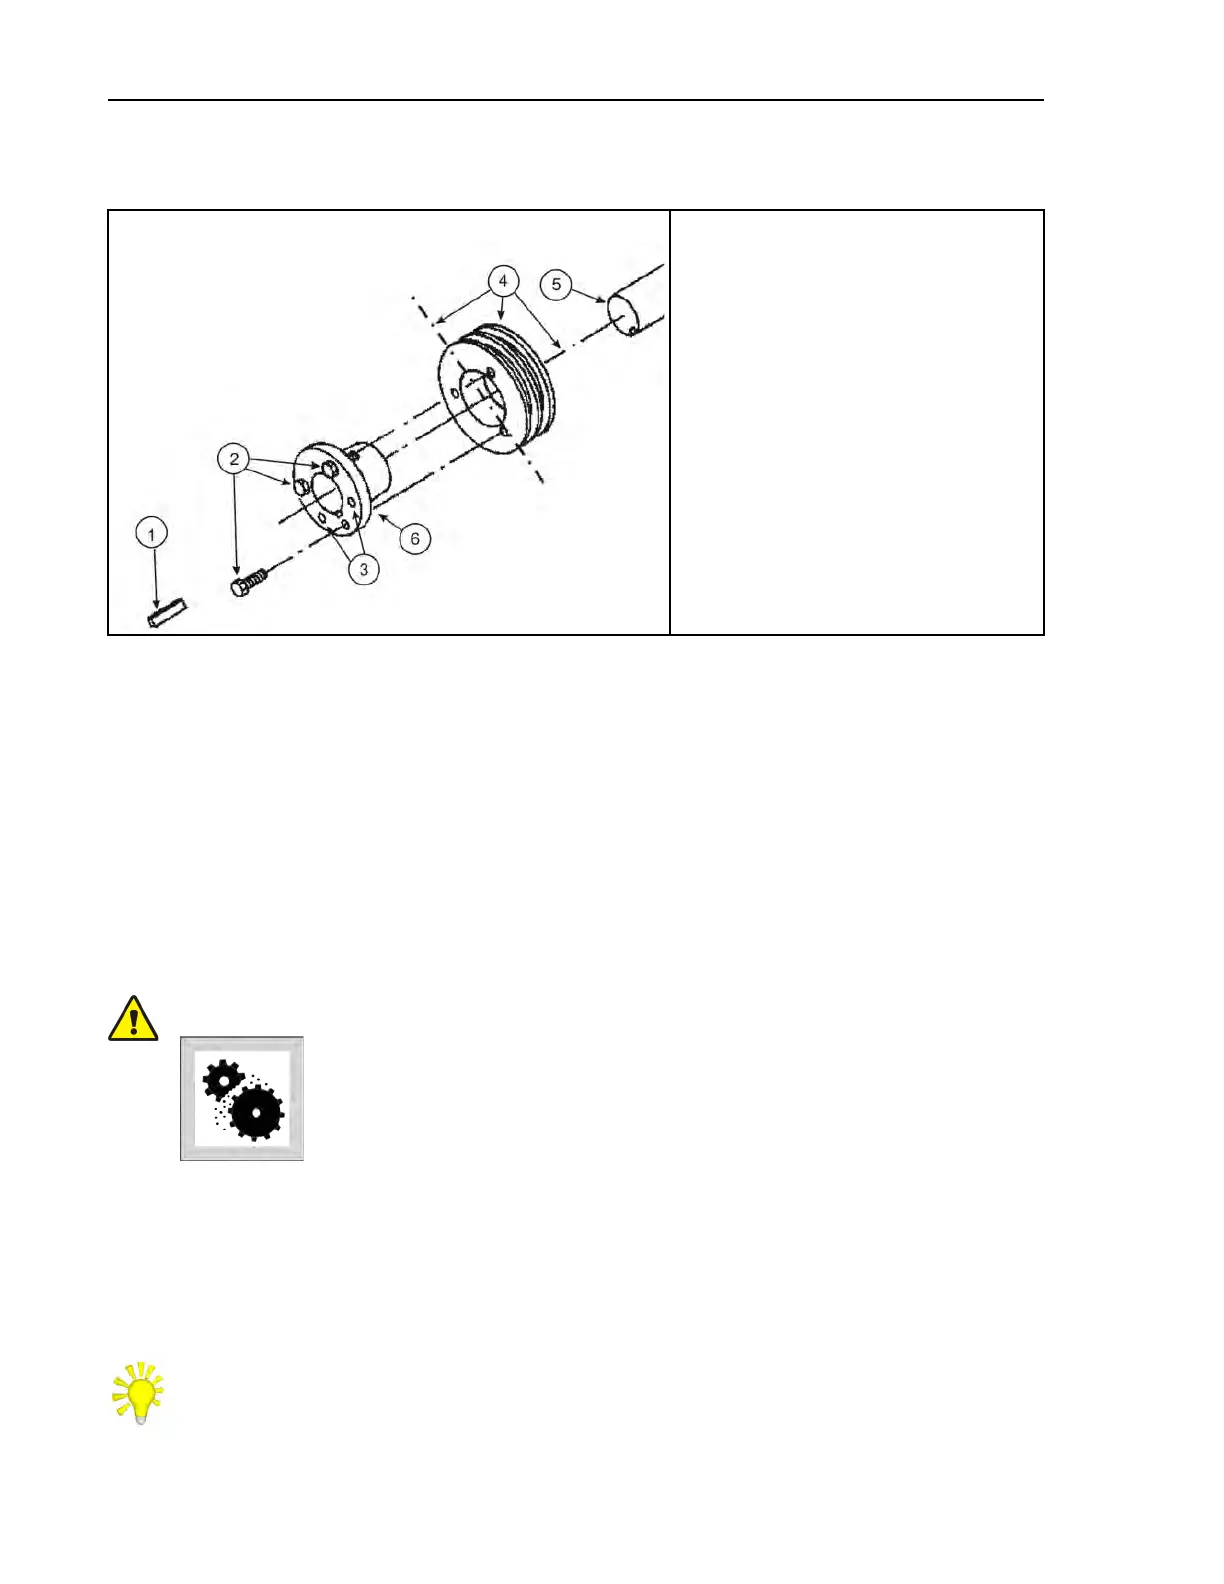
Figure 11. Typical Pulley Assembly
View of Pulley Components
Legend
1. Key
2. Bushing bolts. Tighten bolts in a pattern
that gives the same torque. This will give
minimum axial run-out.
3. Push-off holes
4. Pulley. Measure the radial run-out of the
pulley after you assemble. Make sure that
the center of the pulley is the same as the
center of the shaft.
5. Shaft. Make sure that the shaft is not
bent.
6. Bushing
Belt Requirements
BNUUUM02.C06 0000274605 A.3 A.4 A.2 2/4/20 8:08 AM Released
• Replace damaged belts.
• The pulleys must stay aligned when you adjust the belt tension.
• Do not use belts made from cut belts.
• For a drive with more than one belt:
– Replace all of the belts together.
– Do not mix new and used belts.
– Do not mix belts from more than one manufacturer.
CAUTION: Risk of damage — A screwdriver or metal tool can cause damage to the
belt.
� Do not push the belt on with a tool.
Condition of Belts
BNUUUM02.C07 0000274604 A.3 A.4 A.2 2/4/20 8:08 AM Released
Slippage when the pulley turns more quickly than the belt can move
Slippage occurs if belts are not aligned (see ) or by incorrect tension explained in . Slippage can
cause belts to become too hot. Belts must not have a temperature more than than 140F (60° C).
TIP: The belt storage area must be cool and dry with no sun light.
Drive Assemblies
 Loading...