4
2.3.2) Fixing the front bracket
The front bracket (21) is fitted with its clamp to the gate according to
the distance D (see drawing in paragraph 2.3 - Assembly);
before fixing permanently:
1. Check that the closing line of the gear motor is perfectly
horizontal (fig.4).
2. Open and close the gate by hand to check it moves smoothly.
3. Remove the gear motor and weld the front bracket (21).
Fixing the rear of the gear motor (fig.5)
Fix WINGO to the bracket (22) using the screw (48), washer (55) and
nut (51); completely tighten the latter and then unscrew it by about
1/10 of a turn to give a little play.
Fixing the front of the gear motor (fig.6)
Fit the front fork of WINGO (18) into the front bracket (21) and clamp
with the screw (47) and washer (54).
2.3.3) Opening the gate outwards
If the value of E is greater than 140mm, lengthen the bracket
personally.
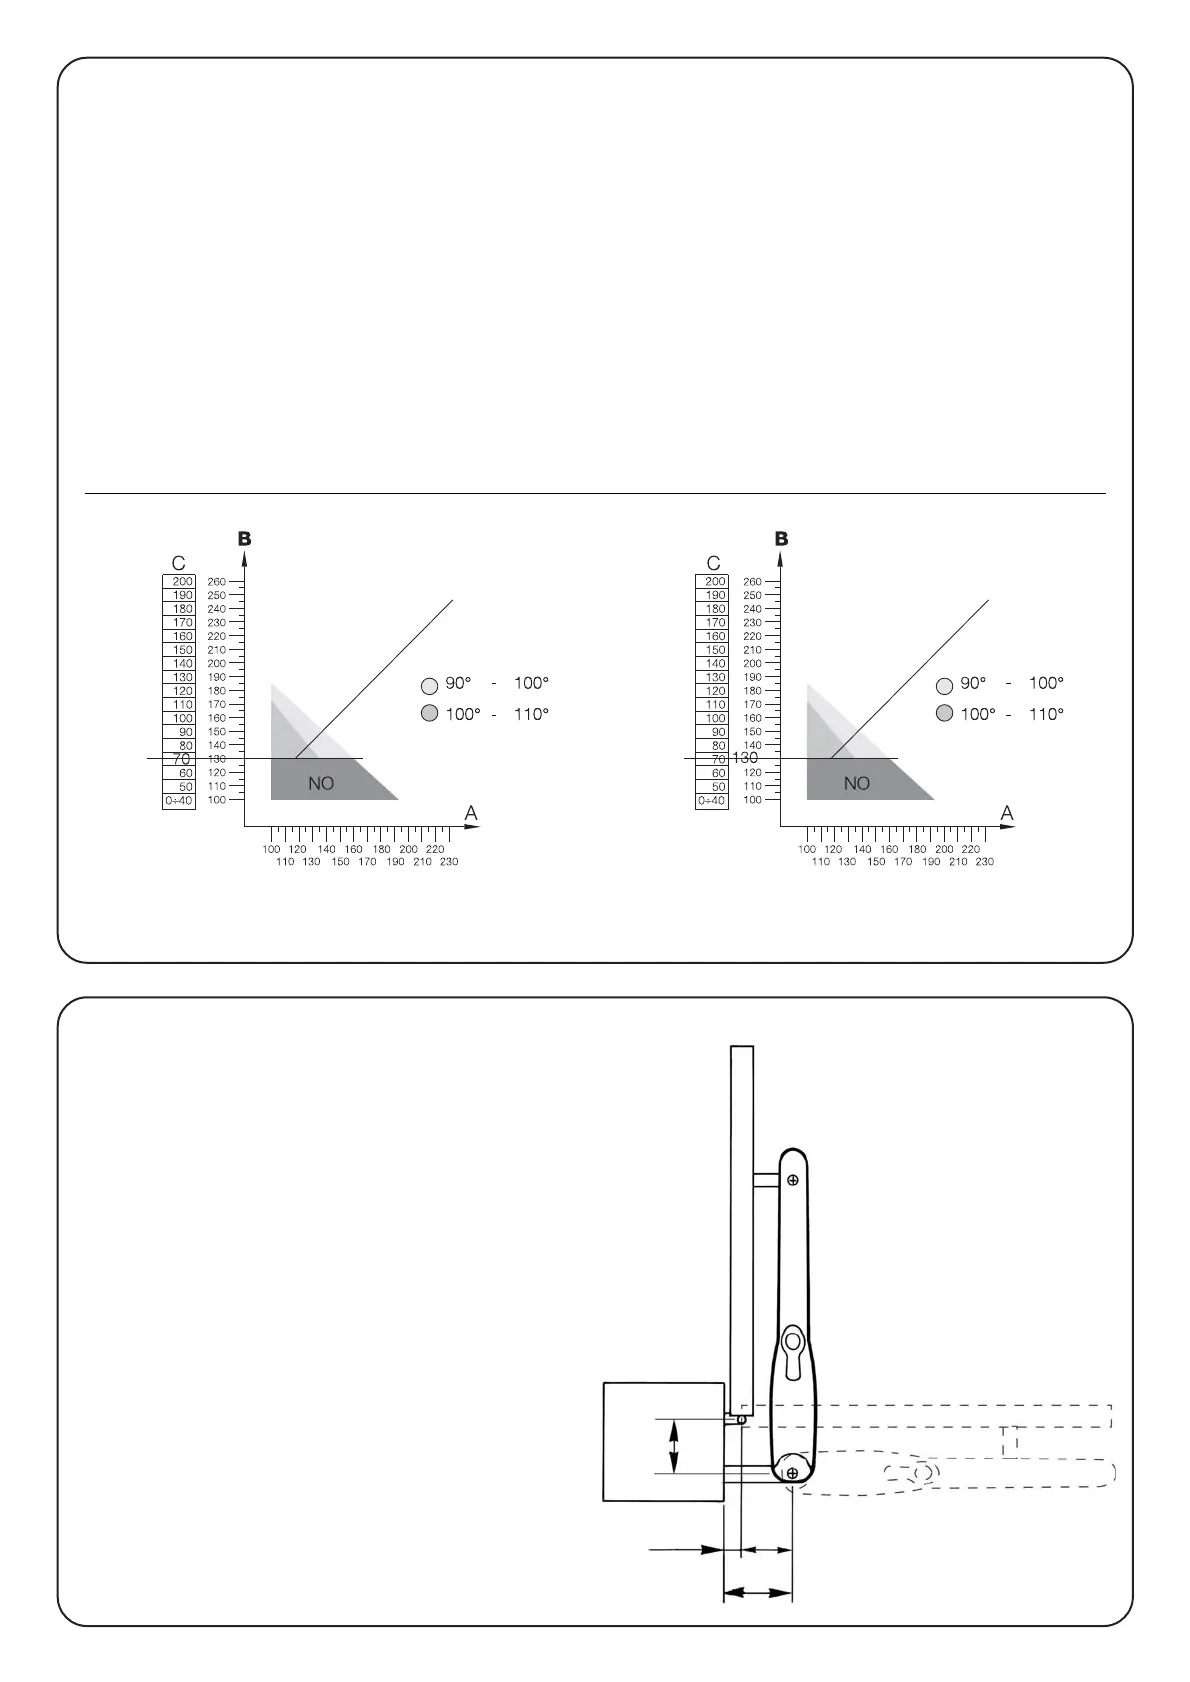
A
B
E
C
Recommended installation line
Horizontal line Horizontal line
Recommended installation line
fig.8
fig.9
Example
 Loading...