E-13
Names of Operational Parts
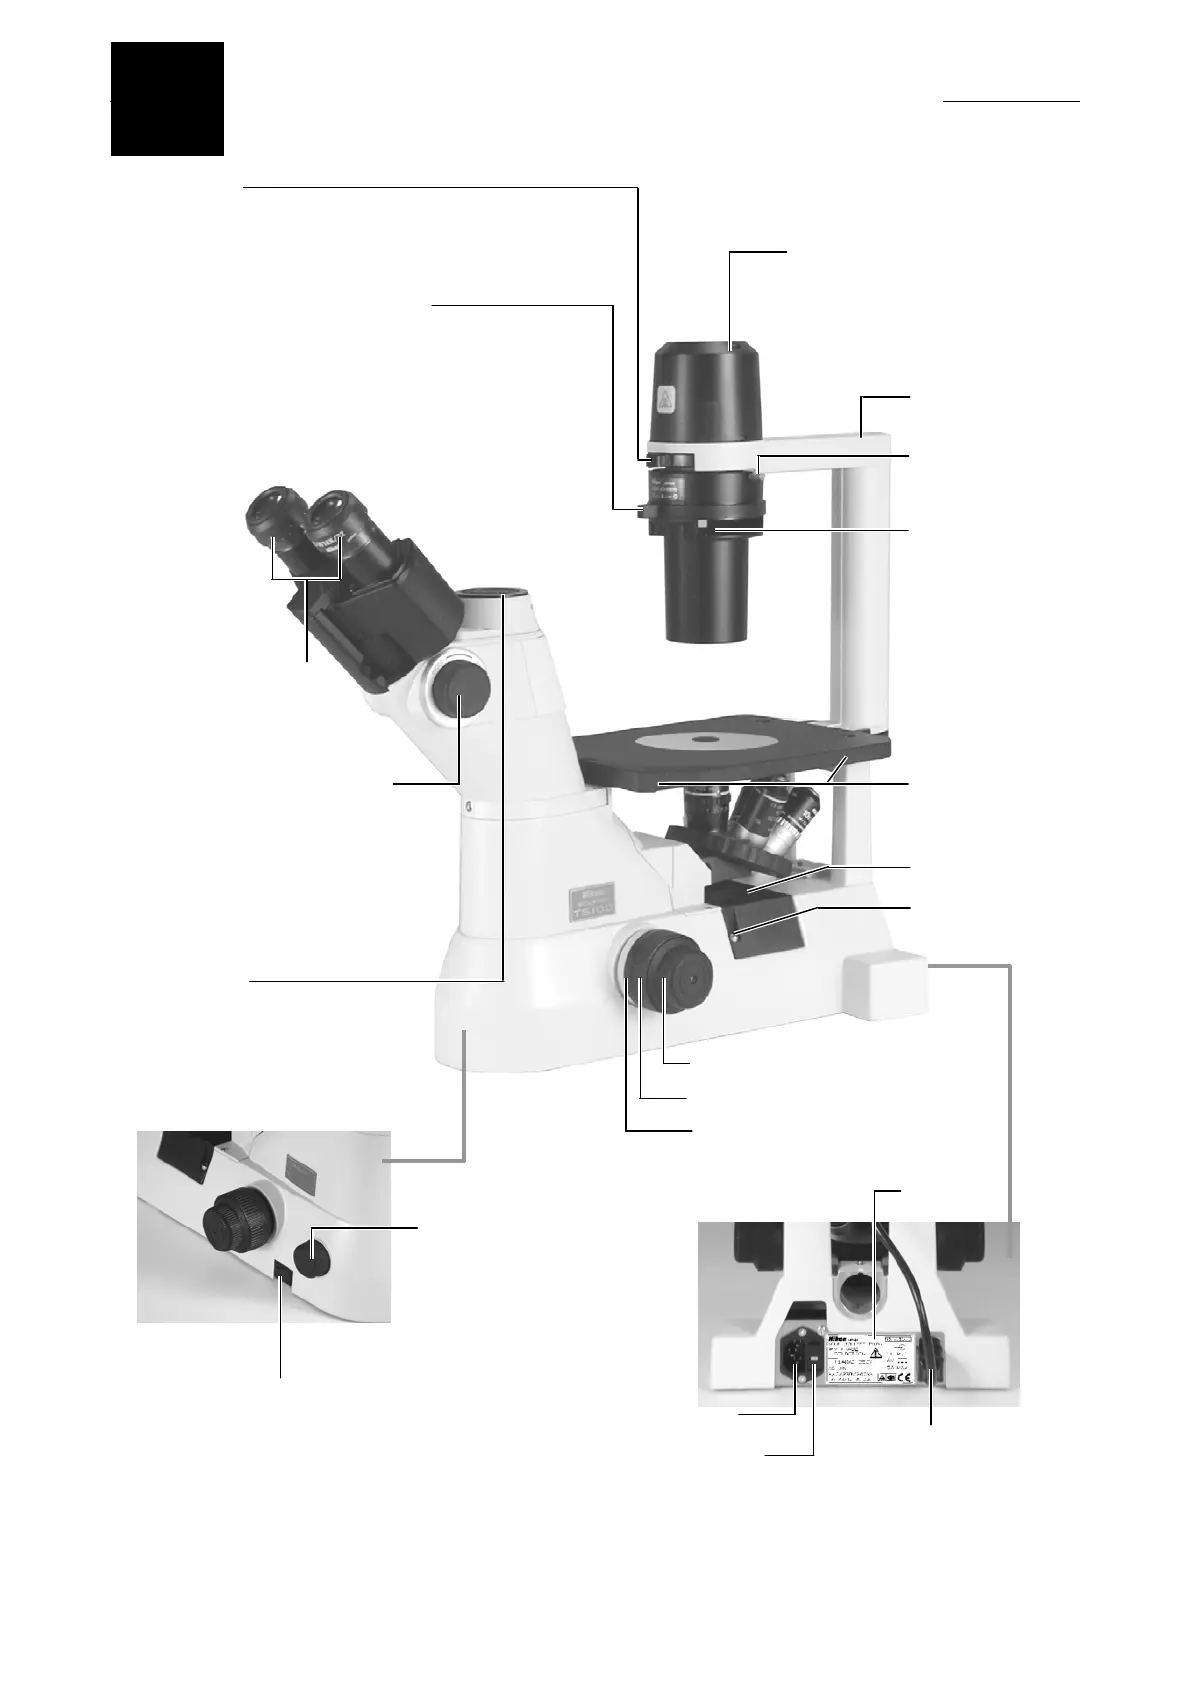
2
This photo shows an example of ECLIPSE TS100-F with ELWD condenser.
Slider installation
hole
This hole allows the
installation of a phase
slider.
(The NAMC condenser
has the hole for
installing the NAMC
slider.)
Condenser clamp
screw
Illumination pillar
Lamphouse cover
To remove the cover, press the
front and back hem and pull
upward. Before replacing the
lamp, (1) turn off the power,
(2) unplug the power cord, and
(3) wait for the lamp to cool.
Mechanical stage
installation screw
holes
(bottom panel)
Water tray
Water tray cover
clamp screw
Filter holder
Holds up to two filters, such as the GIF filter for phase contrast
microscopy and NCB filter (for TS100/TS100-F only) for
bright-field microscopy. Holds a diffuser as standard for TS100
LED MV/TS100LED-F MV. For filter types, see Chapter 4,
Operation of Each Part - 4 Filters”.
Diopter adjustment rings
Adjust independently to
compensate for the
difference between your
right and left eyes. (P.15)
Condenser aperture diaphragm lever
Moving the lever to the right opens the aperture and moving the
lever to the left closes the aperture. Closing down the aperture
allows observation of transparent specimens even under
bright-field microscopy though its resolution is reduced. Fully open
the aperture diaphragm during phase contrast microscopy. During
bright-field microscopy, close the aperture diaphragm to 70% of
the numerical aperture of the objective to get a sharp image with
good contrast. (The aperture diaphragm lever works the same for
NAMC condenser. Fully open the aperture diaphragm during NAMC
microscopy.)
Optical path changeover knob
(for TS100-F/TS100LED-F MV only)
Switches the light path between the
binocular eyepieces and the vertical tube.
PHOTO: 0% to the eyepieces and
100% to the vertical tube.
BINO: 100% to the eyepieces and
0% to the vertical tube.
Vertical tube
(for TS100-F/TS100LED-F MV only)
Accepts various types of adaptors to
allow the attachment of a camera or
other photomicrographic equipment.
Power switch
Press the power switch to the “l” position to
turn on the power and to light up the lamp.
(The switch also lights.)
Press the power switch to the “○” position
to turn off the power and to turn off the
lamp. (The switch also goes off.)
Brightness adjuster
Turn clockwise to increase
voltage to the lamp and to
brighten the viewfield.
Turn counterclockwise to
decrease voltage to the lamp
and to darken the viewfield.
Coarse torque adjustment ring
Adjusts rotation torque of the
coarse focus knob. (P.25)
Coarse focus knob
Fine focus knob
Nameplate
AC inlet
Fuse holder
(voltage selector)
(for TS100/TS100-F only)
Lamp cable
connector
 Loading...


