INSTRUCTION FOR USE ENGLISH
9099867000 - SC351 13
MACHINE TRANSPORT/PARKING
To transport/park the machine, proceed as follows.
1. Check that the function selection knob (31) is turned to “0”.
2. Grab the handlebar (2) and slightly lift the machine brush deck. While holding the machine in this position, drive it to the
transport/parking area.
3. When nishing working, it is advisable to remove the brush/pad in order not to drag it on the oor and leave wet marks.
TANK EMPTYING
An automatic oat shut-off system (25) turns off the vacuum system when the recovery tank (23) is full.
The vacuum system shutdown is signalled by an increase in the vacuum system motor noise, moreover the oor is not dried.
CAUTION!
If the vacuum system turns off accidentally (for example, when the oat is activated because of a sudden
machine movement), to resume the operation: turn off the machine with the function selection knob (31) turned
to “0”, check that the oat inside the grid (25) has gone down to the water level. Then turn on the vacuum
system by pressing the function selection knob (31).
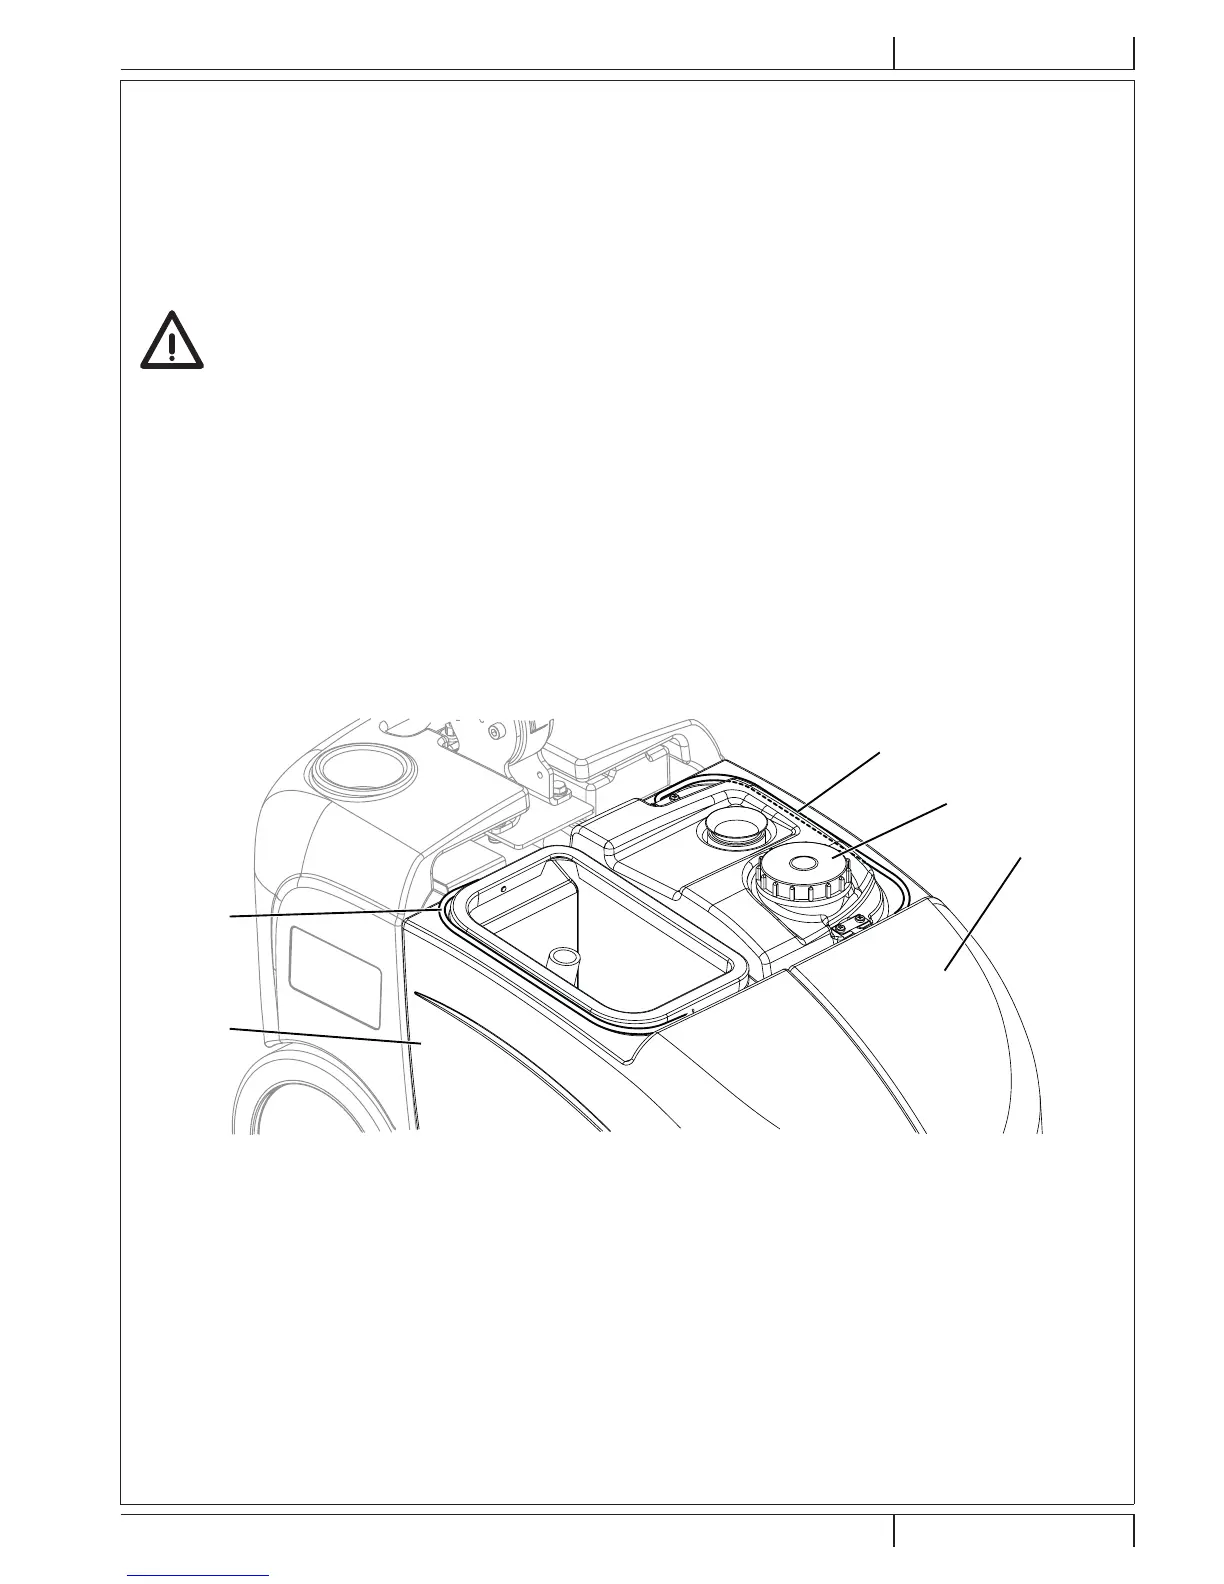
When the recovery tank (23) is full, empty it as shown.
Recovery tank emptying
1. Check that the function selection knob (31) is turned to “0”.
2. Drive the machine to the appointed disposal area.
3. Remove the transparent cover (24).
4. Grab the handle (A, Fig. 3) and lift the recovery tank (B).
5. Drain the recovery tank. Then, rinse the tank with clean water.
6. Place the tank back again on its housing in the frame and install the transparent cover.
Solution tank emptying
7. Perform steps 1 to 3.
8. Grab the handle (C, Fig. 3) and lift the solution tank (D).
9. Open the plug (E) and drain the solution tank. Then, rinse the tank with clean water.
10. Place the tank back again on its housing in the frame and install the transparent cover.
A
C
D
E
B
Figure 3
P100409
 Loading...