ENGLISH INSTRUCTION FOR USE
18 SC351 - 9099867000
BRUSH CLEANING
NOTE
It is advisable to wear protective gloves when cleaning the brush because there may be sharp debris.
1. Remove the brush, as shown in Use chapter.
2. Clean the brush with water and detergent.
3. Check the brush bristles for integrity and wear; if necessary, replace the brush.
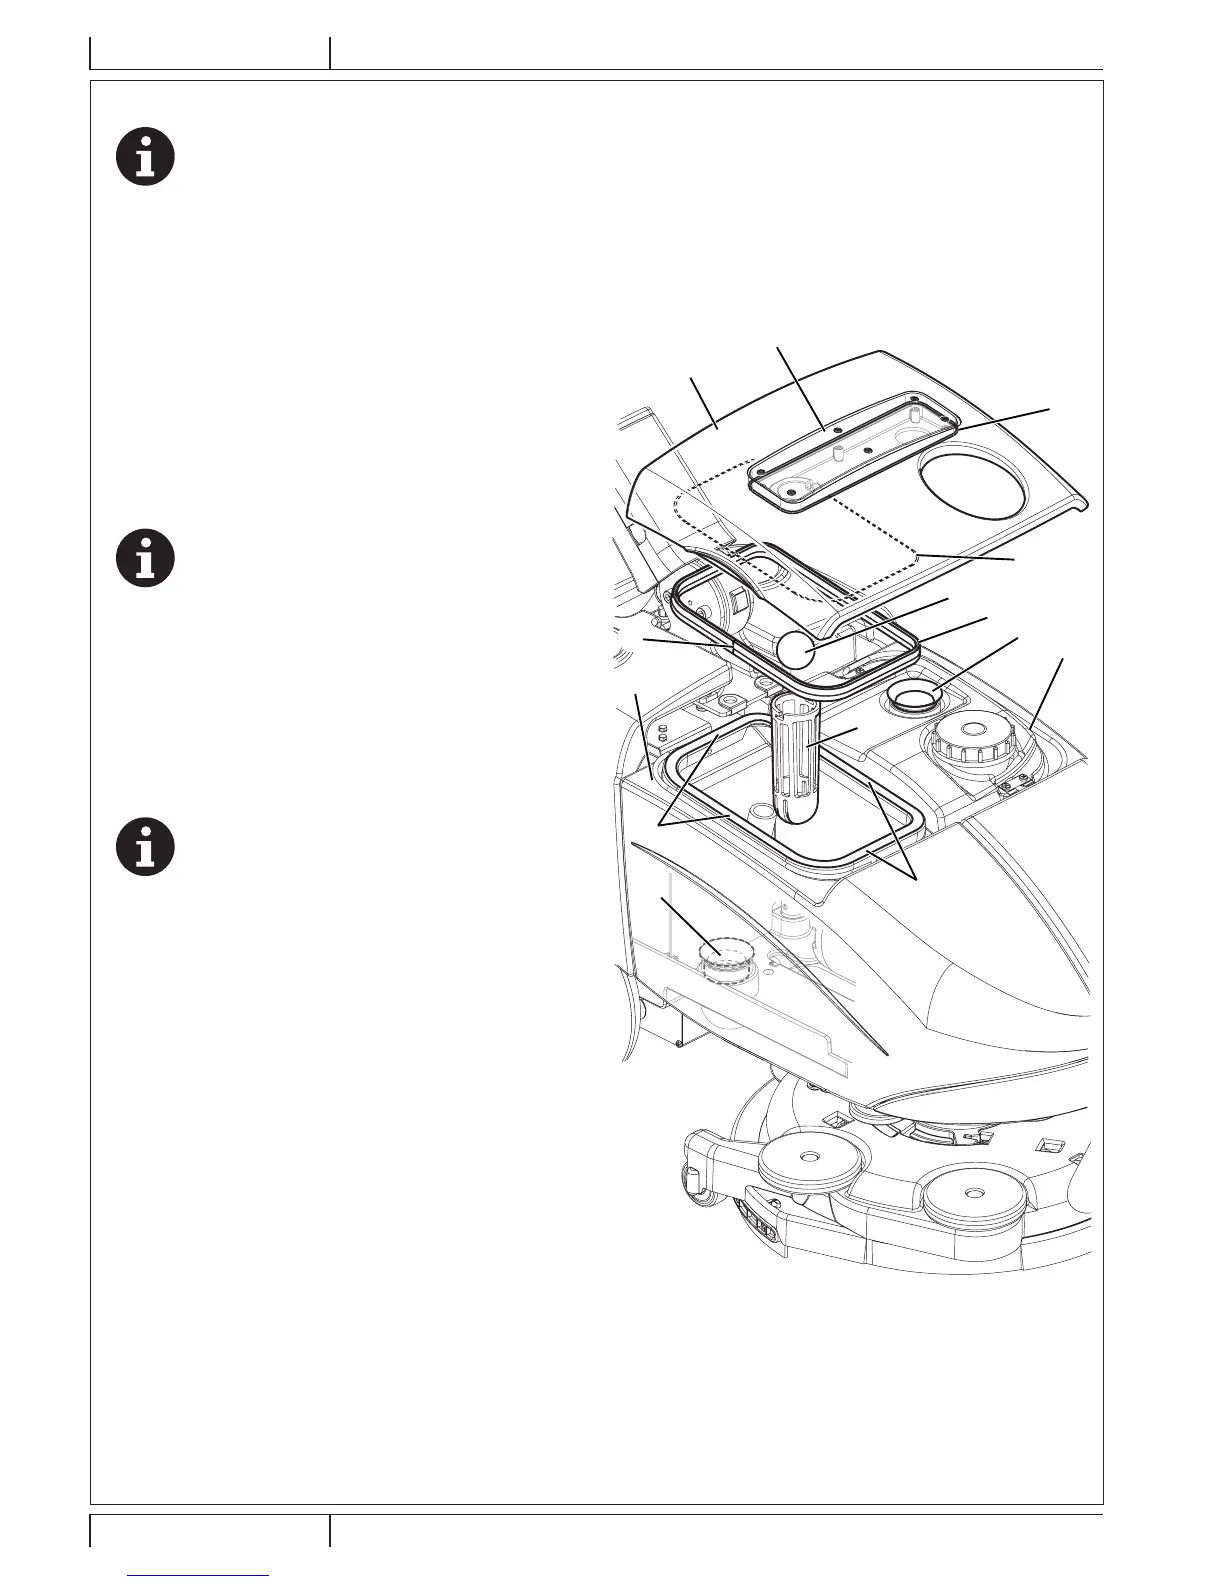
TANK, COVER AND VACUUM GRID CLEANING
1. Drive the machine to the appointed disposal area.
2. Check that the function selection knob (31) is turned to “0”
and disconnect the battery connector (7).
3. Remove the cover (A, Fig. 7), clean and wash the cover
and the vacuum grid (B) with clean water.
4. Drain the water from the tanks (C and D) and clean them.
5. If necessary, disassemble the grid (B) and remove the oat
(E), than clean with care and reinstall.
6. Check the recovery tank cover gasket (F) for integrity.
NOTE
The gasket (F) creates vacuum in the tank that is
necessary for vacuuming the recovery water.
If necessary replace the gasket (F) by removing it from
its housing (G) on the cover. When assembling the new
gasket, install the joint (H) in the area shown in the gure.
7. Check that the seating surface (I) of the gasket (F) is clean
and adequate for the gasket itself.
8. Check the vacuum duct (J) and the gasket (K), carefully
clean if necessary.
9. Reinstall the recovery tank cover (A).
VACUUM SYSTEM GASKET CLEANING
NOTE
The gaskets (L) and (M) create vacuum in the
system that is necessary for vacuuming the recovery
water.
1. Drive the machine on a level oor.
2. Check that the function selection knob (31) is turned to “0”
and disconnect the battery connector (7).
3. Open the cover (A, Fig. 7) and check the vacuum system
motor gasket (L) for integrity.
If necessary replace the gasket by removing it from its
housing.
4. Remove the recovery tank (C).
5. Check the recovery water duct gasket (M) for integrity. If
necessary, replace the gasket.
6. Clean with care and reinstall.
A
C
I
I
D
B
E
 Loading...