2-7
Brightness and Contrast
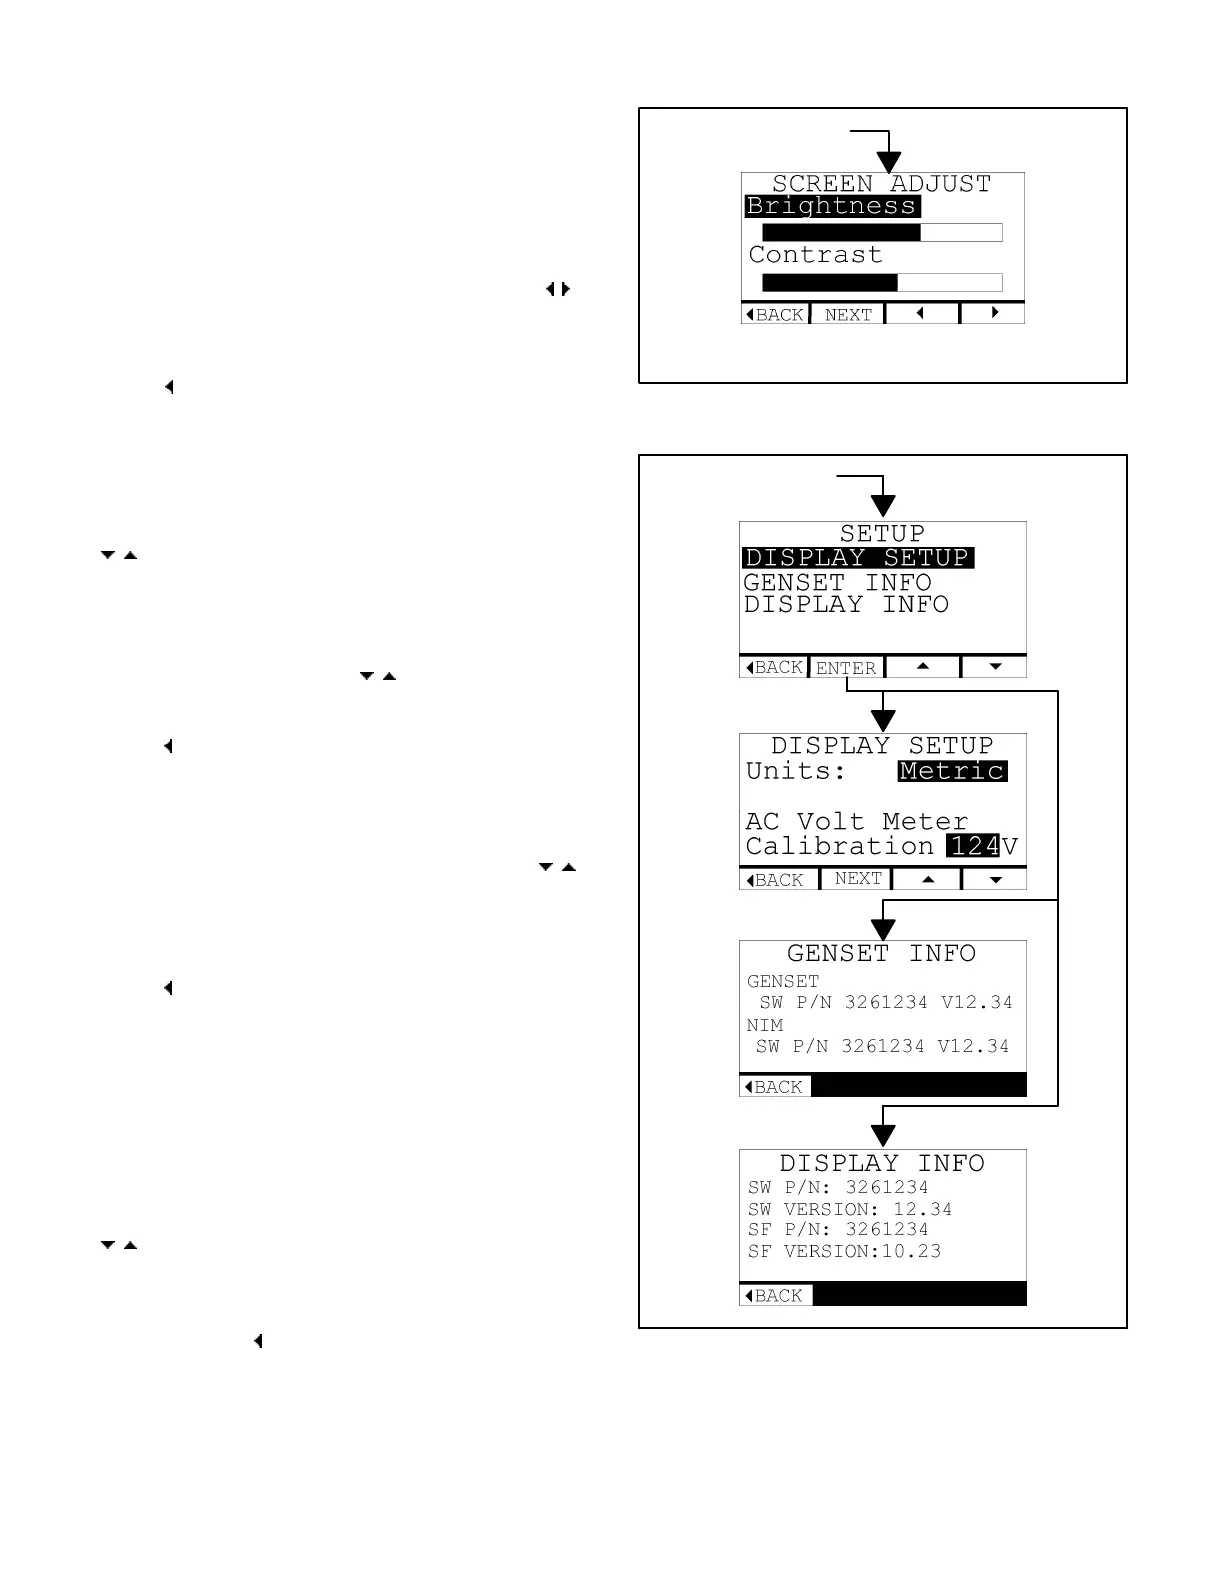
To adjust the brightness and contrast of the LCD
screen and status lamps, go to the SCREEN AD-
JUST screen by pressing SCREEN on any GEN
STATUS screen. Press NEXT to select Brightness
or Contrast . Increase or decrease the selected item
by pressing the increase-decrease buttons [
].
See Figure 2-7. (“Contrast” applies only to the LCD
screen.)
Press [
BACK] to save the settings and go back to
GEN STATUS.
Display Setup
Go to the SETUP screen by pressing SETUP on any
GEN STATUS screen. Press the up-down arrows
[
] to select Display Setup and press ENTER.
See Figure 2-8.
Units: To change the units of measure on the GEN
STATUS screens, press NEXT to select Units. Then
press the up-down arrows [
] to toggle between
Metric and SAE units.
Press [
BACK] to save the selection and go back to
GEN STATUS.
AC Voltmeter Calibration: To calibrate the Display
Voltmeter, press NEXT to select AC Voltmeter
Calibration. Then press the up-down arrows [
]
to increase or decrease the voltage displayed to
correspond to an accurate AC output voltmeter
(line-to-line or line-to-neutral, as desired).
Press [
BACK] to save the selection and go back to
GEN STATUS.
Note:This procedure does not change AC output
voltage. See Adjusting AC Output Voltage (Sec-
tion 8).
Genset and Display Information
Go to the SETUP screen by pressing SETUP on any
GEN STATUS screen. Press the up-down arrows
[ ] to select Genset Info or Display Info and press
ENTER. See Figure 2-8. This information may be
requested by the service technician.
Keep pressing [
BACK] to get back to GEN STA-
TUS.
From SCREEN, Fig. 2-3
FIGURE 2-7. SCREEN BRIGHTNESS & CONTRAST
From SETUP, Fig. 2-3
FIGURE 2-8. SETUP, GENSET & DISPLAY INFO
Redistribution or publication of this document,
by any means, is strictly prohibited.
 Loading...

