EN-3
-Type C
• Vertical area for wall mount
at the left corner
-Type D
• Vertical area for wall mount at the right corner
X
Y
Mounting surface
X
Y
Mounting surface
X
Y
Mounting surface
• Vertical area for ceiling mount
-Type A
-Type B
• Vertical area for wall mount
X
Y
Mounting surface
Caution >>
Fixing screw of
the front cover
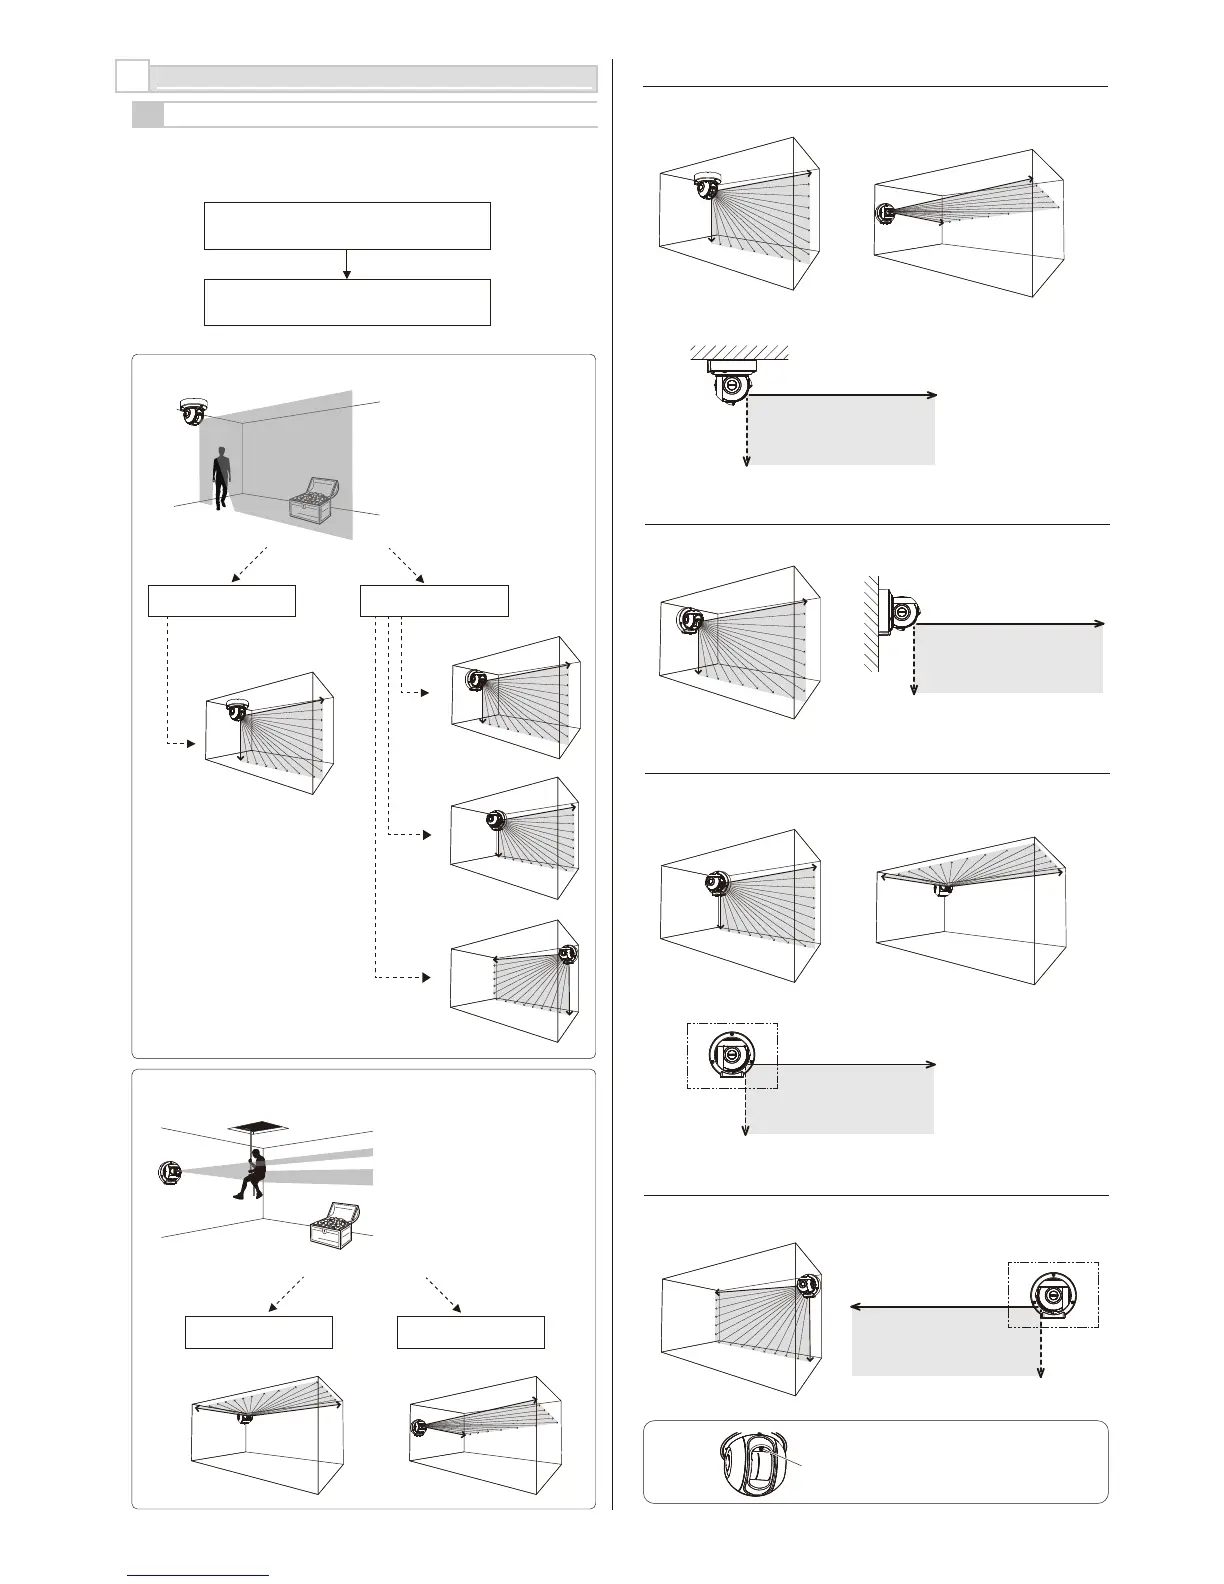
The detection area should cover the
intruders approach.
Which detection area is appropriate,
Vertical or Horizonrtal?
Vertical Detection Area
CEILING MOUNT WALL MOUNT
Type C
Type D
Type B
Type A
Horizontal Detection Area
CEILING MOUNT WALL MOUNT
Type C
Type A
2
MOUNTING TYPE AND ASSEMBLY OPTIONS
2-1
MOUNTING TYPE
RLS-2020 has type A, B, C, and D to be installed.
Select the correct type of assembly to match the installation.
For the vertical detection area to
the mounting surface, be sure that
the fixing screw of the front cover is
placed on top.
The detector can create vertical
detection area.
Protect the asset from intruder who
across the detection area.
The detector can create horizontal
detection area.
Protect the asset from intruder who
across the detection area.
• Horizontal area for wall mount
• Horizontal area for ceiling mount
Detect!
Detect!
 Loading...