13
DRB1536-A
En
13
Connections
Connections
Be sure to turn off the power and unplug the AC adapter from the power outlet before making or changing connections between devices.
Wait until all connections between devices have been completed before connecting the AC adapter.
Only use the AC adapter included with this unit.
Refer to the operating instructions for the component to be connected.
Power to this unit is supplied by the AC adapter or by USB bus power.
This unit can be used by connecting it to a computer using a USB cable, even without connecting the AC adapter.
! Connect this unit and the computer directly using the included USB cable.
! A USB hub cannot be used.
! When using USB bus power, use the connected computer on an AC power supply.
! In cases like the ones below, the power may be insufficient and this unit may not operate on USB bus power.
— When the computer’s USB power supply capacity is insufficient.
— When other USB devices are connected to the computer.
If this unit does not operate on USB bus power, connect the included AC adapter.
! The following limitations apply when operating on USB bus power:
— The jog dial indicator will not light.
— The indicators (aside from the jog dial) will be dimmer.
— The [AUX IN] and [MIC] terminals cannot be used.
— The volume of the headphones will be lower.
To use the unit without these limitations, connect the included AC adapter.
Names of terminals
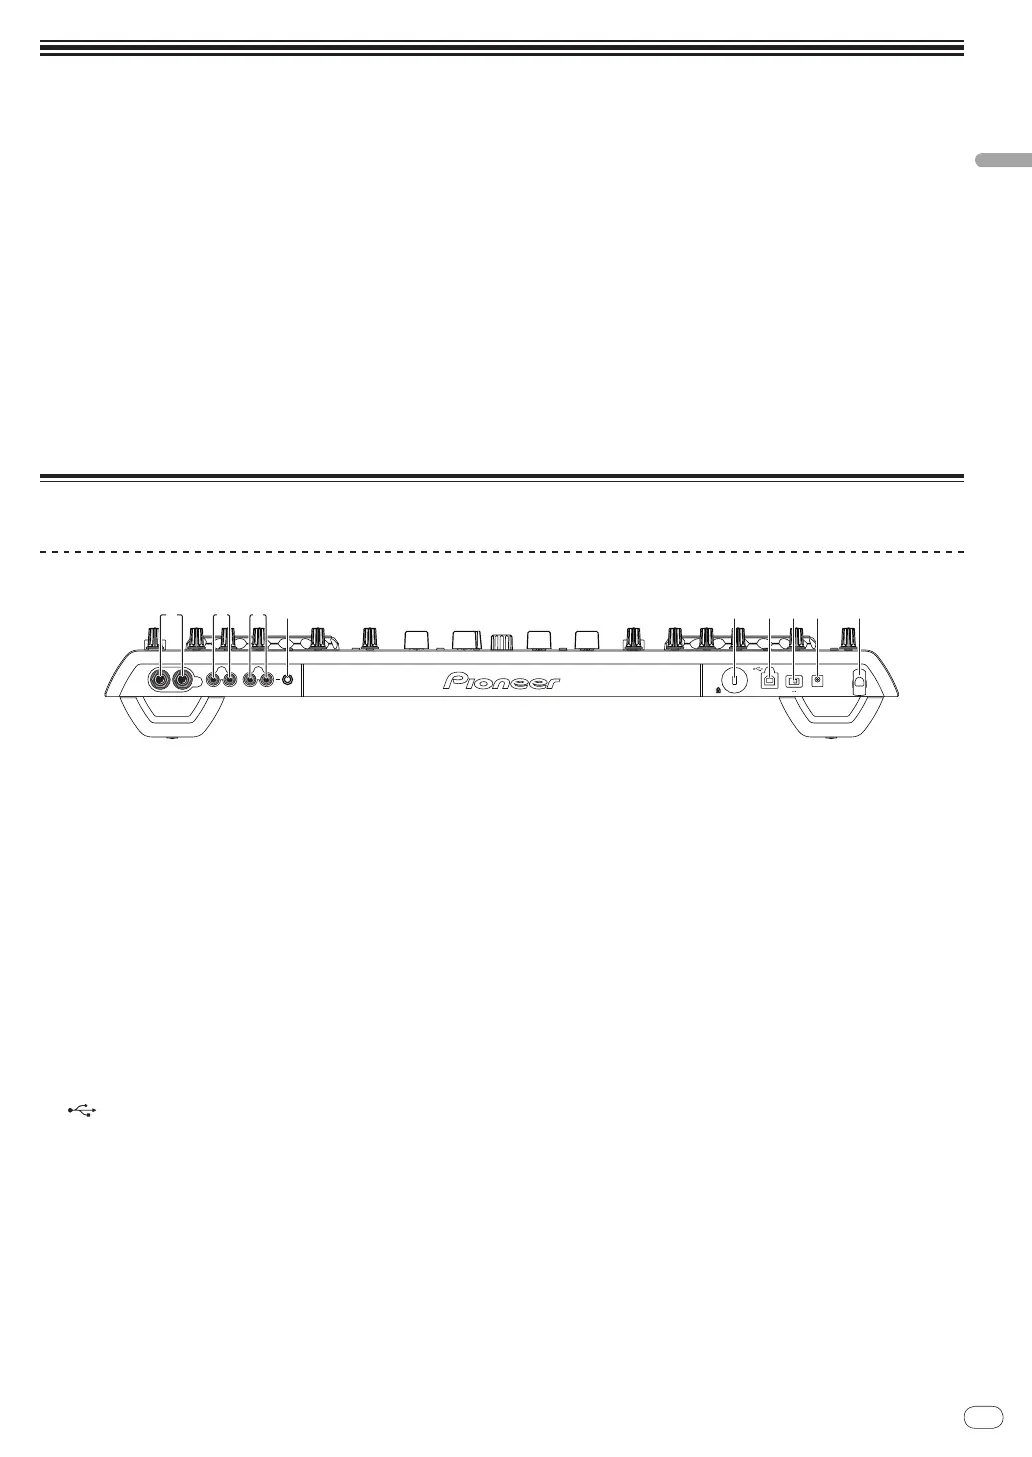
Rear panel
MASTER OUT 2
MASTER
OUT 1
(TRS)
AUX IN VOL
USBONOFF DC IN
MIN
LRL
L
R
R
MAX
4 5 6 7 8 91 2 3
1 MASTER OUT 1 terminal
Connect powered speakers, etc., here.
This is a TRS phone jack, so both balanced and unbalanced outputs
are supported.
! The sound will be distorted if the level is raised too high when
using unbalanced outputs.
2 MASTER OUT 2 terminal
Connect to a power amplifier, etc.
3 AUX IN terminal
Connect to the output terminal of an external device (sampler, por-
table audio device, etc.)
! This cannot be used when operating on USB bus power.
4 VOL control
Adjusts the audio level input to the [AUX IN] terminals.
5 Kensington security slot
6
USB terminal
Connect to a computer.
! Connect this unit and the computer directly using the included
USB cable.
! A USB hub cannot be used.
7 ON/OFF switch
Turns this unit’s power on and off.
8 DC IN terminal
Connect to a power outlet using the included AC adapter (with the
power plug mounted).
Wait until connection of all equipment is completed before connect-
ing the AC adapter.
Only use the included AC adapter.
9 Cord hook
Catch the AC adapter’s power cord and USB cable on this hook when
using this unit. For details, see Cord hook on page 14.
! The sound will be interrupted if the AC adapter or USB cable is
disconnected during playback.
 Loading...