EasyManua.ls Logo

Pioneer DDJ-T1 User Manual

Pioneer DDJ-T1
32 pages
To Next Page IconTo Next Page
To Previous Page IconTo Previous Page
Page #19 background imageLoading...
Page #19 background image
18
19
DRB1536-A
En
19
Part names and functions
3 HEADPHONES VOL control
Adjusts the audio level output from the [PHONES] terminal.
4 GAIN control
Adjusts the sound level input to the various decks.
5 EQ (HI, MID, LOW) controls
These adjust the sound quality input to the various decks.
These adjust the [HI] (high range), [MID] (medium range) and [LOW]
(low range), respectively.
6 Effect assign buttons
Press the [1] or [2] button to assign TRAKTOR effect unit [FX 1] or
[FX 2] to the deck.
7 CUE button
The sound of decks for which the headphones [CUE] button is
pressed can be monitored over headphones.
When multiple headphones [CUE] buttons are pressed, the sound of
the decks for which the buttons are pressed is mixed and output from
the headphones.
8 SYNC button
The track on the deck for which the [SYNC] button is pressed is
synchronized to the [BPM] and [Beat Grid] of the deck for which the
[MASTER] button is pressed or of the master clock.
9 MASTER button
Sets the tempo of the deck for which the [MASTER] button is pressed
as the master for synchronizing with the beat sync function.
a Channel fader
Adjusts the sound level output from the various decks.
b CH FADER START switch
Switches the [CH FADER START] function on/
off.
When the [CH FADER START] switch is set to [ON], the fader start
and back cue functions can be used according to the movement of
the channel faders.
! Fader start: When the channel fader is moved from the front-
most position towards the back while pausing at the cue point,
playback starts immediately.
! Back cue: When the channel fader is returned from the back to
the front-most position, playback returns to the set cue point,
cues there, and the pause mode is set immediately.
c Crossfader
Switches the sound of the decks assigned to the left and right sides
of the crossfader for output.
The deck assignment can be changed with the [Deck Assign Button]
at the sides of the TRAKTOR crossfader.
Do not pull on the channel fader and crossfader knobs with excessive
force. The knobs are not designed to be removed. Pulling the knobs
strongly may result in damaging the unit.
4 Effect
ONOFF
ADVANCED
CHAINED
MIN MAX
DRY/ WET
DECK
FX1
FUNCTION
IN ADJUST OUT ADJUST
MOVE
HOT CUE
IN
AUTO LOOP
KEY
LOCK
TEMPO
RANGE
OUT
NEEDLE SEARCH
MODE SIZE
BWDFWD
DELETE 1
ACTIVE
FILTER
A
C
SELECT/ BACK
1
1
2
2
3
3
MIN MAX MINMAX MIN
LOWHI
MAXMIN
VOL
MAIN
BROWSE VIEW
HEADPHONES
MASTERCUE
MIX
MAXMIN
VOL
MAX
5
2
6
3
7
4
8
GAIN
MINMAX
C
LOAD
FX
12
EQ
HI
MINMAX
MID
MINMAX
LOW
MINMAX
GAIN
MINMAX
TREE FAVORITES
A
LOAD
FX
12
EQ
HI
MINMAX
MID
MINMAX
LOW
MINMAX
GAIN
MINMAX
B
LOAD
PUSH
FX
12
EQ
HI
MINMAX
MID
MINMAX
LOW
MINMAX
EQ
HI
MINMAX
MID
MINMAX
LOW
MINMAX
GAIN
MINMAX
D
LOAD
FX
12
REC
5
543
4321
! The [Advanced] mode cannot be selected with TRAKTOR Pioneer DDJ-T1 EDITION.
! The effect panel can be switched to the [Advanced] mode when you upgrade to TRAKTOR PRO or TRAKTOR SCRATCH PRO.
1 ADVANCED/
CHAINED selector button
! [Chained] mode: Up to 3 effects can be selected on the effect
panels and operated simultaneously.
! [Advanced] mode: The parameters of the one selected effect
can be adjusted in detail.
2 Effect button
This button is exclusively for use in the [Advanced] mode.
3 DRY/WET control
Changes the balance between the effect sound and original sound.
4 SELECT/BACK button
The effect type switches each time the button is pressed.
With TRAKTOR Pioneer DDJ-T1 EDITION, the 6 types of effects below
can be used.
[
no Effect
][
Flanger
][
Delay
][
Reverb
][
Beatmasher2
]
[
Gater
]
When the [SELECT/BACK] button is pressed while pressing the
[SHIFT] button, the direction in which the effect types switch is
reversed.
When in the [Advanced] mode, the effect type is switched by
pressing the [1] button for [SELECT/BACK].
5 Effect control
! Effect control dials
The linked functions differ depending on the TRAKTOR effect
panel’s mode.
[Chained] mode: Adjusts the balance between the effect
sound of the each effects and the original sound.
[Advanced] mode: Adjusts the various parameters of the
selected effect.
! Effect control buttons
The linked functions differ depending on the TRAKTOR effect
panel’s mode.
[Chained] mode: Switches the various effects on/
off.
[Advanced] mode: When the effect control [1] button is
pressed, all the effect setting values return to the default
setting values.
When effect control buttons [2] and [3] are pressed, the
various parameters switch between on and off. The types of
parameters differ according to the effect.

Other manuals for Pioneer DDJ-T1

Question and Answer IconNeed help?

Do you have a question about the Pioneer DDJ-T1 and is the answer not in the manual?

Pioneer DDJ-T1 Specifications

General IconGeneral
Frequency range20 - 20000 Hz
Channels quantity4 channels
Digital sound processing- bit
Total Harmonic Distortion (THD)0.005 %
Microphone inYes
Booth out (1/4\")2
USB 2.0 ports quantity1
Mac operating systems supportedMac OS X 10.5 Leopard, Mac OS X 10.6 Snow Leopard
Windows operating systems supportedWindows 7 Home Premium, Windows 7 Home Premium x64, Windows 7 Professional, Windows 7 Professional x64, Windows 7 Starter, Windows 7 Starter x64, Windows 7 Ultimate, Windows 7 Ultimate x64, Windows Vista Business, Windows Vista Business x64, Windows Vista Home Basic, Windows Vista Home Basic x64, Windows Vista Home Premium, Windows Vista Home Premium x64, Windows Vista Ultimate, Windows Vista Ultimate x64, Windows XP Home, Windows XP Home x64, Windows XP Professional, Windows XP Professional x64

Summary

Safety, Compliance, and General Information

FCC Compliance and Regulatory Notices

Details FCC rules, cautions, and official declarations for device operation.

DDJ-T1 Getting Started

AC Adapter and Power Safety

AC Adapter Safety Instructions

Critical safety guidelines for using the AC adapter and its components.

TRAKTOR Software Installation Guide

Windows TRAKTOR Installation Steps

Comprehensive guide for installing the TRAKTOR software on Windows operating systems.

TRAKTOR Software Installation (Mac)

Macintosh TRAKTOR Installation Steps

Comprehensive guide for installing the TRAKTOR software on Macintosh operating systems.

Launching and Activating TRAKTOR

Launching TRAKTOR and Service Center

Instructions on starting the TRAKTOR application and its associated Service Center.

TRAKTOR Product Activation Methods

Detailed procedures for activating the software online or offline using Service Center.

TRAKTOR Activation and Updates

Offline TRAKTOR Activation Process

Steps for activating TRAKTOR without an internet connection, requiring a second computer.

Driver Installation and Software Agreement

Driver Setup and Unit Connection

Installing the DDJ-T1 Driver Software

Step-by-step instructions for installing the necessary driver software on Windows.

DDJ-T1 Connections Overview

DDJ-T1 Part Names and Functions

Control Panel Overview

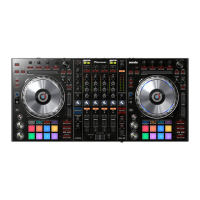
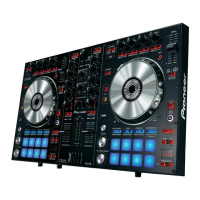
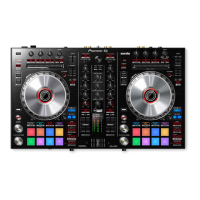
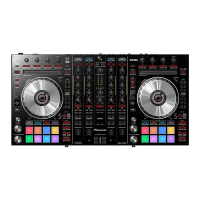
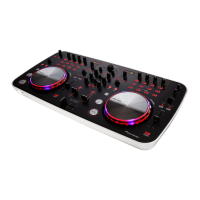
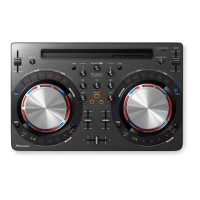
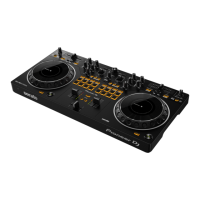
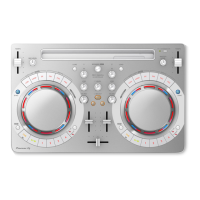
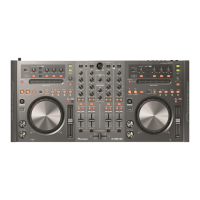
An introduction to the main sections of the DDJ-T1 control panel.

Browser Functions

Deck Functions and Controls

Playback, Cueing, and Shifting Functions

Guides on using PLAY/PAUSE, CUE, and SHIFT for track control.

Looping, Hot Cues, and Beat Grids

Instructions for setting loops, hot cues, and adjusting beat grids.

Mixer Functions and Controls

Volume, Gain, and EQ Adjustments

How to control master volume, headphone mix, input gain, and EQ settings for each deck.

Channel Faders, Crossfader, and Start Functions

Explains the operation of channel faders, crossfader, and related start/sync features.

Effect Functions and Controls

Effect Assignment and Parameter Adjustment

How to assign effects and use the DRY/WET control for sound shaping.

Basic Operations and Track Management

Advanced Operations and Functions

Applying Effects and Beat Synchronization

Guides on using effects and synchronizing track playback speeds with beat sync.

TRAKTOR Preferences Configuration

Troubleshooting Common Issues

Resolving Power, Indicator, and Connectivity Problems

Solutions for common issues like no power, indicator lights, and unit recognition.

Pioneer DDJ-T1 Limited Warranty

Related product manuals