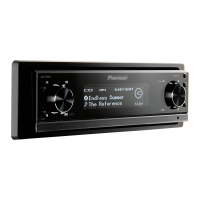
2 Push MULTI-CONTROL left or right to
select the equalizer curve you want to re-
call.
Each time MULTI-CONTROL is pushed left or
right, equalizer curve is recalled in the follow-
ing order.
MEMORY1 (memory 1)—MEMORY2 (mem-
ory 2)—MEMORY3 (memory 3)—MEMORY4
(memory 4)—MEMORY5 (memory 5)—FLAT
(flat)
# When FLAT is selected, no supplement or cor-
rection is made to the sound. This is useful to
check the effect of the equalizer curves by switch-
ing alternatively between FLAT and a set equali-
zer curve.
Copying the equalizer curve
1 Use MULTI-CONTROL to select EQ 1 in
the audio function menu.
Refer to Introduction of audio adjustments on
page 24.
2 Push MULTI-CONTROL left or right to
select the equalizer curve you want to
copy.
3 Press MULTI-CONTROL and hold to copy
the selected equalizer curve.
4 Push MULTI-CONTROL left or right to
select the storage area (MEMORY1 to
MEMORY5).
5 Press MULTI-CONTROL and hold to
store the equalizer curve.
Fine-adjusting equalizer curve
You can perform 31–band level adjustment to
achieve the optimum acoustic characteristics
for your vehicle’s interior environment.
1 Select the storage area (MEMORY1 to
MEMORY5).
Refer to Copying the equalizer curve on this
page.
# If an equalizer curve has already been stored
in memory, it will be over written by the newly ad-
justed equalizer cur ve.
2 Use MULTI-CONTROL to select EQ 2 in
the audio function menu.
Refer to Introduction of audio adjustments on
page 24.
3 Push MULTI-CONTROL left or right to
select the equalizer band to adjust.
Each time MULTI-CONTROL is pushed left or
right, equalizer bands are selected in the fol-
lowing order.
20Hz—25Hz—31.5Hz—40Hz—50Hz—63Hz
—80Hz—100Hz—125Hz—160Hz—200Hz—
250Hz—315Hz—400Hz—500Hz—630Hz—
800Hz—1k—1.25k—1.6k—2kHz—2.5k—
3.15k—4k—5k—6.3k—8k—10k—12.5kHz—
16k—20k
4 Push MULTI-CONTROL up or down to
adjust the level of the equalizer band.
Each time MULTI-CONTROL is pushed up or
down, the level of the equalization band in-
creases or decreases.
+12 to –12 is displayed as the level is in-
creased or decreased.
# You can then select another band and adjust
the level.
5 Equalizer curve is automatically stored
in memory.
Using the auto-equalizer
The auto-equalizer is the equalizer curve cre-
ated by auto TA and EQ (refer to Auto TA and
EQ (auto-time alignment and auto-equalizing)
on the next page).
You can turn the auto-equalizer on or off.
1 Use MULTI-CONTROL to select A.EQ in
the audio function menu.
Refer to Introduction of audio adjustments on
page 24.
Audio Adjustments
En
30
Section
03

 Loading...