En
65
10
Controlling the rest of your system (In case of SC-LX85)
! For greater convenience, assign the TV
connected to the MONITOR OUT terminal
to the TV operation selector switch, and
assign your satellite/cable receiver or set-top
box connected to the TV/SAT input terminal
to the TV input button. If a single device is
connected to both terminals, that device
should be assigned to both the TV operation
selector switch and TV input buttons.
! Devices may be assigned to the following
input function buttons.
RECEIVERSOURCE
MAIN
MULT I
OPERATION
ZONE2 3
INPUT SELECT
PHONO
VIDEO
CD-R
IN
AUX
DVD
iPod
USB
OPTION
MULT I CH
ADAPTER
NET RADIO
CD
TUNER
HMG
BD
TV
HDMIDVR
BDR
12
MULT I
OPERATION
Selecting preset codes directly
1 While pressing MULTI OPERATION,
press HOME MENU.
The remote display shows SETUP MENU.
2 Use i/j to select ‘PRESET RECALL’,
then press ENTER.
3 Press the input function button for
the component you want to control, then
press ENTER.
When assigning preset codes to TV CONTROL,
set the remote control operation selector switch
to TV here.
The remote display shows the component you
want to control (for example DVD or TV).
! You can’t assign TUNER, HMG NET RADIO,
ADAPTER and iPod USB.
4 Use i/j to select the first letter of
the brand name of your component, then
press ENTER.
This should be the manufacturer’s name (for
example, P for Pioneer).
5 Use i/j to select the manufacturer’s
name from the list, then press ENTER.
6 Use i/j to select the proper code
from the list, then try using this remote
with your component.
The code should start with the component type
(for example, DVD 020). If there is more than
one, start with the first one.
To try out the remote control, switch the com-
ponent on or off (into standby) by pressing u
SOURCE. If it doesn’t seem to work, select the
next code from the list (if there is one).
! If you can’t find or properly enter a preset
code, you can still teach the remote
individual commands from another remote
control (see Programming signals from other
remote controls on page 65).
! When using a Pioneer HDD recorder, please
select PIONEER DVR 450, 451 or 452.
! When using a Pioneer flat panel TV released
prior to summer 2005, please select preset
code 644.
7 If your component is controlled
successfully, press ENTER to confirm.
The remote display shows OK.
Programming signals from
other remote controls
If the preset code for your component is not
available, or the available preset codes do not
operate correctly, you can program signals from
the remote control of another component. This
can also be used to program additional opera-
tions (buttons not covered in the presets) after
assigning a preset code.
The remote can store about 200 preset codes
(this has been tested with codes of Pioneer
format only).
Certain buttons represent operations that can-
not be learned from other remote controls. The
buttons available are shown below:
DVD
RECEIVER SOURCE
MAIN
MULT I
OPERATION
ZONE2
SOURCE
TV
RECEIVER
3
iPod
USB
OPTION
MULTI CH
ADAPTER
NET RADIO
INPUT SELECT LIGHT
CD
PHONO
AUX
INPUTMUTEMUTE
VOL
VOL
TV CONTROL
CH
VIDEO
CD-R
IN
TUNER
HMG
BD
TV
HDMIDVR
BDR
12
AUDIO
PARAMETER
TOP MENU
BAND
iPod CTRL PTY SEARCH
CATEGORY
LIST
TOOLS
HOME
MENU
STATUS
THXPQLSMP
EMORY
PHASE CTRL CH LEVEL
T.EDIT
GUIDE
VIDEO
PARAMETER
INPUTMUTE
TUNE
TUNE
PRESET PRESET
MUTE
PGMMENU
STEREO
SIGNAL SELSLEEP AUDIO
INFO
DIMMER
A.ATT
CLR
SBchMCACC
HDMI OUT
D.ACCESS
ENTER
CLASS
DISP
CH
AUTO/ALC/
DIRECT
STANDARD ADV SURR
ENTER
RETURN
1 While pressing MULTI OPERATION,
press HOME MENU.
The remote display shows SETUP MENU.
2 Use i/j to select ‘CODE LEARNING’,
then press ENTER.
The remote display prompts you for the com-
ponent you want to control (for example DVD
or TV).
3 Press the input function button for
the component you want to control, then
press ENTER.
PRESS KEY blinks in the remote display.
! You can’t assign TUNER, HMG NET RADIO,
ADAPTER and iPod USB.
! The TV CONTROL buttons (u, VOL +/–,
CH +/–, MUTE and INPUT) can only be
learned after the operation selection switch
is set to TV.
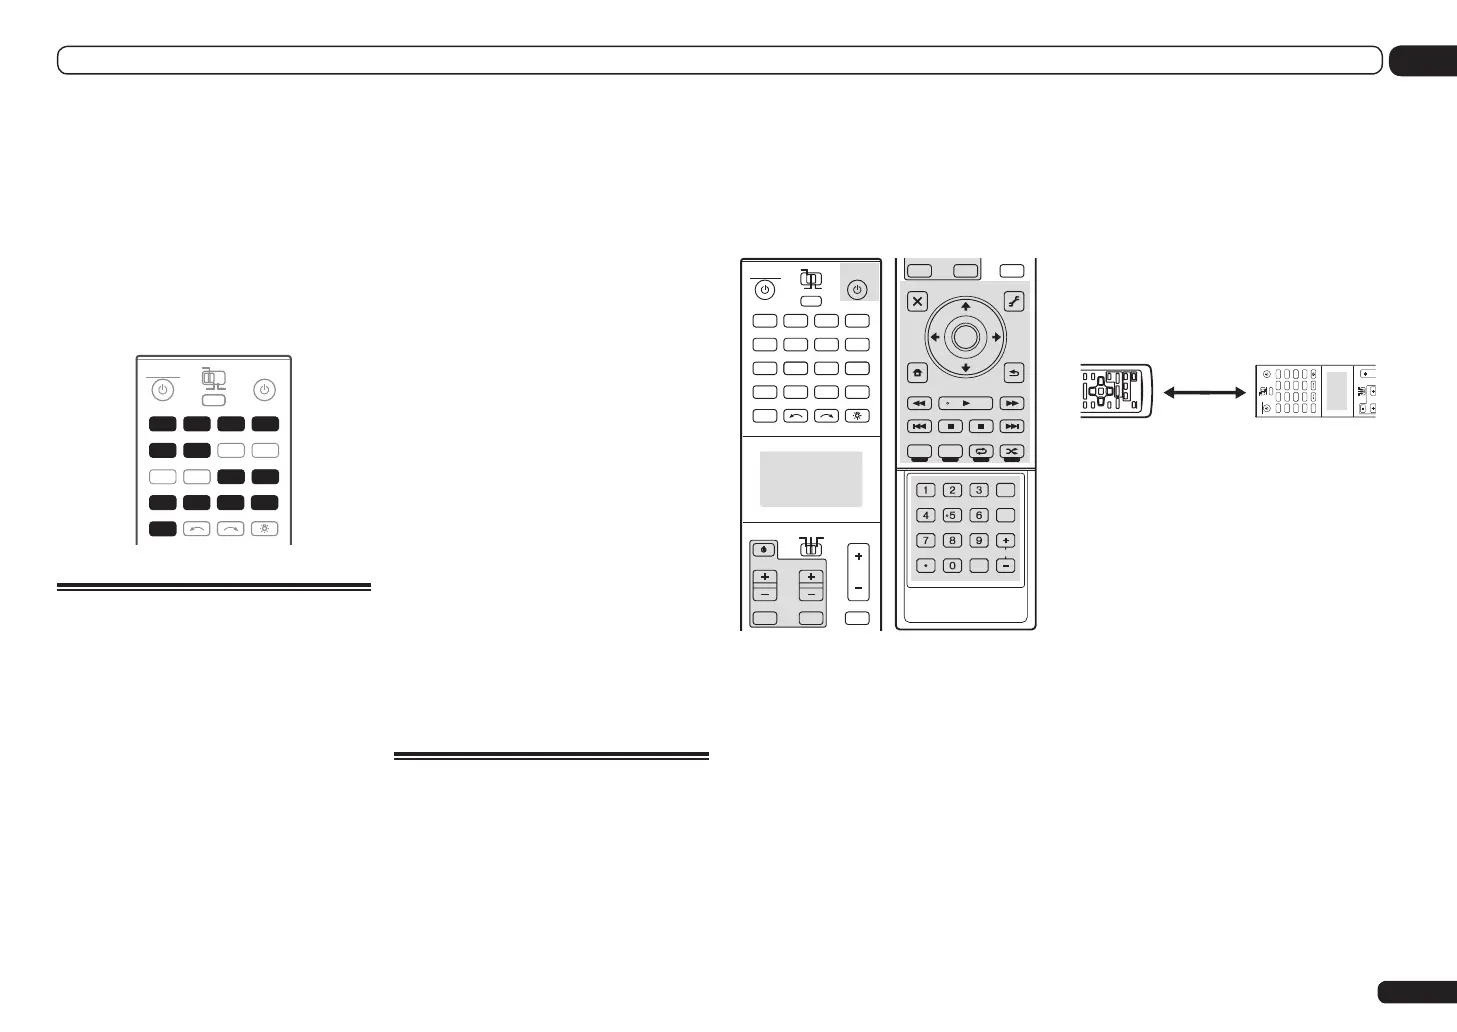
4 Point the two remote controls towards
each other, then press the button that will
be doing the learning on this receiver’s
remote control.
PRESS KEY lights continuously to indicate the
remote is ready to accept a signal.
! The remote controls should be 3 cm apart.
DVD
RECEIVER SOURCE
MAIN
MULTI
OPERATION
ZONE2
SOURCE
TV
RECEIVER
3
iPod
USB
OPTION
MULTI CH
ADAPTER
NET RADIO
INPUT SELECT LIGHT
CD
PHONO
AUX
VOL
VOLCH
VIDEO
CD-R
IN
TUNER
HMG
BD
TV
HDMIDVR
BDR
12
3 cm
This receiver’s
remote control
Other remote
control
5 Press the corresponding button on
the other remote control that is sending
(teaching) the signal to this receiver’s
remote control.
For example, if you want to learn the playback
control signal, press and hold d briefly. The
remote display will shows OK if the operation
has been learned.
If for some reasons the operation hasn’t been
learned the remote display will shows ERROR
briefly, and then display PRESS KEY again. If
this happens, keep pressing the (teaching)
button as you vary the distance between the two
remotes, until the remote display shows OK.
6 To program additional signals for the
current component repeat steps 4 and 5.
To program signals for another component, exit
and repeat steps 1 through 5.
7 Press and hold MULTI OPERATION for
a couple of seconds to exit and store the
operation(s).
 Loading...