ELECTRICAL 5 - 46
November 2007 GEM Service Manual
ACCESSORY SYSTEM
COMPONENT REPLACEMENT
FUSE REPLACEMENT
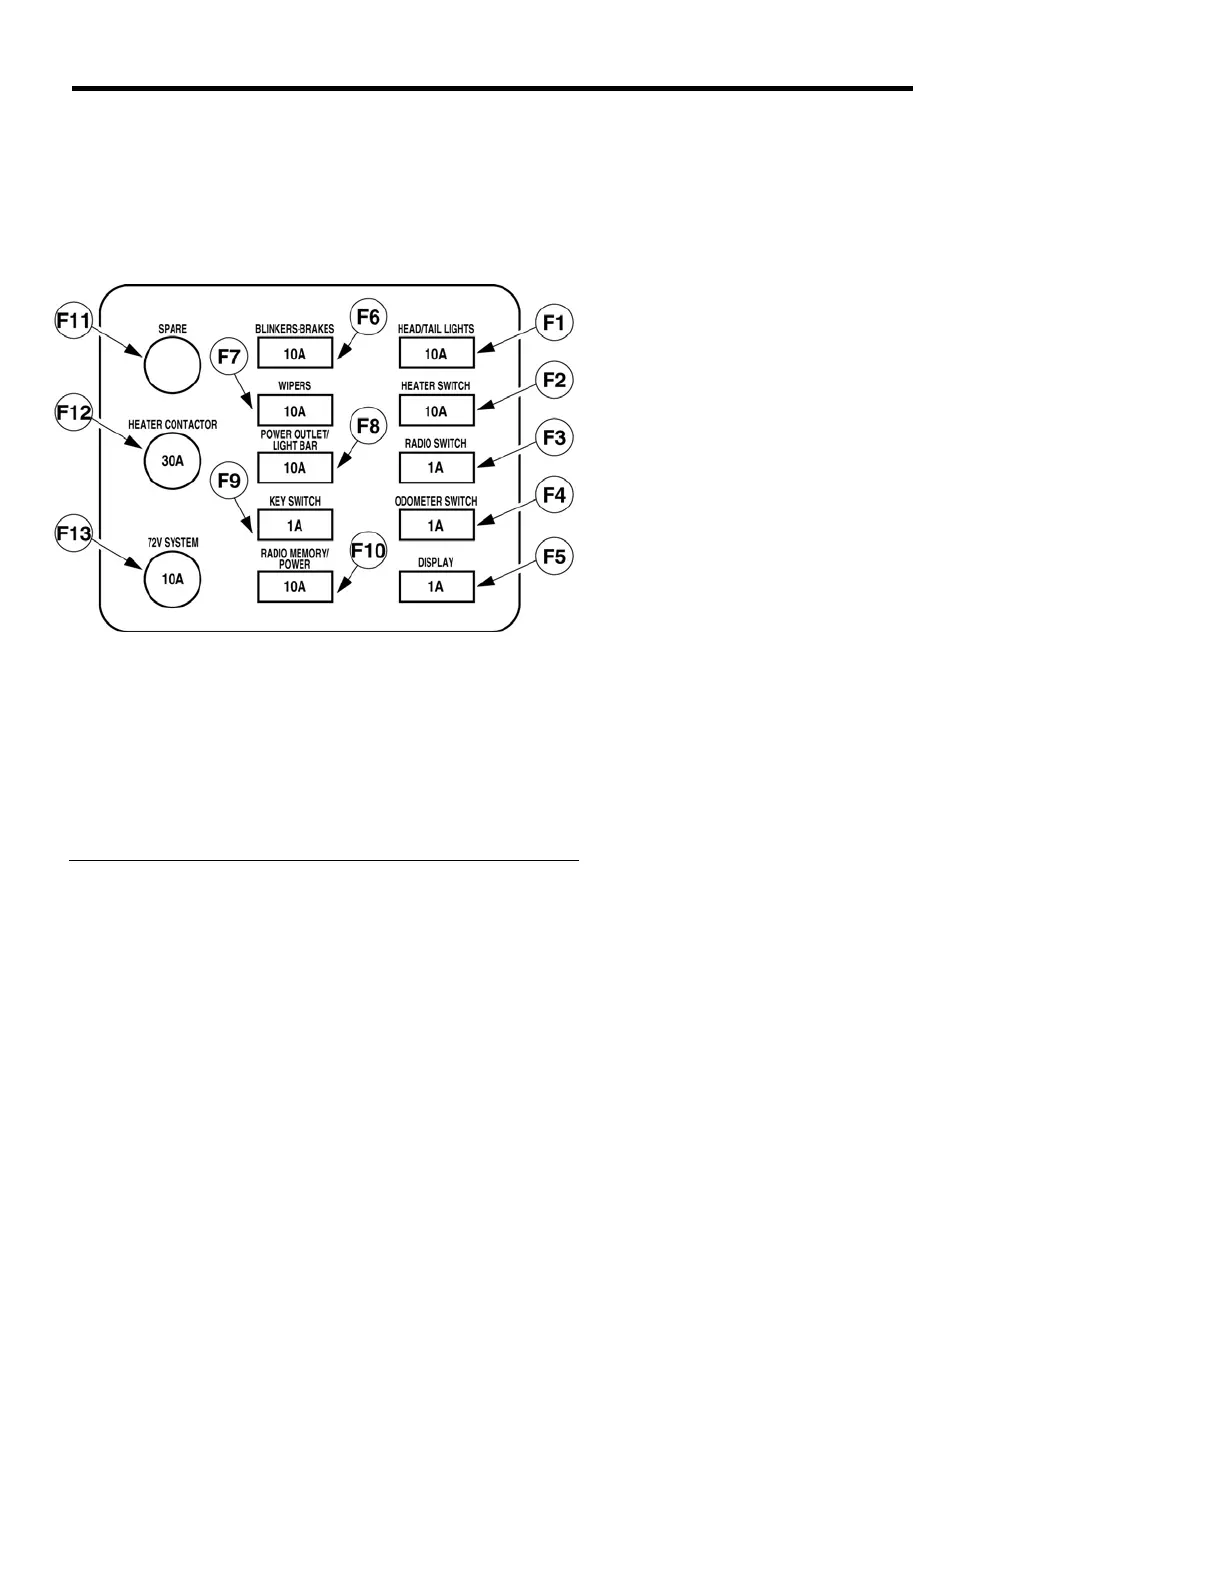
Fig. 22 PSDM Fuses
F1 - Head/Tail Lights (10A) F8 - Power Outlet and Light Bar (10A)
F2 - Heater Switch (10A) F9 - Key Switch (1A)
F3 - Radio Switch (1A) F10 - Radio Memory/Power (10A)
F4 - Odometer Switch (1A) F11 - Spare
F5 - Display (1A) F12 - Heater Contactor (30A)
F6 - Blinkers/Brakes (10A) F13 - 72-Volt System (10A)
F7 - Window Wiper (10A)
1. Open the fuse panel access door.
2. Locate blown fuse using volt/ohm meter.
3. Use fuse puller to remove fuse.
4. Replace with appropriate size fuse. See ECM
troubleshooting section for appropriate sizes.
5. Reverse the removal procedure to install.
HEADLIGHT REPLACEMENT
1. Open hood.
2. Remove light from mounting bracket.
Disconnect black and violet wires.
3. Reverse procedure to reassemble.
4. Adjust headlight as follows: Position the front of
the car about five feet away from a wall. Turn
on headlights and adjust them so the center of
the beam on the wall is about one inch lower
than the center of the light on the car.
FRONT TURN INDICATOR LAMP REPLACEMENT
1. Open hood.
2. Remove lock nut from light and disconnect the
red and black wires.
3. Replace light assembly.
4. Reverse the removal procedure to install.
REAR TURN INDICATOR LAMP REPLACEMENT
1. Remove two Phillips-head screws holding lens
in place.
2. Remove lens.
3. Twist bulb counterclockwise to remove, noting
type of bulb, and replace. (2057/2067)
4. Reverse the removal procedure to install.
WIPER MOTOR REPLACEMENT
1. Open hood and remove upper dash panel. See
Body, section 7.
2. Remove wiper arm and blade with 13mm
socket; or for the style without nut, gently pry off
arm with a large screwdriver.
3. Use 3/8-inch socket or wrench to remove Tek
screws from wiper bracket.
4. Disconnect the yellow/blue and the white/blue
electrical wires from wiper motor. Use a 3/4-
inch wrench or adjustable wrench to remove
capture, nut, washer and rubber bushing from
wiper shaft. Remove wiper from windshield sill.
5. Reverse the removal procedure to install.
INSTRUMENT POD REMOVAL
1. Remove upper and lower dash panels. See Pod
Covers in the Body section.
2. Remove Pod covers. See Pod Covers in Body
section.
3. Remove steering wheel. See Steering Wheel in
Steering and Suspension section.
4. Remove the 4 self-tapping screws.
5. Reverse procedure to install.
 Loading...