1. Remove front and rear belt guard covers, see "Belt/Chain Guard Cover Replacement"
on page18.
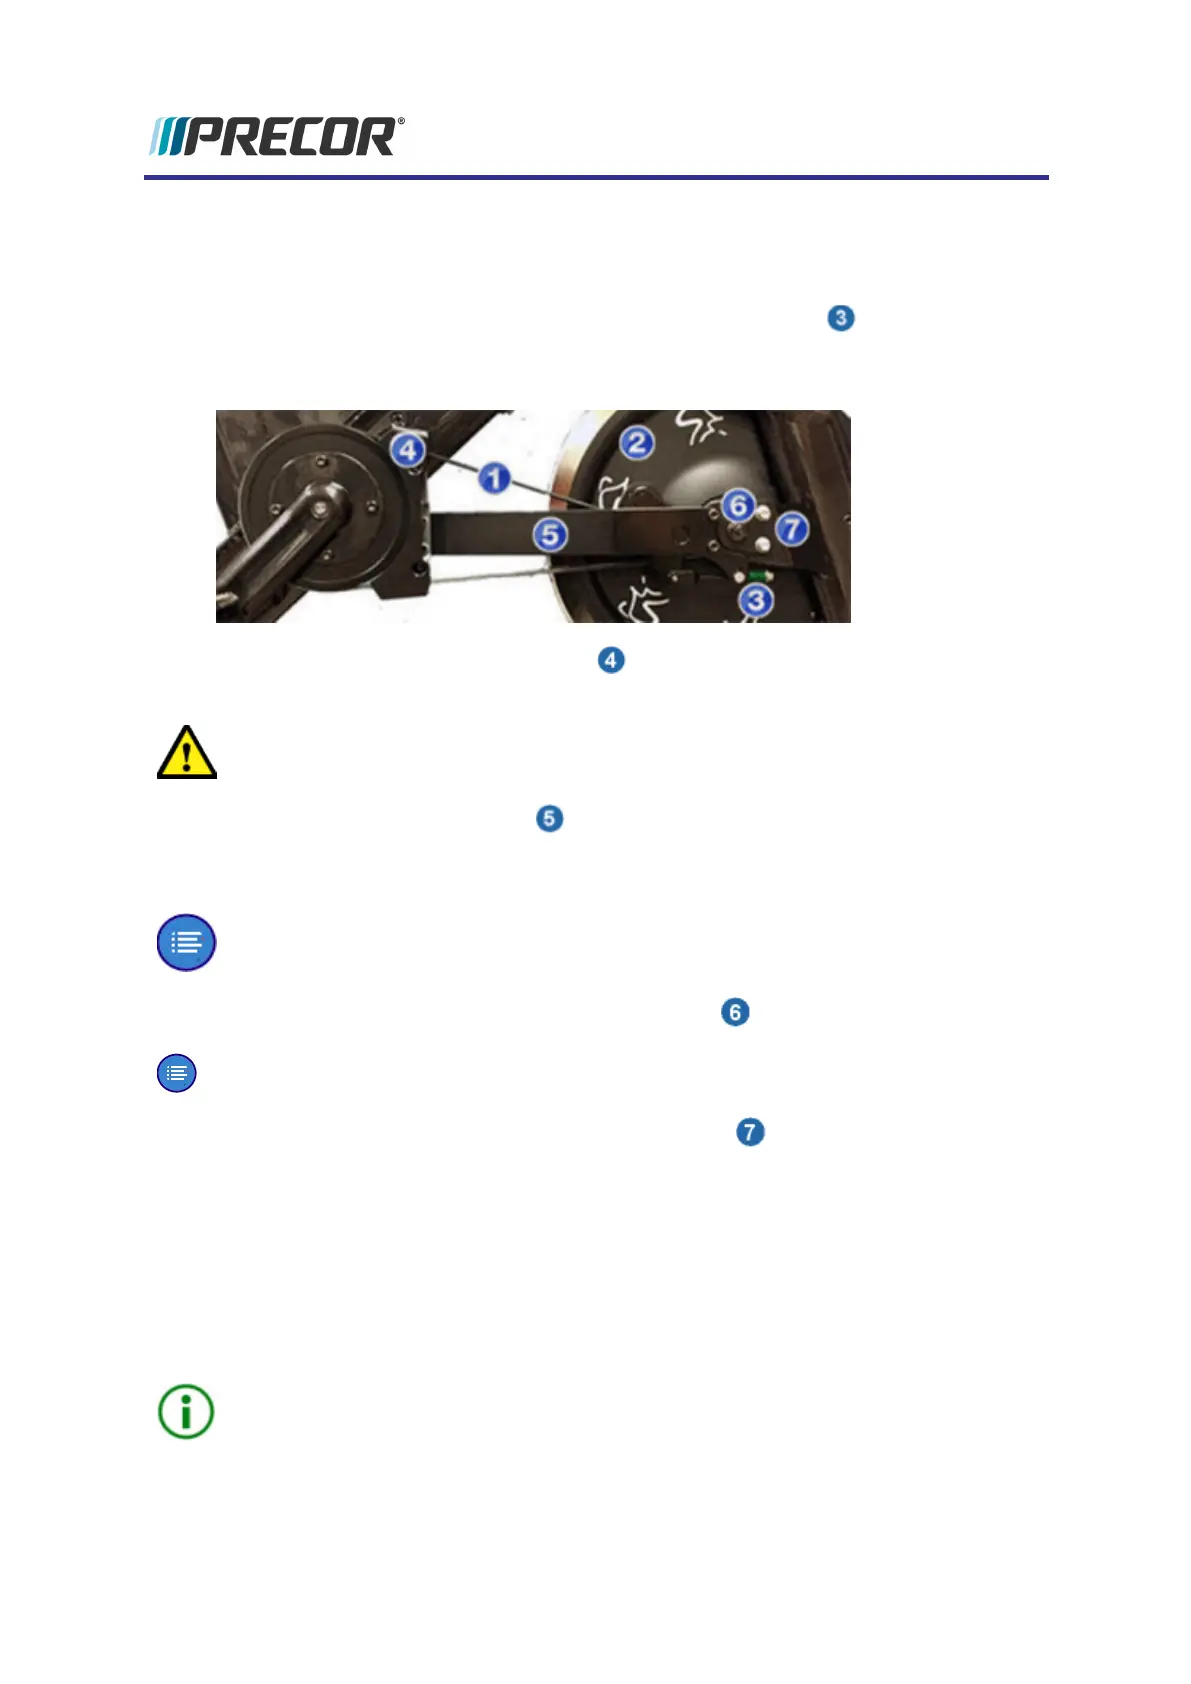
2. Remove all brake pad resistance by turning resistance knob counterclockwise (-).
3.
Release belt tension by loosening the belt tension adjustment nut using a 13 mm
wrench. Release as much tension as possible without removing the nut off the tension
bolt.
4.
Remove the rear belt pulley finger guard by removing the fasteners (2x) using a 5
mm hex key. Retain fastener hardware for installation.
CAUTION: It is important to release belt tension prior to removing the frame cross
member.
5.
Remove the frame cross member by removing fasteners (4x) using 6 mm hex key.
Firmly grasp the cross member while removing. The belt tensioner is mounted onto the
cross member and may have a small amount of belt tension applied.
NOTE:Make sure to note how the belt is installed onto the tension mechanism pul-
leys for installation.
6.
Loosen, but do not remove, the left and right axle nuts using a 19 mm wrench.
NOTE:Make sure there is no brake pad resistance against the flywheel.
7.
Remove the left and right axle mounting plate fasteners (2x each) using a 6 mm hex
key. Retain fastener hardware for installation.
8. Carefully slide the flywheel off the frame and remove the belt.
Installation Instructions.
9. Install the belt over the front flywheel pulley and rear pulley.
10. Use two service techs to carefully install the flywheel by inserting the axle mounting
plates into the frame axle mounting slots.
TIP: You may find it easier to stand the bike frame on its front (resting on the front sta-
bilizer and handlebar) and then installing the flywheel into the axle mounting slots.
The weight of the flywheel will help to slide the flywheel into the mounting slots.
22
4 Replacement Procedures
Belt and Flywheel Replacement
 Loading...