Rins136 Issue 9 Page 15
7.2 Panel Assembly (Plastic Version)
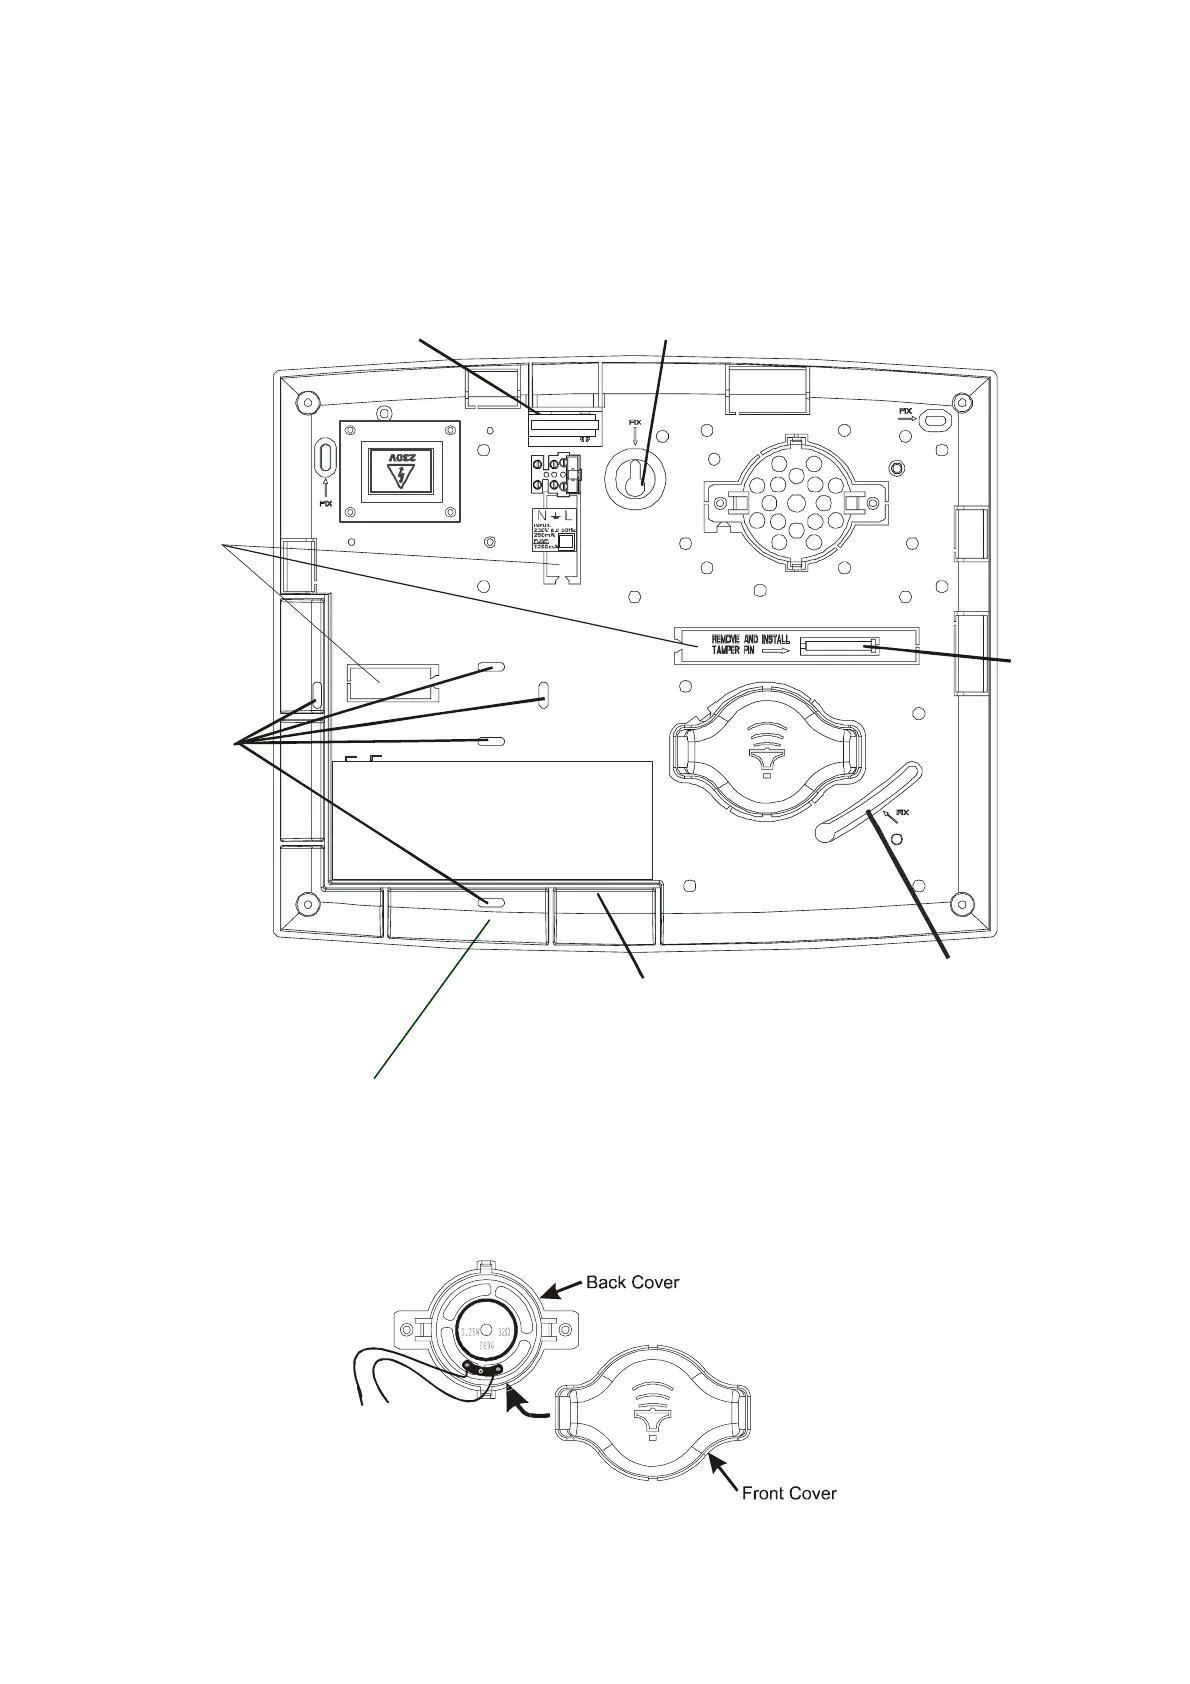
The Sterling 10 plastic case is packaged with the transformer, speaker and tamper switch in place. The speaker cover,
tamper switch pin and cable knock out should be removed from the panel prior to affixing to the wall.
Note: Use the cable tie provided to secure the battery in place
Remove the speaker back cover. If the internal speaker is to be used inside the panel, discard the front cover. If the
speaker is to be fitted externally remove the speaker back cover from the panel. The speaker should be mounted using
the two outer holes on the back cover and then clip the front cover into place.
Battery support tray
Wall fixing hole
Tamper switch
Wiring
knockouts
Tam per
switch pin
Wall fixing hole
+
-
Cable tie
slots
 Loading...