2.
INSTALLATION
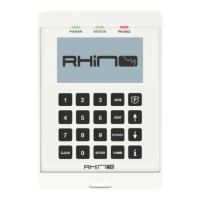
Panic Pack
Panel
Mounting
Mount the Rhino Panic Pack
on a flat, plumb wall using at least four
appropriate screws. The rear casing has bee n designed with a
several
key-hole slot s
so that mounng is possible without removing
the Printed Circuit Board (PCB).
It is essenal to ensure that none of the fixing slots or cable entries
are accessible after fixing.
Transformer
The panic pack is powe red by a 20VA transformer, which is supplied
with a sealed fused plug and short length of cable. Therefore, the
transformer should be installed close to 220VACo utlet socket.
The low voltage AC output from the transformer should be routed
into the Rhino Panic Pack
housing and connected to the AC input
terminals using suitable cable.
If the transformer 220VAC cable requires extending , it
mustb ec arriedo utb ya qualifiede lectrician .
Installation Sequence
Before attempting to install the Rhino Panic Pack system, read this section. Once you have an overall
understanding of the installation sequence, carefully work through each step.
1. Design the layout
Make a rough sketch of the premises to gte an idea of where all the remote controls are expected to be.
2. Mounting the panic pack panel
The Rhino Panic Pack must be mounted within the protected area close to a 220VAC power source.
You must complete all wiring before connecting the battery or applying AC to the Rhino Panic Pack.
3. Wiring
Install any special buttons for things like medical assistance, fire assistance, etc.
4. Other wiring
Complete all the other wiring including external/internal sounders.
5. Apply power to the Rhino Panic Pack
Once steps 1 to 4 are completed, apply power to the panic pack. First, connect the red battery lead
to the positive terminal and the black lead to the negative terminal. Then, connect the AC.
6. Program the system
Use the Rhino UDL software to program the system. See Section 3 for details.
7. Testing the system
Test the system thoroughly to ensure that all features and functions are operating as required.
Panic Pack Panel
Mounting
Mount the Rhino Panic Pack on a flat, plumb wall using at least four appropriate screws. The rear
casing has been deigned with several key-hole slots so that mounting is possible without removing
the printed circuit board (PCB). It is essential to ensure that none of the fixing slots or cable entries
are accessible after fixing.
Transformer
The panic pack is powered by a 20VA transformer, which is supplied with a sealed fused plug and
shirt length of cable. Therefore, the transformer should be installed close to 220VAC outlet socket.
The low voltage AC output from the transformer should be routed into the Rhino Panic Pack
housing and connected to the AC input terminals using suitable cable.
If the transformer 220VAC cable requires extending, it must be carried out by a qualified
electrician.
6
 Loading...