6
Setting Your Fax Header
The fax header consists of date, time, ID number, the receiving fax number and
page index which will be shown at the top of all outgoing faxes.
To set the fax header,
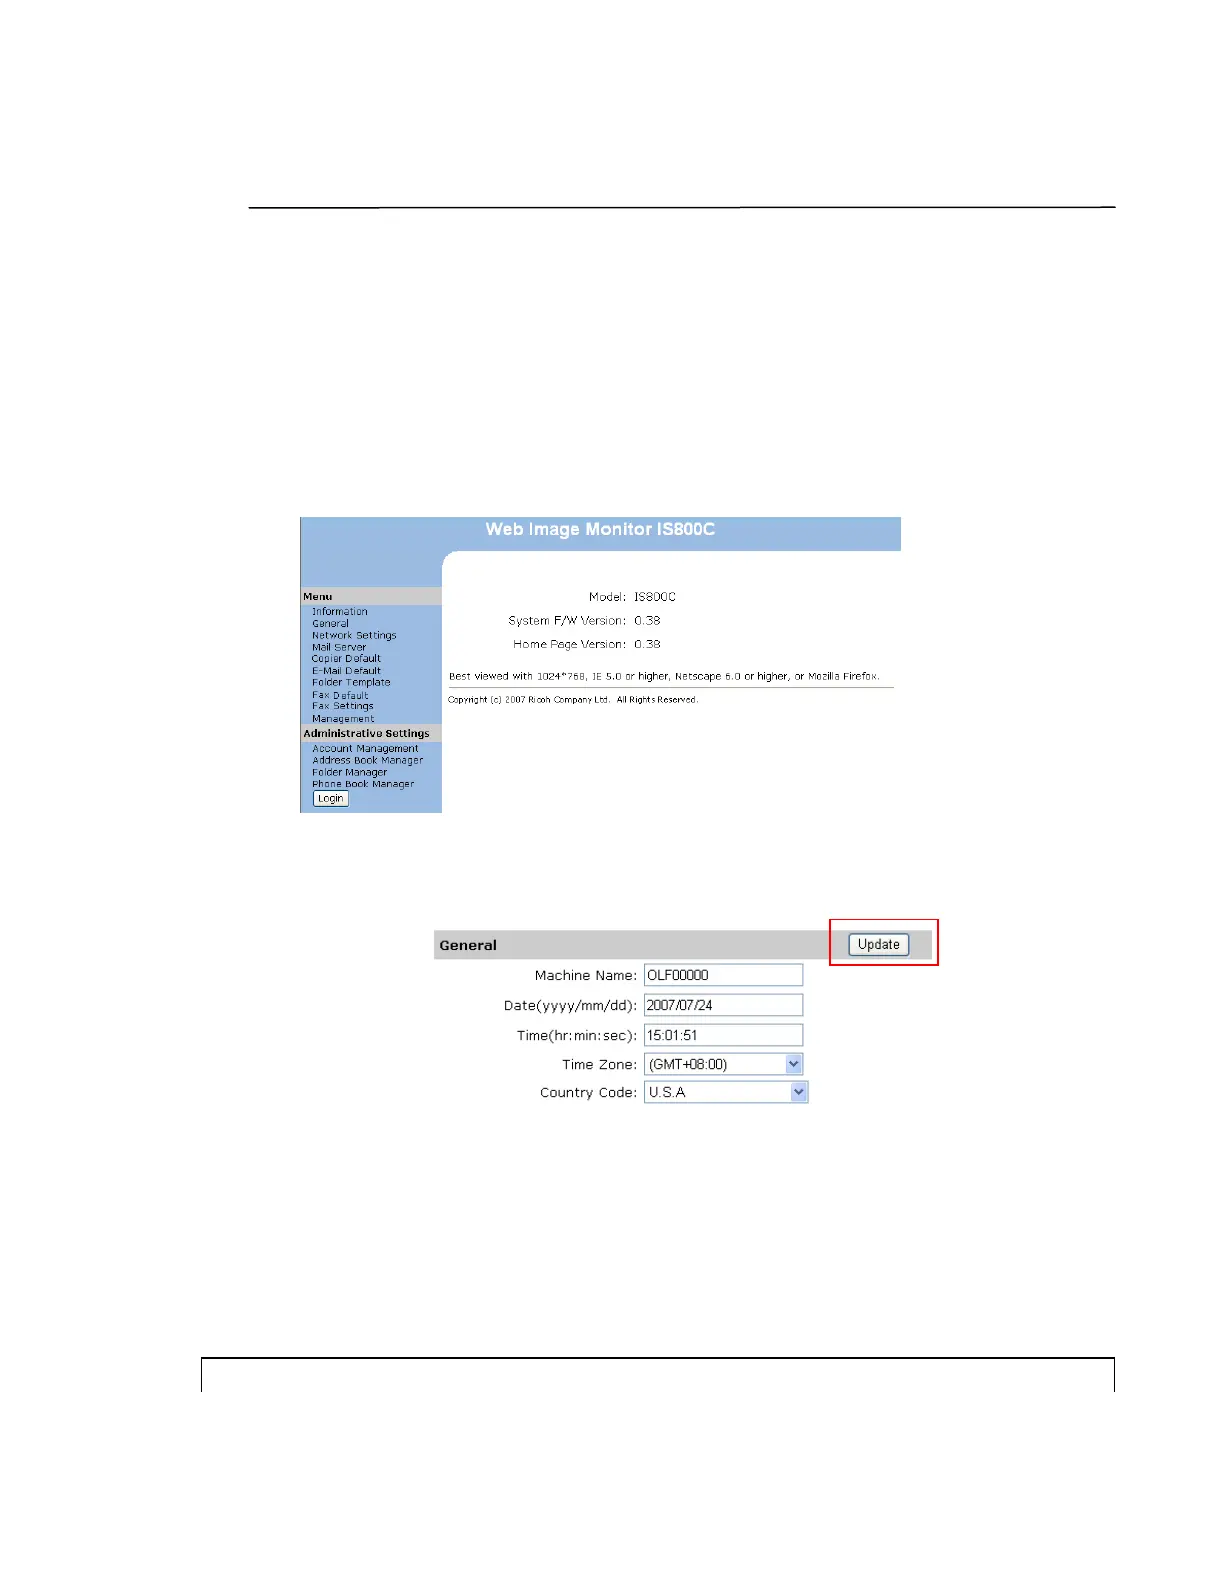
1. Start your browser.
2. Type the IP address of your MFP. The MFP’s web page appears.
3. Click General from Menu to prompt the General screen.
4. Type current date and time using the format (YYYY/MM/DD) and (hh:mm:ss)
and click Update to save your settings.
5. Click Fax Settings from Menu to prompt the Fax Settings screen.
6. Enter your text in the ID # field. For example, your company name or your
fax number. Up to 32 characters or digits can be entered.
7. Enter the product’s fax number in the Station Number field on the Fax
Settings screen. Up to 20 digits can be entered and so
me characters such as
“+”, “ ”(spa
ce), are supported.
The following is an example of the fax header.
ID#: AAA Company Station #: 5231111 To:1234567 2007/07/31 15:31 Page:1
 Loading...