83
Advanced Operation
Using Special Settings
1. Place your document(s) with text FACE UP in the ADF or FACE DOWN on
the glass.
2.
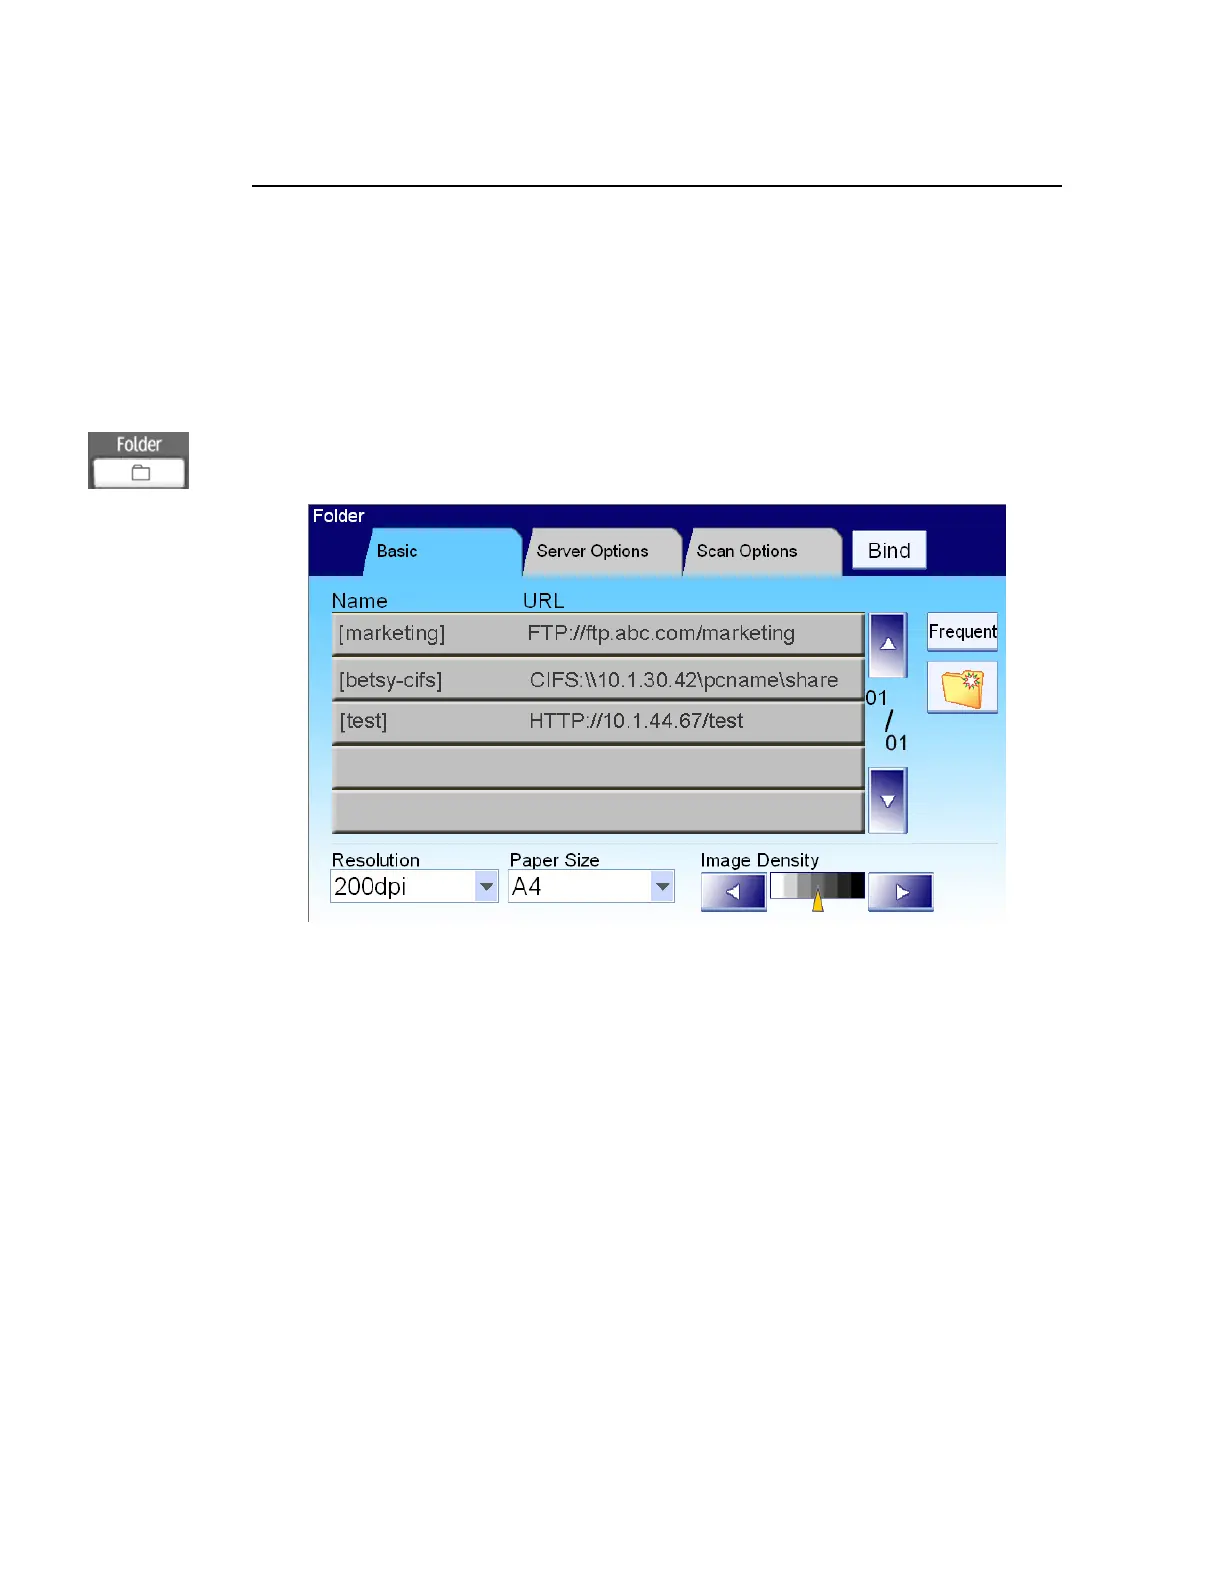
Press the Folder button on the control panel. The LCD-display prompts the
following Folder main screen.
3. Choose a folder to place your scanned image.
- Or you may use the Up-arrow or Down-arrow button to scroll from
the list.
- Or you may switch to most frequently used folder list by touching the
Show All button.
4. On the Basic screen, check if the paper size, scanning resolution, or image
density meets your requirement. If not, change the settings to suit your
needs.
5. Touch the Server Options tab to prompt the Server Options screen. If
you are a registered user with a different login name displayed on the
Server Options screen, please enter your own login name and password,
your desired file name for the scanned image, the e-mail address to send
the filing report, and check if you wish to create a subfolder on the screen.
6. Touch the Scan tab to prompt the Scan Settings screen. Change the file
format and the compression if they are not your ideal choice. (For
information about the setting, please see the setting descriptions below.)
7. Press the B&W Start button to send your document(s) in black and white,
or the Color Start button to send your document(s) in color.
 Loading...