Network Connection -
Wired
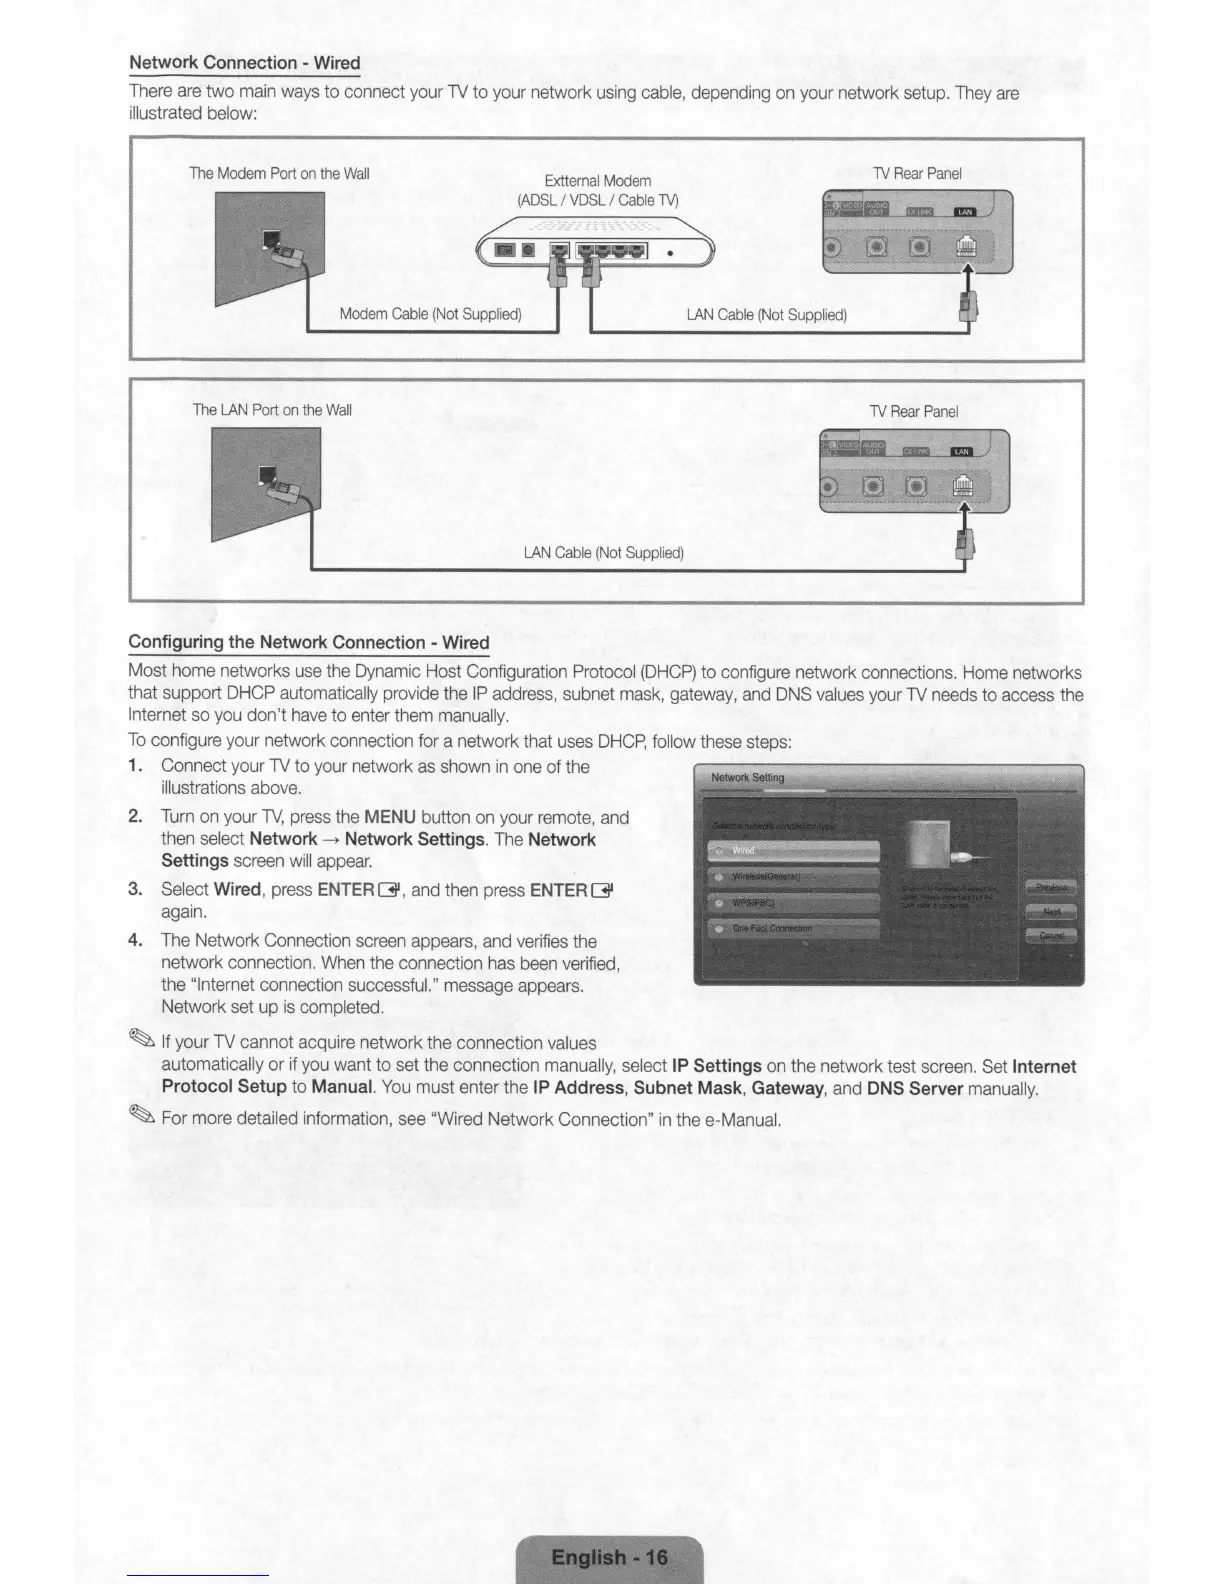
There
are
two
main
ways
to
connect
your
TV
to
your
network
using
cable,
depending
on
your
network
setup.
They
are
illustrated
below:
Modem
Cable
(Not
Supplied)
The
Modem
Port
on
the
Wall
Extternal
Modem
(ADSL
/
VDSL
/
Cable
TV)
LAN
Cable
(Not
Supplied)
1V
Rear
Panel
The
LAN
Port
on
the
Wall
LAN
Cable
(Not
Supplied)
1V
Rear
Panel
Configuring
the Network
Connection
-
Wired
Most
home
networks
use
the
Dynamic
Host
Configuration
Protocol
(DHCP)
to
configure
network
connections.
Home
networks
that support
DHCP
automatically
provide
the
IP
address,
subnet
mask,
gateway,
and
DNS
values
your
TV
needs
to
access
the
Internet
so
you
don't
have
to
enter
them
manually.
To
configure
your
network connection for a network that
uses
DHCP,
follow
these
steps:
1. Connect your
TV
to
your
network
as
shown
in
one
of
the
illustrations
above.
2.
Turn
on
your
T\/,
press
the
MENU
button
on
your
remote,
and
then
select
Network
~
Network
Settings.
The
Network
Settings
screen
will
appear.
3.
Select
Wired,
press
ENTER
~,
and
then
press
ENTER
~
again.
4.
The
Network
Connection
screen
appears,
and
verifies
the
network connection.
When
the
connection
has
been
verified,
the
"Internet connection successful."
message
appears.
Network
set
up
is
completed.
~
If
your
TV
cannot acquire network the connection
values
automatically
or
if
you
want
to
set
the
connection
manually,
select
IP
Settings
on
the network test
screen.
Set
Internet
Protocol Setup
to
Manual.
You
must enter the
IP
Address, Subnet Mask,
Gateway,
and
DNS
Server
manually.
~
For
more
detailed information,
see
"Wired Network Connection"
in
the
e-Manual.
Network Connection -
Wired
There
are
two
main
ways
to
connect
your
TV
to
your
network
using
cable,
depending
on
your
network
setup.
They
are
illustrated
below:
Modem
Cable
(Not
Supplied)
The
Modem
Port
on
the
Wall
Extternal
Modem
(ADSL
/
VDSL
/
Cable
TV)
LAN
Cable
(Not
Supplied)
1V
Rear
Panel
The
LAN
Port
on
the
Wall
LAN
Cable
(Not
Supplied)
1V
Rear
Panel
Configuring
the Network
Connection
-
Wired
Most
home
networks
use
the
Dynamic
Host
Configuration
Protocol
(DHCP)
to
configure
network
connections.
Home
networks
that support
DHCP
automatically
provide
the
IP
address,
subnet
mask,
gateway,
and
DNS
values
your
TV
needs
to
access
the
Internet
so
you
don't
have
to
enter
them
manually.
To
configure
your
network connection for a network that
uses
DHCP,
follow
these
steps:
1. Connect your
TV
to
your
network
as
shown
in
one
of
the
illustrations
above.
2.
Turn
on
your
T\/,
press
the
MENU
button
on
your
remote,
and
then
select
Network
~
Network
Settings.
The
Network
Settings
screen
will
appear.
3.
Select
Wired,
press
ENTER
~,
and
then
press
ENTER
~
again.
4.
The
Network
Connection
screen
appears,
and
verifies
the
network connection.
When
the
connection
has
been
verified,
the
"Internet connection successful."
message
appears.
Network
set
up
is
completed.
~
If
your
TV
cannot acquire network the connection
values
automatically
or
if
you
want
to
set
the
connection
manually,
select
IP
Settings
on
the network test
screen.
Set
Internet
Protocol Setup
to
Manual.
You
must enter the
IP
Address, Subnet Mask,
Gateway,
and
DNS
Server
manually.
~
For
more
detailed information,
see
"Wired Network Connection"
in
the
e-Manual.
 Loading...