English _137
● APPENDIX
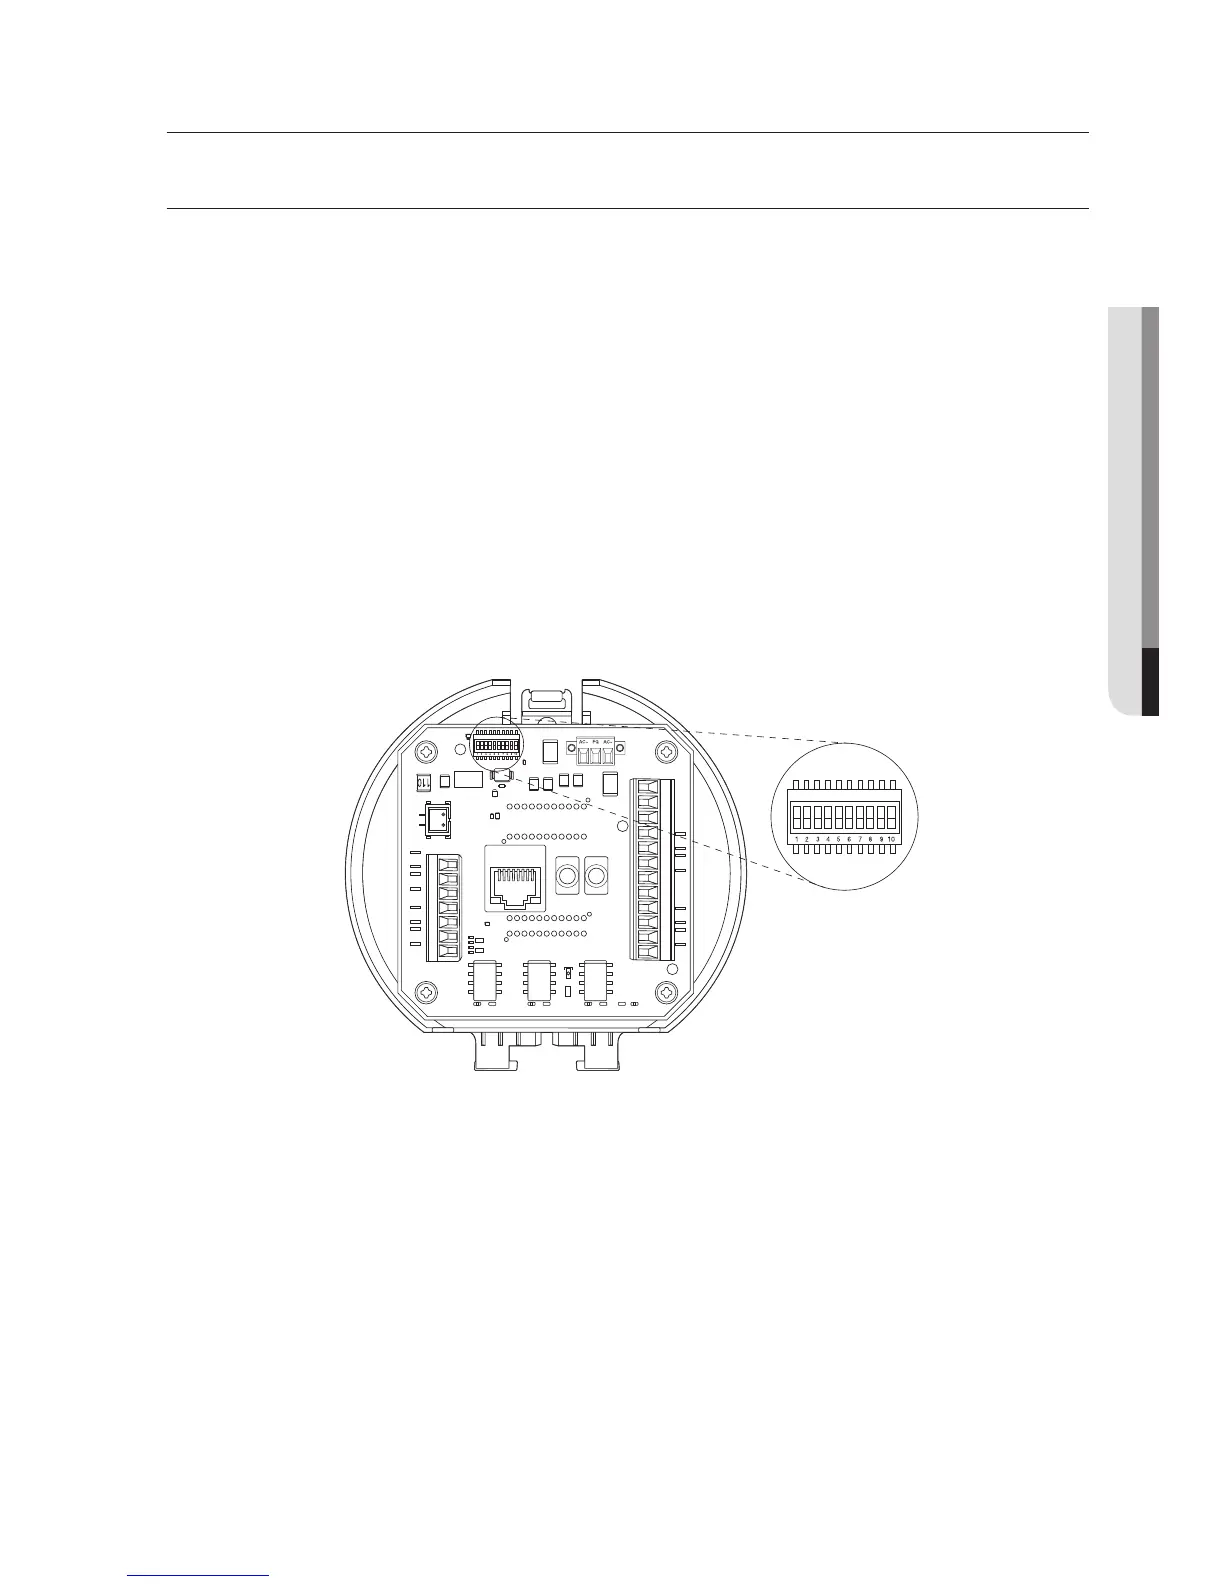
appendix
DIP SWITCH SETTING
How to set up Protocols and ID DIP Switches
You can control various settings of the camera system using the Communication and ID
DIP switches. Before installing the product, please set up the DIP switches according to the
installation environment.
1. Set the switches according to your installation environment. For more detailed setup
information, please refer to the chart on the next page.
2. The camera may malfunction if the switches are not fully turned On/Off; please
double check the switches before finishing setup.
3. Be cautious that the switch can be damaged when it is operated with a sharp tool.
4. Be cautious that the switch can be damaged when it is operated with an excessive
force.
2N.C
2N.0
COM2
1N.C
1N.0
COM1
GND
IN4
IN3
GND
IN2
IN1
Alarm
IN1 IN2 GND IN3 IN4 GND 1C0M 1.N0 1.NC 2C0M 2.N0 2.NC
AXICOM
IMO3
5VDC
AXICOM
IMO3
5VDC
AXICOM
IMO3
5VDC
Video Out
AUDIO_OUTAUDIO_IN
Power
AC 22~26V
Alarm2 ONAlarm1 ON
D+ D- TXD+
TXD-
GND
A.COM
A.NO
AUDIO_OUTAUDIO_IN
AXICOM
IMO3
5VDC
Alarm2 ON
1143Н
AXICOM
IMO3
5VDC
Alarm1 ON
1143Н
AXICOM
IMO3
5VDC
1143Н
IN1 IN2 GND IN3 IN4 GND 1C0M 1.N0 1.NC 2C0M 2.N0 2.NC
ON DIP
D+ D- TXD+
TXD-
GND
A.COM
A.NO
ON DIP
Communication Protocol DIP
Switch (SW1)
 Loading...