Segway Personal Transporter SE Service Manual
9–9
Pivot Assembly
Removal
Tool Required: T-30 6-lobe wrench
1. Make sure the PT is powered off, unplugged, and the
batteries have been removed.
2. Establish a Serviceable Powerbase (page 8–2).
3. Remove the Radio Board (page 9–3).
4. Detach the Console from the Powerbase
(page 9–4).
5. Remove the AC Input Filter (page 9–7).
6. Remove the Power Board (page 9–5).
7. Remove the Interconnect Board (page 9–6).
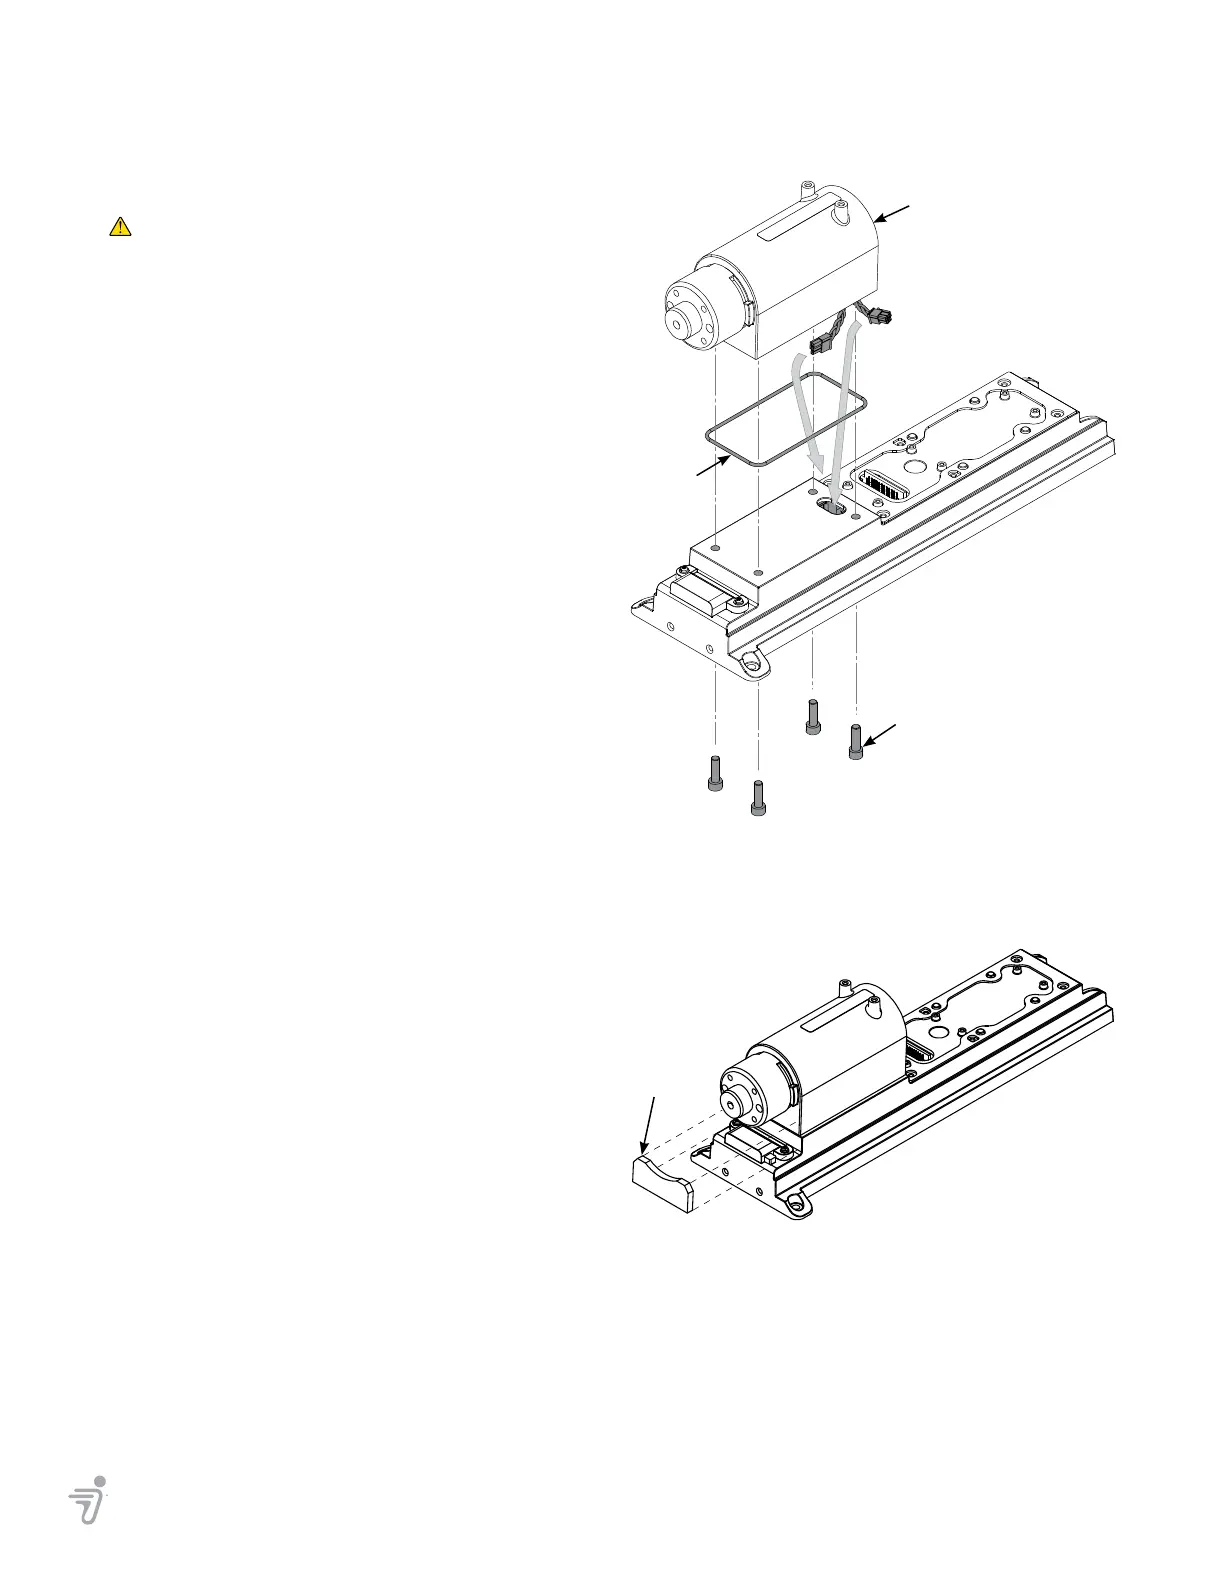
8. Using a T-30 6-lobe wrench, remove the four
fasteners and discard. See Figure 9–11.
9. Remove the Pivot Assembly.
Installation
Tools Required: T-30 6-lobe wrench
Torque wrench
1. Install the gasket into the groove on the underside of
the Pivot Assembly.
2. Thread the Pivot Assembly harnesses through the
hole in the Console Base and position the Pivot
Assembly on the Console Base.
3. Using a T-30 6-lobe wrench, install four new
fasteners. Torque to 11 N-m (8.1 ft-lbf).
4. Install the Gap Pad. See Figure 9–12.
5. Install the Interconnect Board (page 9–6).
6. Install the Power Board (page 9–5).
7. Install the AC Input Filter (page 9–7).
8. Install the Console onto the Powerbase
(page 9–4).
9. Install the Radio Board (page 9–3).
10. Reassemble the PT from the Serviceable Powerbase
(page 8–2).
11. Perform post-service tests (page A–1).
Figure 9–11: Pivot Assembly
Pivot Assembly
Gasket
20205-00001
11 N-m (8.1 ft-lbf)
Figure 9–12: Gap Pad
Gap Pad
Console
 Loading...