Segway Personal Transporter SE Service Manual
11–2
CU Board
CU Board
Removal
Tools Required: Small flathead screwdriver
T-10 6-lobe wrench
1. Make sure the PT is powered off, unplugged, and the
batteries have been removed.
2. Establish a Serviceable Powerbase (page 8–2).
3. Remove the Radio Board (page 9–3).
4. Remove the Console (page 9–4).
5. Remove the Chassis Cover (page 10–2).
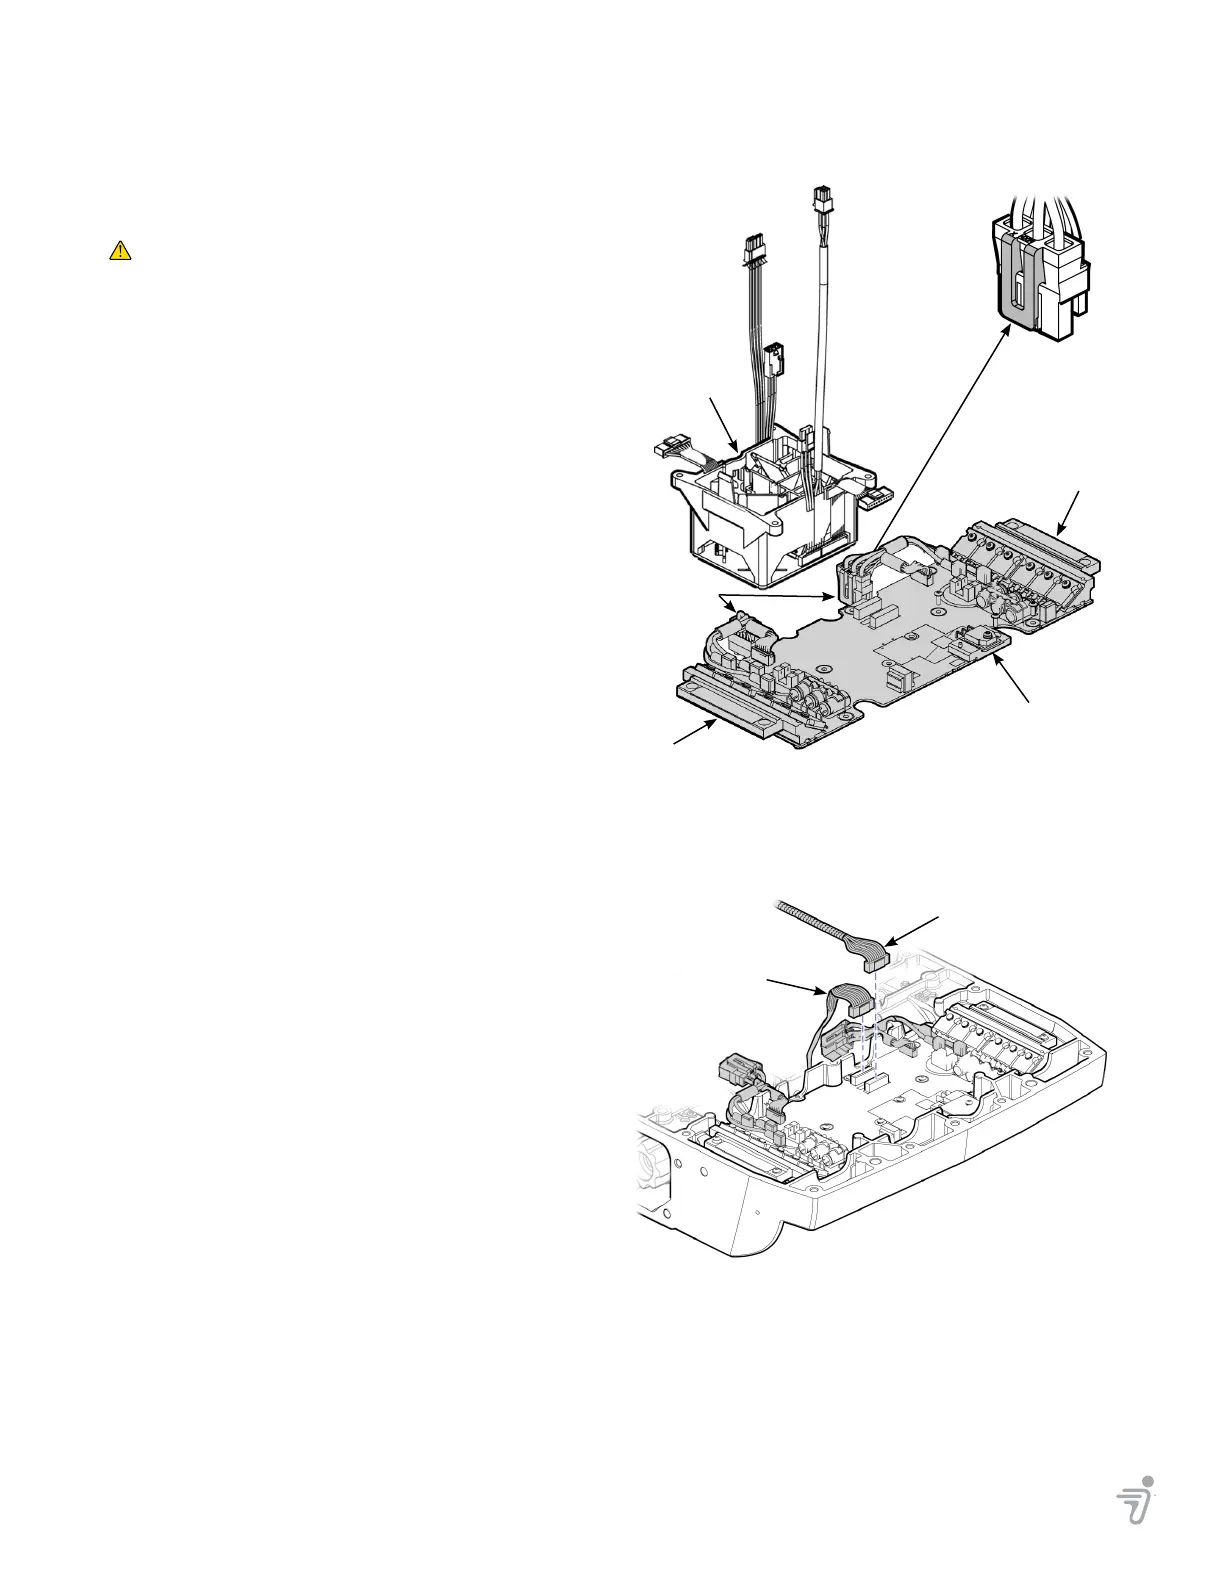
6. Disconnect the two CU motor harnesses from the
motors (one per motor). Using a small flathead
screwdriver, gently lift the tab on the connector,
then carefully pull on the connector to unseat it. See
Figure 11–1.
7. Disconnect the BSA harness and CU harness from
the CU board by squeezing the plastic tab on the
connector and gently pulling on the connector. See
Figure 11–2.
8. Using a T-10 6-lobe wrench, remove the 14 screws
that hold the CU Board to the Chassis. Discard the
fasteners. See Figure 11–3.
9. Grasp the CU Board by the edges of the heat sinks
and lift it from the Chassis.
10. Using ESD best practices, place the CU Board in an
ESD bag for return shipment to Segway.
Figure 11–2: BSA Harness and CU Harness
BSA Harness
CU Harness
Connector Tab
Balance Sensor
Assembly (BSA)
CU Board
Figure 11–1: Motor Harnesses Locations
Motor
Harnesses
Heat Sink
Heat Sink
 Loading...