Class N1 vehicles
Read and observe and on page 98 first.
On class N1 vehicles, which are not fitted with a protective grille, a lashing set
which complies with the standard EN 12195 (1 - 4) must be used for fastening
the load.
Proper functioning of the electrical installation is essential for safe vehicle op-
eration. It is important to ensure that the electrical installation is not damaged
during the adjustment process or when the storage area is being loaded and
unloaded.
Variable loading floor in the luggage compartment (Estate)
Introduction
This chapter contains information on the following subjects:
Removing and inserting the variable loading floor
104
Securing the loading floor in the raised position
104
Removing and refitting carrier rails
105
Using the variable loading floor with a spare wheel
105
The variable loading floor makes it easier to handle bulky goods and creates an
even boot floor when the rear seat backrests are folded forward.
CAUTION
The maximum permissible load of the variable loading floor is 75 kg.
Note
The room under the variable loading floor can be used to stow objects.
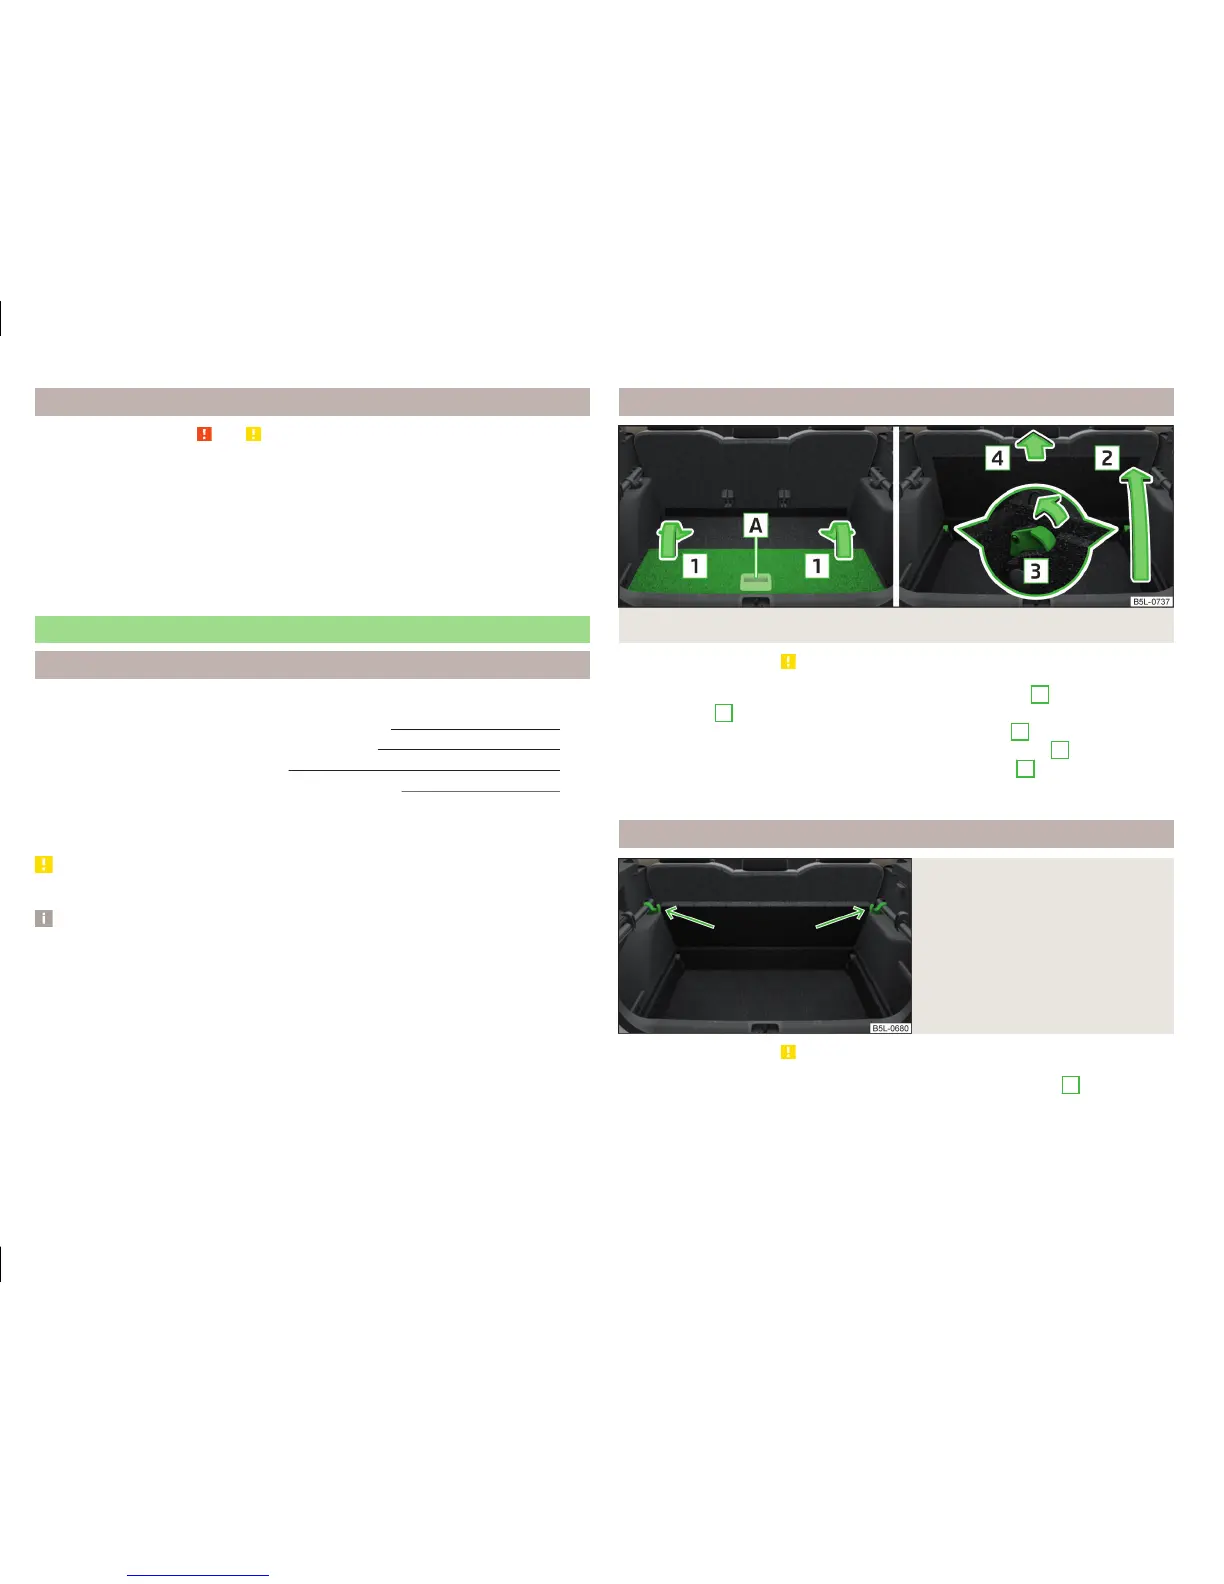
Removing and inserting the variable loading floor
Fig. 109 Fold up / removal variable loading floor
Read and observe
on page 104 first.
›
Fold the variable loading floor together using the handle
A
and fold in the
direction of
1
» Fig. 109.
›
Fold up the variable loading floor in direction of arrow
2
.
›
Pull on both sides of the locking levers in direction of arrow
3
.
›
Remove the variable loading floor in direction of arrow
4
.
Insertion takes place in reverse order.
Securing the loading floor in the raised position
Fig. 110
Secured loading floor in the
raised position
Read and observe on page 104 first.
›
Fold up the hooks on the fastening strip in direction of arrow
1
» Fig. 102 on
page 100.
›
Fold up the variable loading floor behind the rear back backrests.
104
Using the system

 Loading...