Depending on the equipment configuration, the following is true after
locking
›
The turn signal lights flash once as confirmation that the vehicle has been
locked.
›
An audible signal sounds additionally on vehicles which are fitted with the
anti-theft alarm system.
›
The doors, the boot lid and the fuel filler flap are locked.
›
The interior light operated via the door contact goes out.
›
The SafeLock system is switched on.
›
The indicator light in the driver door begins flashing.
›
The anti-theft alarm system is activated.
If the doors or the boot lid remain open after the vehicle has been locked, the
turn signal lights do not flash until they have been closed.
WARNING
■
Never leave the key in the vehicle when you exit the vehicle. Unauthor-
ized persons, such as children, for example, could lock the car, turn on the
ignition or start the engine - there is a danger of injury and accidents!
■
When leaving the vehicle, never leave people who are not completely in-
dependent, such as children, unattended in the vehicle. The children might,
for example, release the handbrake or take the vehicle out of gear. The ve-
hicle could then start to move – risk of injury and accidents! These individu-
als might also not be able to leave the vehicle on their own or to help
themselves. Can be fatal at very high or very low temperatures!
CAUTION
■
Each key contains electronic components; therefore it must be protected
against moisture and severe shocks.
■
Keep the groove of the keys absolutely clean. Impurities (textile fibres, dust,
etc.) have a negative effect on the functionality of the locking cylinder and ig-
nition lock.
■
The battery must be replaced if the central locking or anti-theft alarm system
does react to the remote control at less than approx. 3 metres away
» page 194.
■
When leaving the vehicle, always check if it is locked.
■
If the driver's door has been opened, the vehicle cannot be locked.
Note
In the event of an accident in which the airbags are deployed, the locked doors
are automatically unlocked in order to enable rescuers to gain access to the
vehicle.
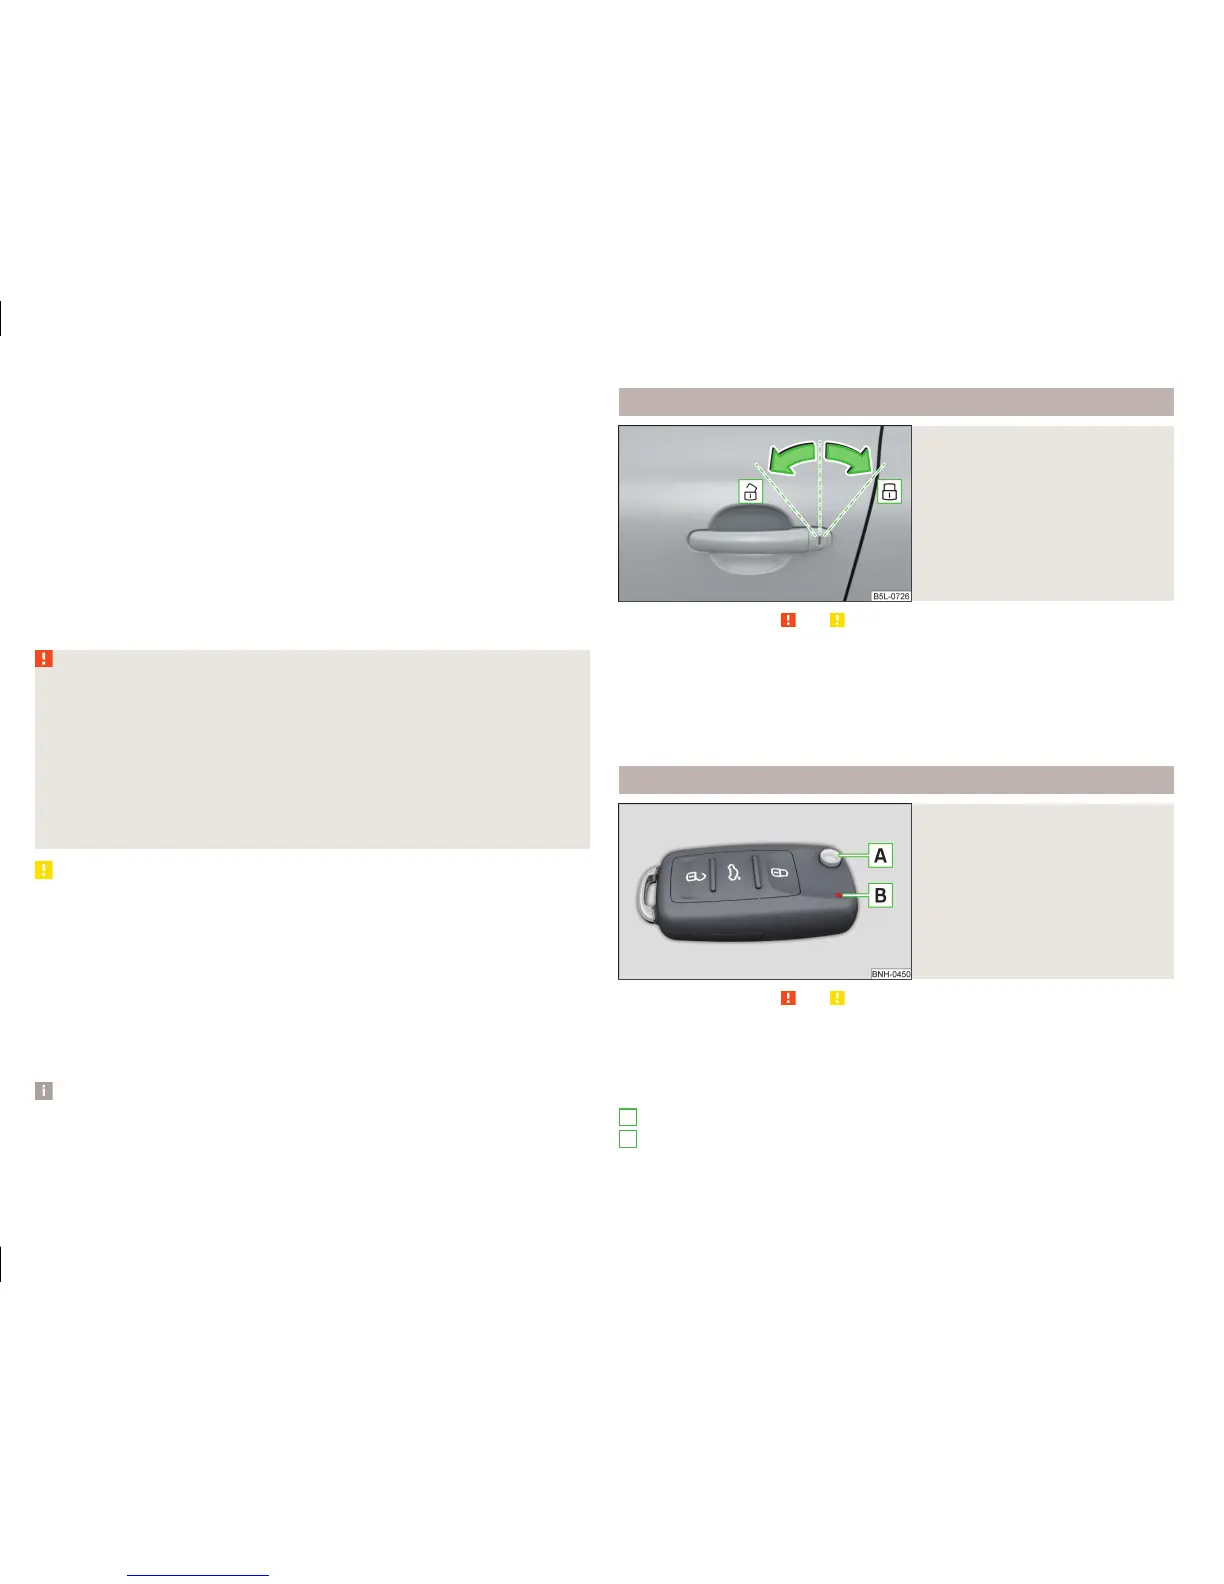
Unlock / lock using key and lock
Fig. 32
Left side of the vehicle: Turning
the key for unlocking and locking
the vehicle
Read and observe and on page 54 first.
The key allows you to unlock and lock the vehicle via the lock cylinder in the
driver's door.
Unlocking/locking the vehicle with the key » Fig. 32
Unlocking the vehicle
Locking the vehicle
Unlocking / locking with the remote control key
Fig. 33
Remote control key
Read and observe and on page 54 first.
Function and description of the remote control key » Fig. 33
Unlocking the vehicle
Locking the vehicle
Unlocking / locking the boot lid
Button for the extension / retraction of the key
Warning light
A
B
54
Using the system
 Loading...