4-6. PS-739D Board
Preparation
1. Remove the top cover. (Refer to “4-2. Top Cover”)
Procedure
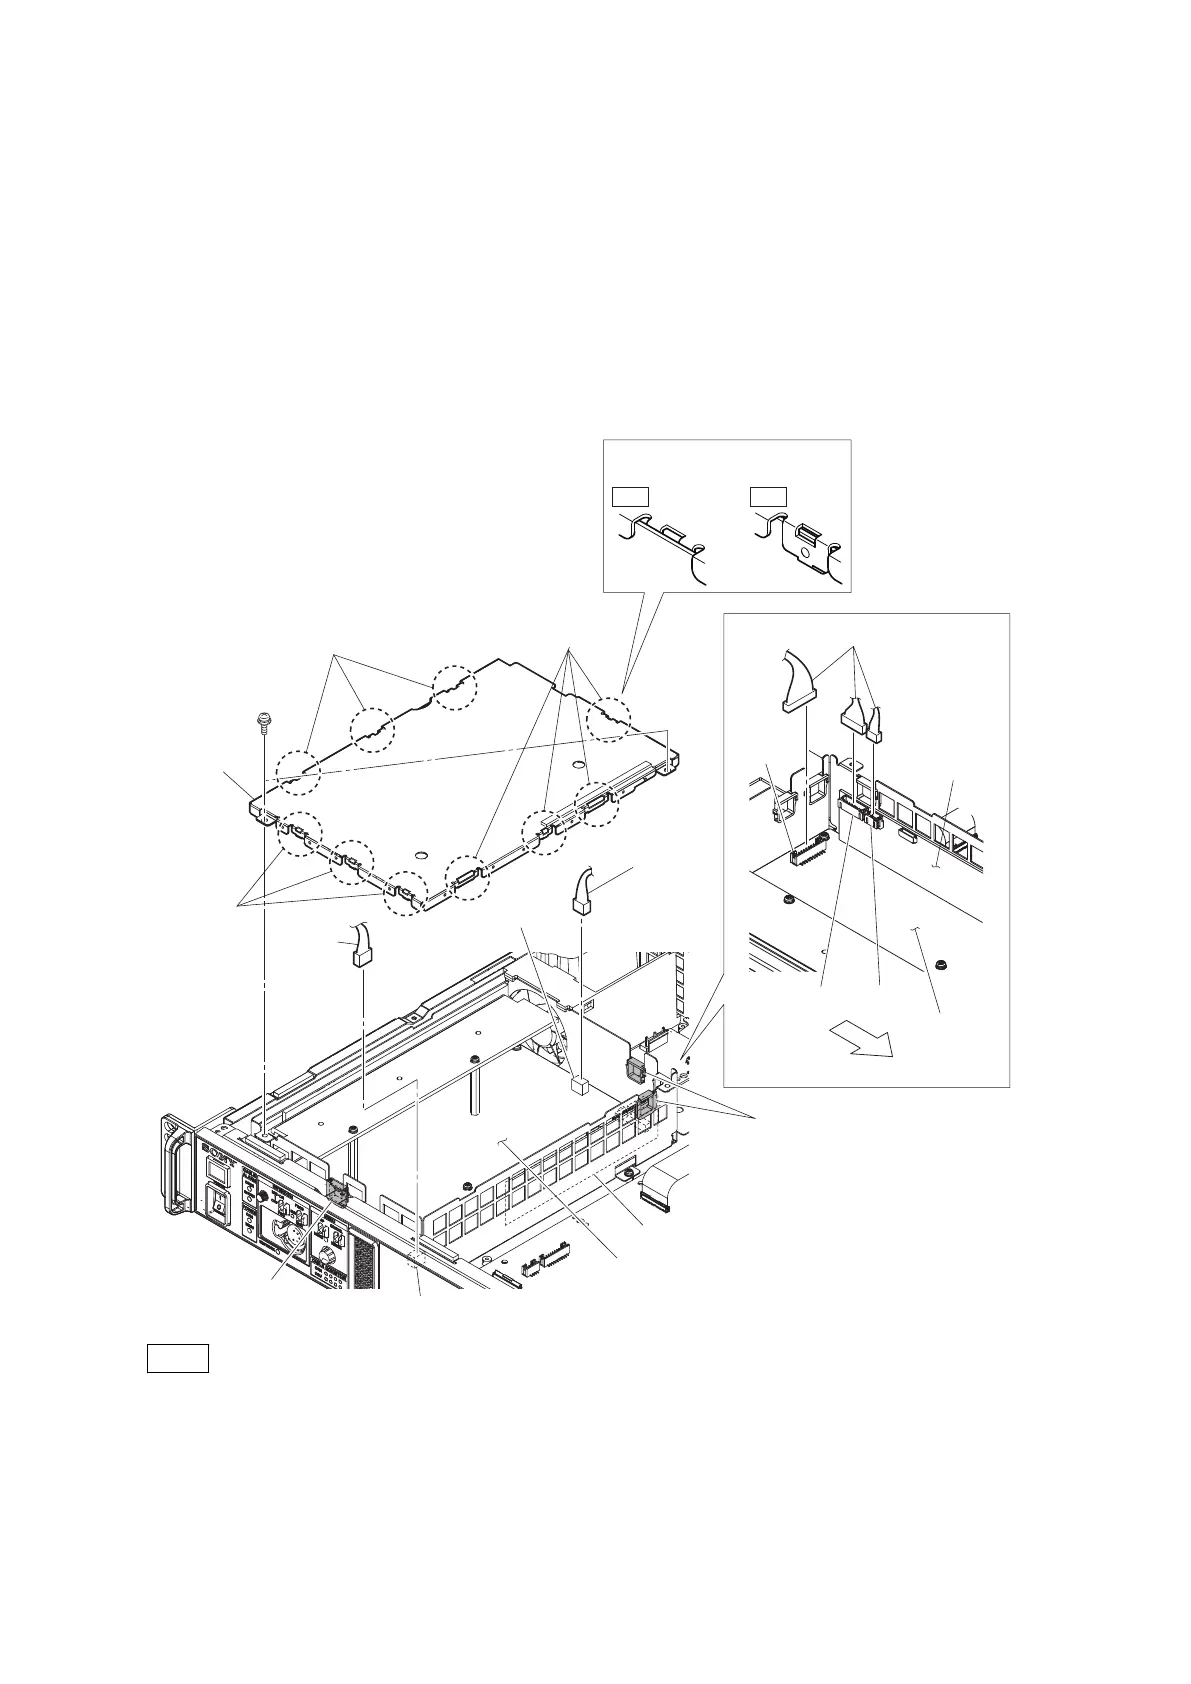
1. Remove the two screws to detach the PS cover.
2. Open the three wire holders.
3. Disconnect the three harnesses from the three connectors (CN1, CN1004, and CN2002) on the PS-739D board.
4. Disconnect the two harnesses from the two connectors (CN5006, CN5007) on the CT-257 board.
OK NG
PSW3 x 6
PS cover
Wire holders
Wire holder
PS-739D board
PS-739D board
Front side
CT-257 board
CT-257 board
Harness
Harnesses
Harness
CN1004
CN1
CN2002
CN5007
CN5006
Note for installing
Claws
Claws
Claws
Note
When installing the PS cover, attach ten claws to the PS cover as shown in the figure.
5. Remove the five screws to detach the PS-739D board.
HXCU-TX70
4-9
 Loading...