SA-Z9R
10
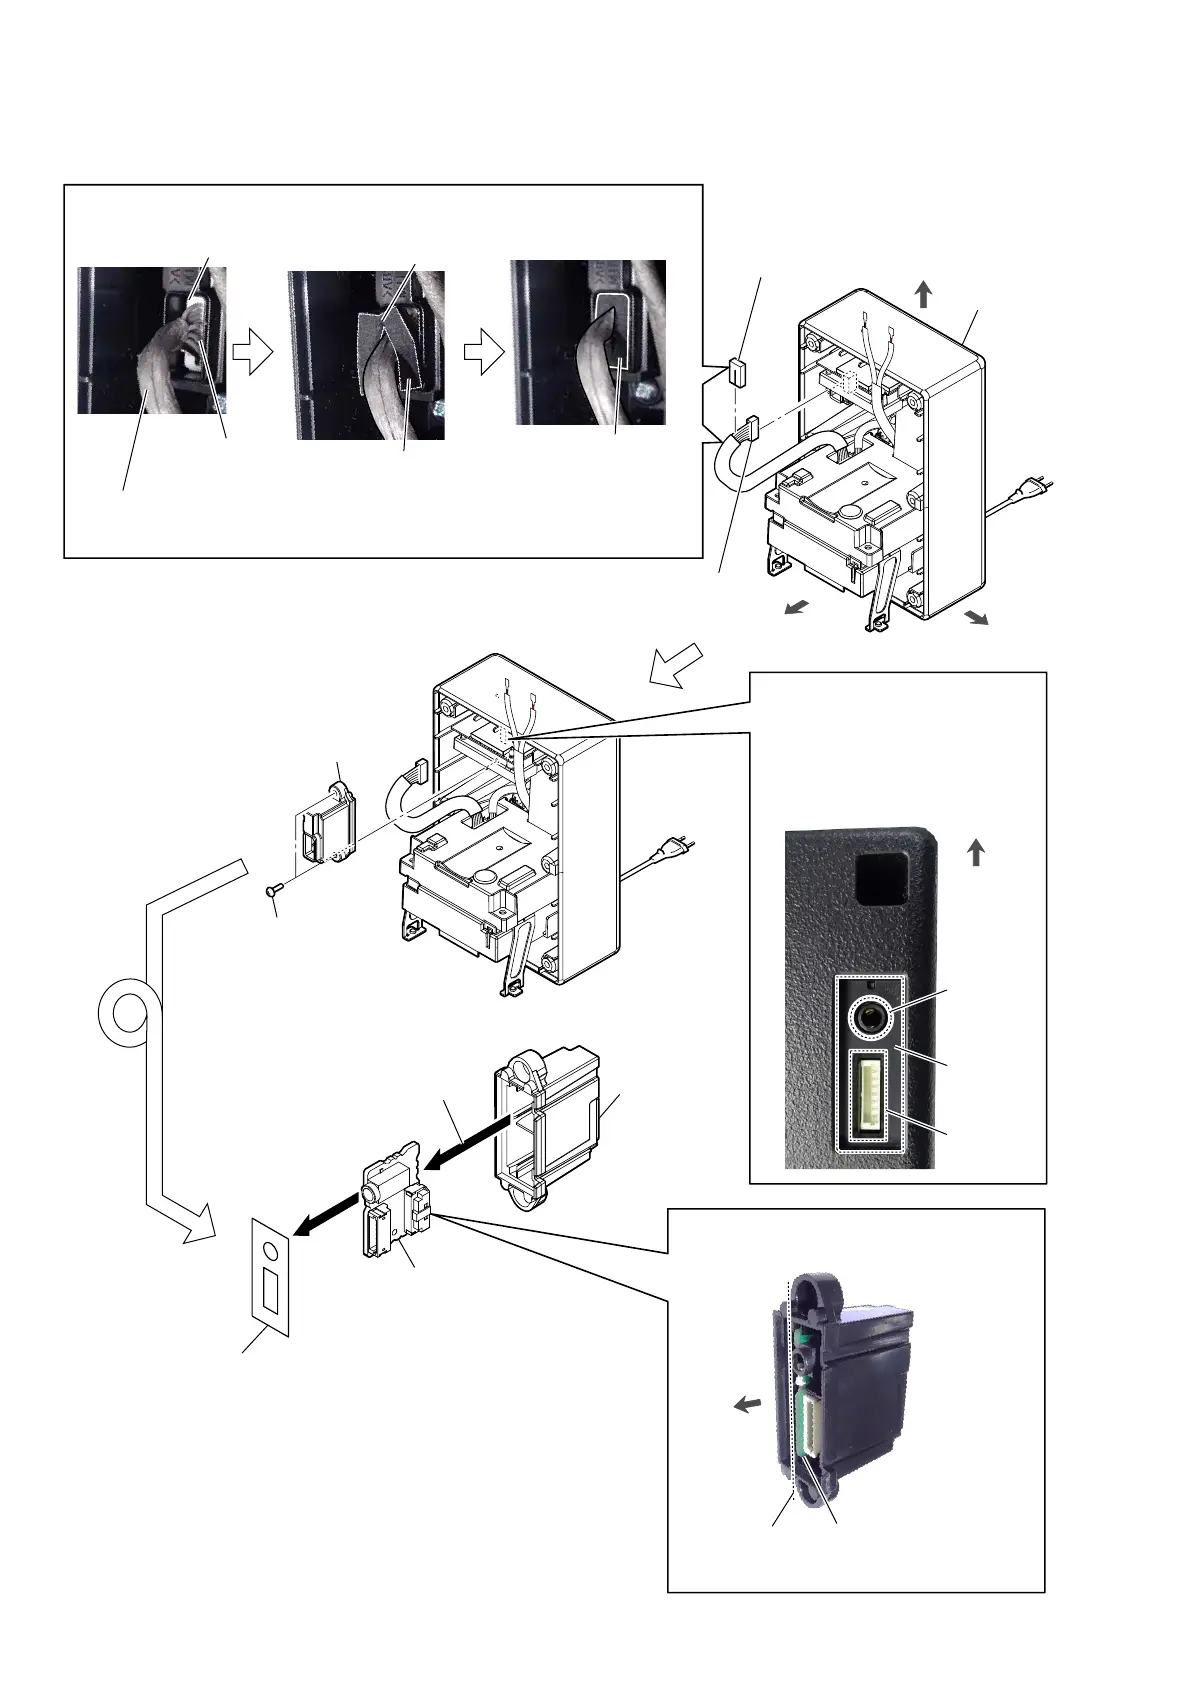
2-5. REAR JACK BOARD
3 two screws
(BVTP3 u 8)
4 REAR JACK
board block
6 Remove the REAR JACK board
in the direction of the arrow.
Turn over.
,QVWDOOLQJSRVLWLRQRIWKH5($5-$&.ERDUG
guide line REAR JACK board
rear side
5 packing
(terminal)
7 terminal case
8 REAR JACK board
top side
front side
right side
cabinet block
2 harness (REAR-AMP~
REAR-JACK) connector
(CN8013)
1 bushing
(terminal board)
+RZWRLQVWDOOWKHEXVKLQJWHUPLQDOERDUG
Attach in order from 1 to 2.
2
Push the
bushing
(termianl board), to
fit inside the terminal
case as shown above
figure.
CN8013
termnal
case
harness (REAR-AMP
~REAR-JACK)
bushing (terminal board)
1
Pinch the
harness (REAR-AMP
~REAR-JACK) by the bushing
(termianl board), and insert
the bushing (termianl board)
to the terminal case.
top side
Check that the hole of jack and
connector are not covered by
the packing (terminal).
&KHFNDIWHULQVWDOOLQJWKH5($5
-$&.ERDUGEORFN
–5HDUYLHZ–
jack
packing
(terminal)
connector
 Loading...