SA-Z9R
7
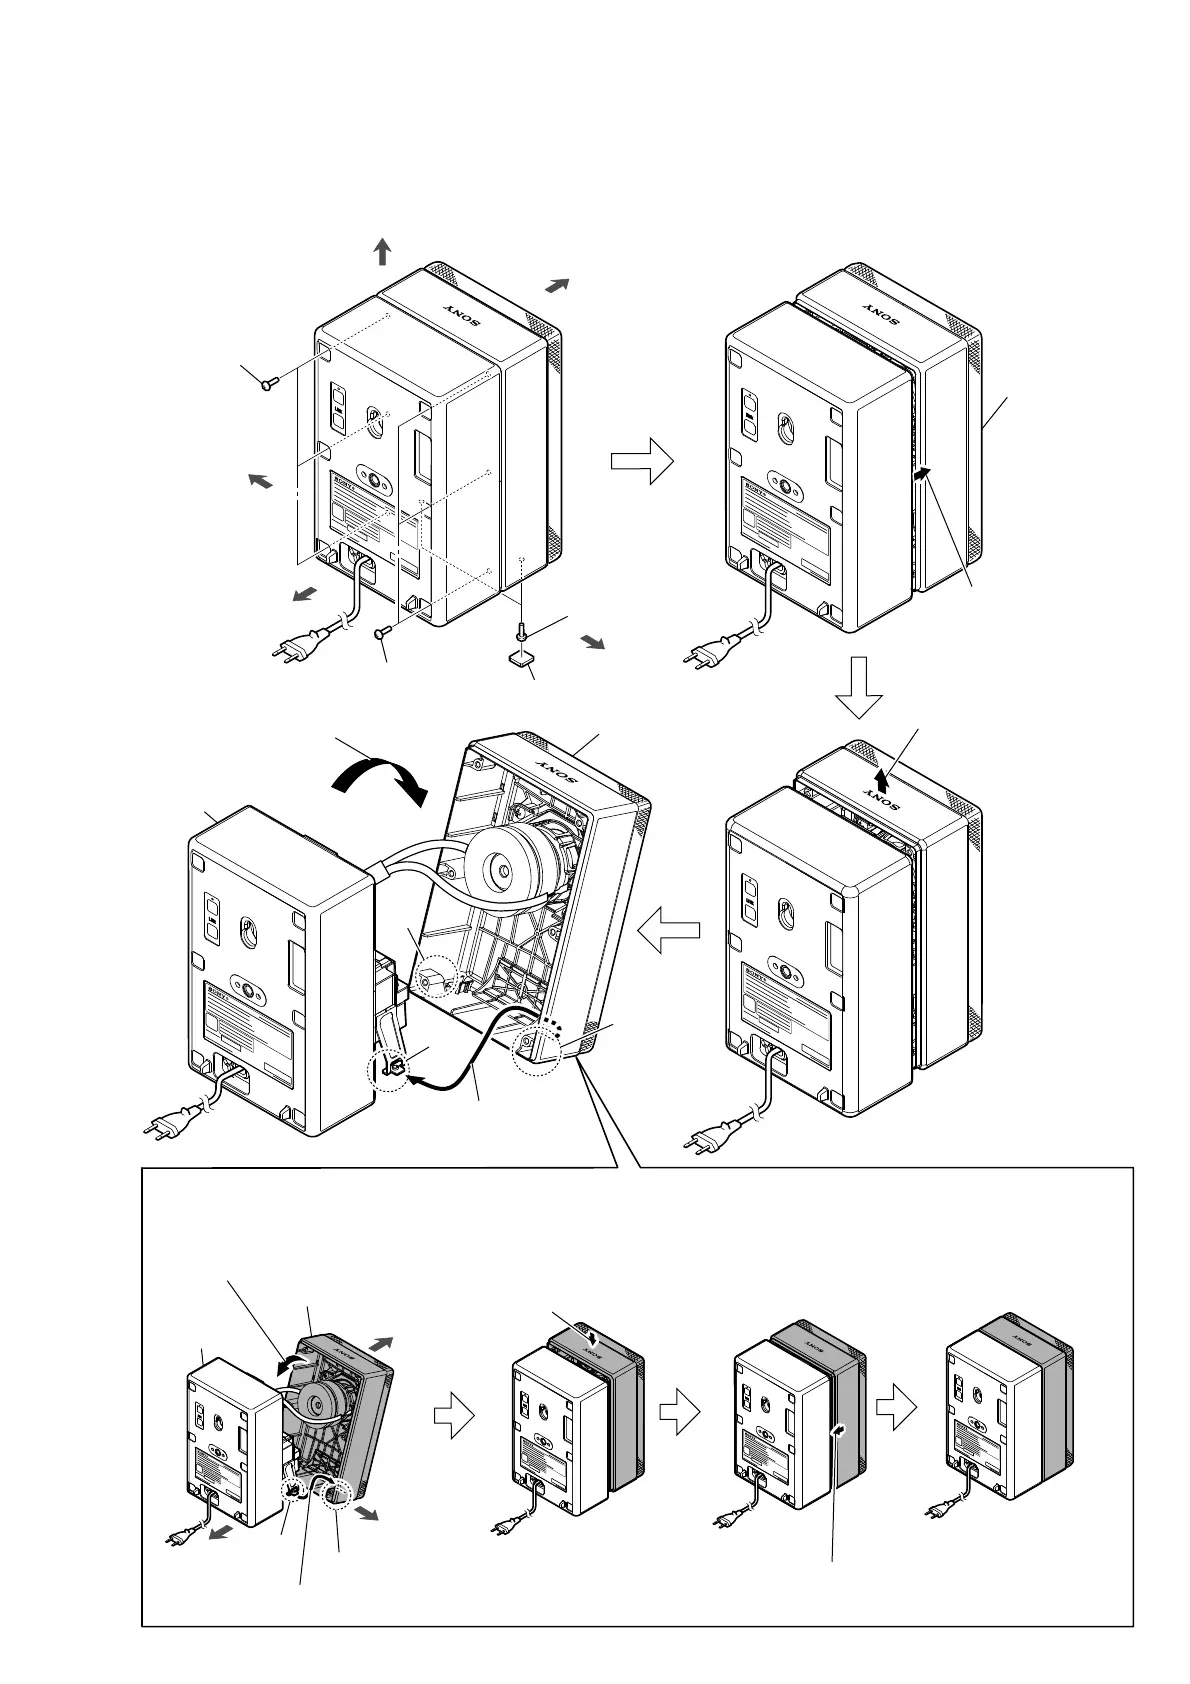
Note: Follow the disassembly procedure in the numerical order given.
2-2. BAFFLE ASSY BLOCK-1
• Continued on 2-3 (page 8).
front side
right side
left side
+RZWRLQVWDOOWKHEDIIOHDVV\EORFN
rear side
6 Remove the baffle assy
block in the direction
of the arrow.
4
Pull out the baffle assy
block in the direction
of the arrow.
top side
front side
baffle assy block
left side
2 Install the baffle assy block
in the direction of the arrow.
1 three screws
(BVTP3.5 u 10)
1 three screws
(BVTP3.5 u 10)
2 two feet
3 two screws
(BVTP3 u 8)
7
Draw out the leg from the
back of the screw hole on
the baffle assy.
screw
hole
screw
hole
leg
baffle assy block
cabinet block
1
Insert the leg to the back of the
screw hole on the baffle assy.
cabinet block
leg
screw hole
rear side
Attach in order from 1 to 4.
3
Slide the baffle assy
block in the direction
of the arrow.
4
Push in the baffle assy
block
in the direction of the arrow.
5
Slide the baffle assy
block in the direction
of the arrow.
baffle assy block
 Loading...