SA-Z9R
13
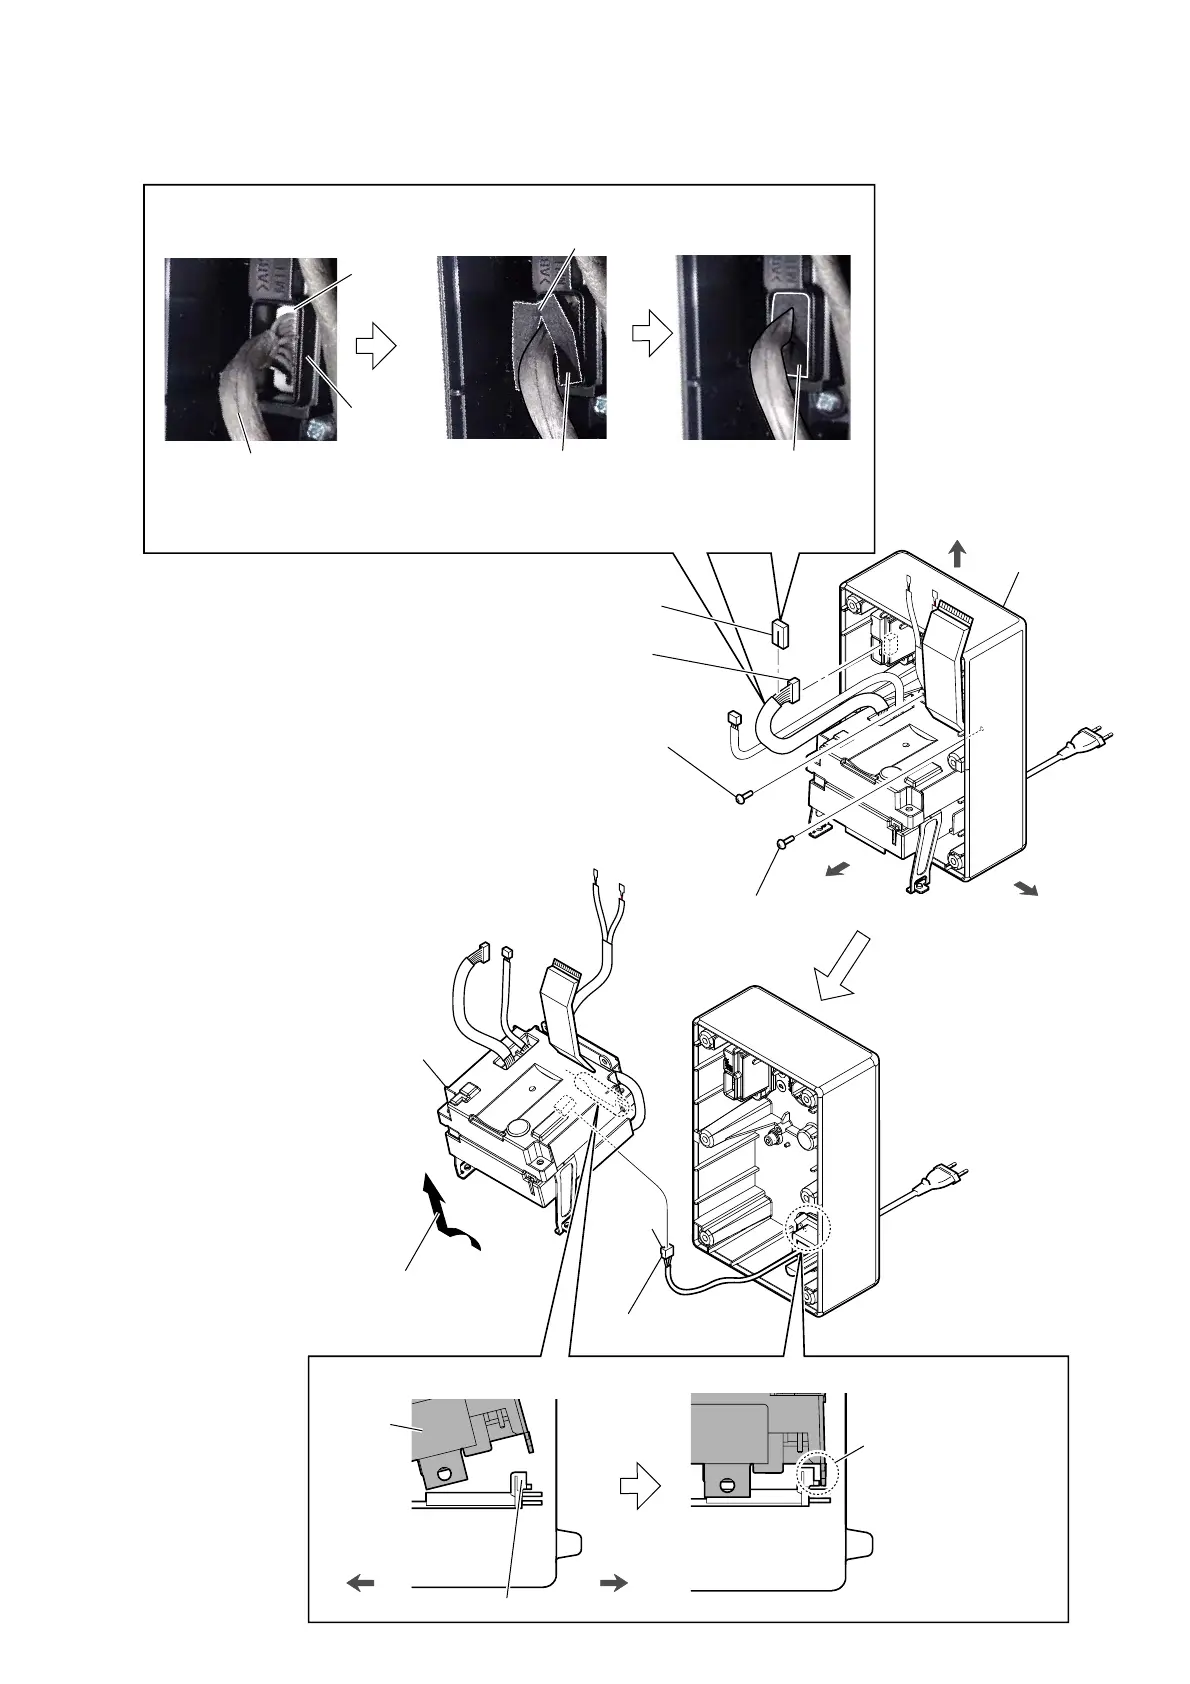
2-8. INSULATOR BLOCK
top side
+RZWRLQVWDOOWKHEXVKLQJWHUPLQDOERDUG
front side
right side
cabinet block
–6LGHYLHZ–
CN8013
bushing (terminal board)
2 harness (REAR-AMP~
REAR-JACK) connector
(CN8013)
5 power-supply cord
connector (CN1)
1 bushing
(terminal board)
3 screw
(BVTP3 u 8)
3 screw
(BVTP3 u 8)
6 insulator block
termnal
case
harness (REAR-AMP
~REAR-JACK)
Attach in order from 1 to 2.
1
Pinch the
harness (REAR-AMP
~REAR-JACK) by the bushing
(termianl board), and insert
the bushing (termianl board)
to the terminal case.
2
Push the
bushing
(terminal board), to
fit inside the terminal
case as shown above
figure.
insulator
block
+RZWRLQVWDOOWKHLQVXODWRUEORFN
bush case
front side
rear side
Insert the protrusion of the
insulator block to the back
of the bush case.
4 Remove the insulator block in
the direction of the arrow.
claw side
 Loading...