7
VISCA RS-422 OUT terminal
When you connect multiple cameras,
c
onnect it to the VISCA RS-422 IN terminal of
the next camera in the daisy chain
connection.
V
IDEO OUT terminal
Supplies the image as a USB video signal.
For details, see the table of “Video output
fo
rmat/Frame rate” (page 52).
HDMI
OUT terminal
Supplies the images as an HDMI video
signa
l.
For details, see the table of “Video output
fo
rmat/Frame rate” (page 52).
Note
Under the following cases, VGA output is
applied to the image output through the
HDMI OUT terminal and the image quality is
degraded.
• When the SYSTEM SELECT switch is set to 7
• When you choose [720/59.94p] for [VIDEO
FOR
MAT] on the OSD menu
LAN (network) terminal (RJ-45)
Network communication and PoE+ power
s
upply are provided using the network cable
(category 5e or higher, shielded twist pair).
For more information on the connection,
r
efer to the instruction manual of the PoE+
power supply device.
It lights up in orange when the network is
connected by 100BASE-TX.
It is turned off when the network is connected
b
y 10BASE-T or the network is disconnected
.
It flashes in green during network
c
ommunication.
Factory settings for network
IP address: 192.168.0.100
Subnet mask: 255.255.255.0
Default gateway: 192.168.0.254
Name: CAM1
User name: admin
Password: Admin_1234
When connecting this product to a network,
c
onnect via a system that provides a
protection function, such as a router or
firewall. If connected without such
protection, security issues may occur.
12 V (DC pow
er input) terminal
Connect the AC adapter (supplied).
Note
Do not use any AC adapter other than the
supplied AC adapter. Otherwise, a fire or
malfunction may occur.
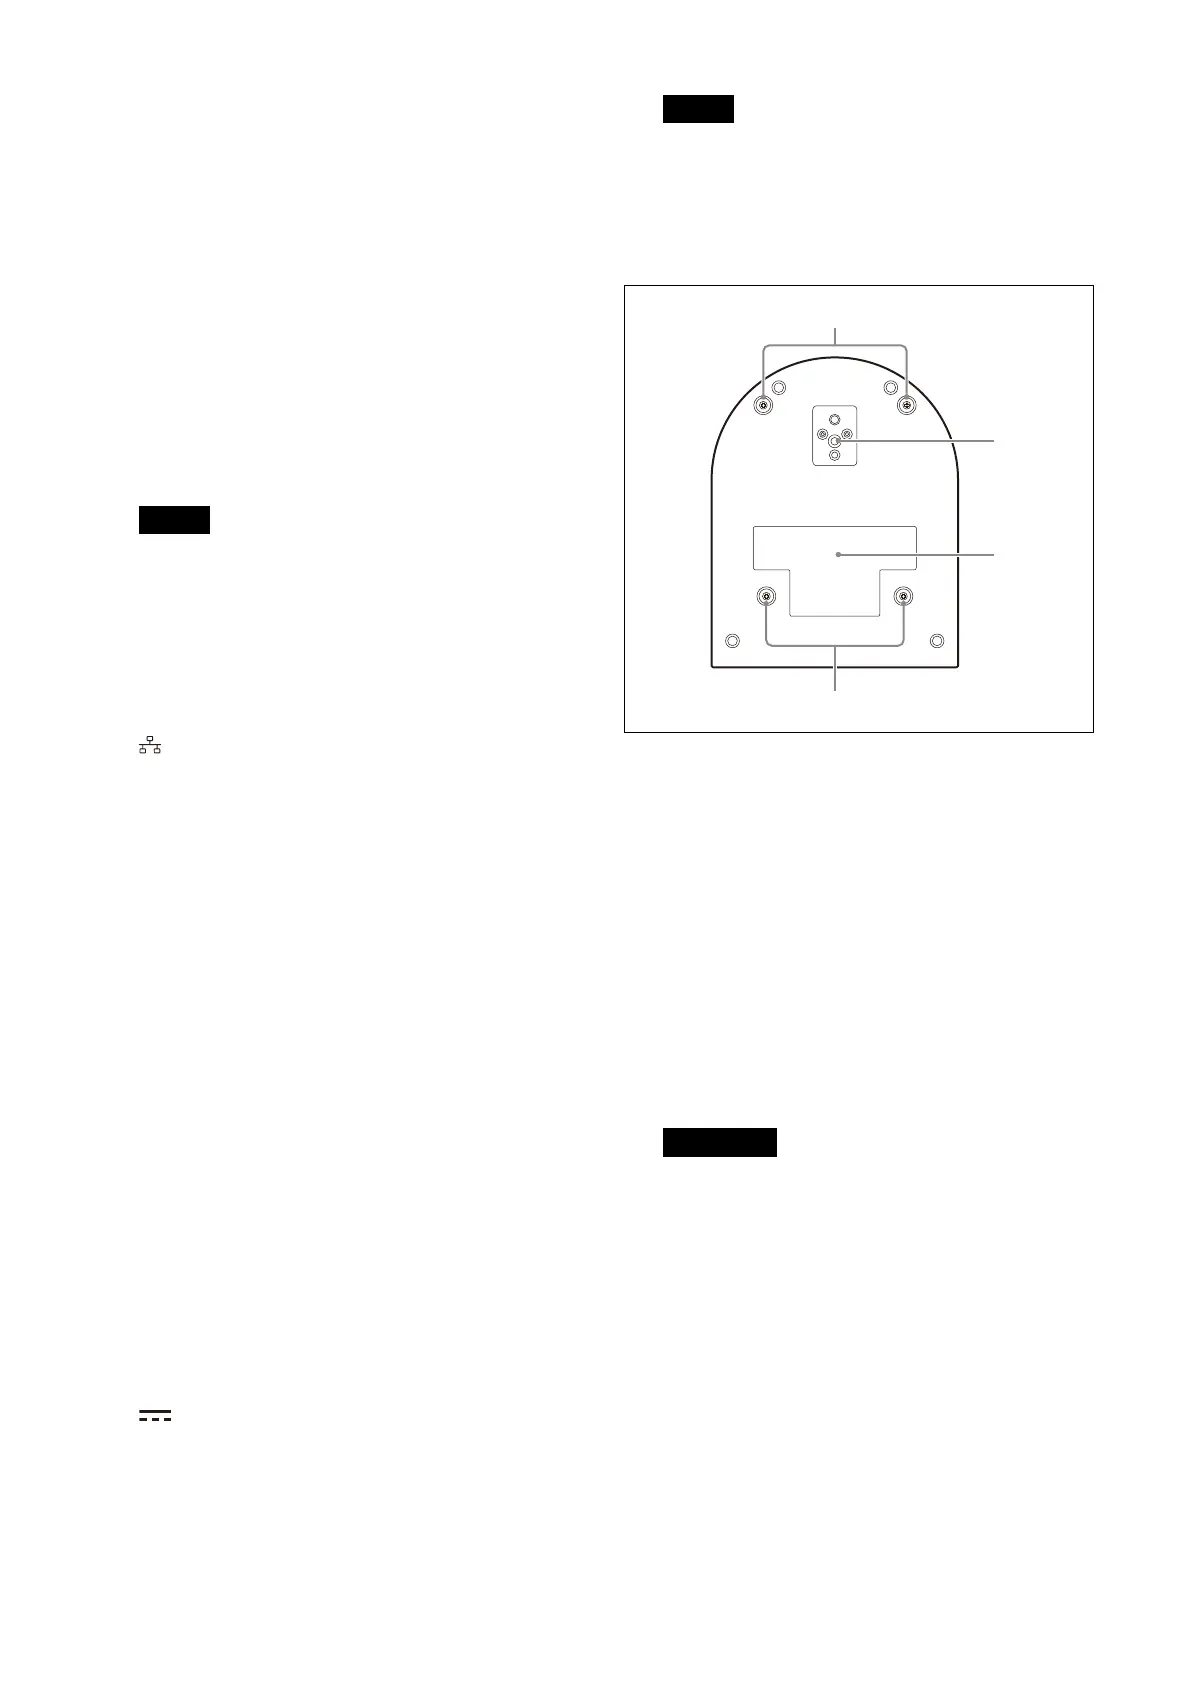
Bottom
C
eiling bracket mounting screw holes
When installing on the ceiling, use the screw
ho
les to attach the supplied ceiling bracket
(A). For details, see “Installing the Camera”
(page 14).
Tr
ipod socket hole
Use this to attach the tripod, etc.
For details, see “Attaching the Camera to a
Tripod” (page 14).
Rating label
This label shows the name of device and its
el
ectric rating.
Important
The product name and electric rating are
located at the bottom of the unit.
ȹ
Ⱥ
Ȼ
ȹ
 Loading...