49EN
5. OPERATION
NOTE: this mode may not guarantee adequate coverage of the garden, both in terms of time
required and in terms of uniformity of the cutting result, especially if the garden has an irregular
shape. To achieve the maximum eciency of the robot lawn mower, it is recommended to carry
out programming (See par. 4.7).
NOTE: If after pressing the "CONFIRM" button (G), the " SELECT MODE" button (F) is pressed,
the icons for the selected functions will start ashing again, requesting conrmation of the newly
selected function. Press the “CONFIRM” button (G). The icons will once again light up with a
steady glow.
NOTE: if the cover (B) is opened, either during work or with the robot in the base, the icons
relating to the selected functions will ash,to indicate that it is necessary to conrm the operation
before closing the cover again. If the cover is closed without pressing the The "CONFIRM"
button (G), the robot will not perform any operation until a new command is given by the user.
5.2. MANUAL FUNCTIONING OF THE ROBOT LAWN MOWER
The robot lawn mower can be used without performing the programming procedure described in Par. 4.7.
In this mode the robot lawn mower carries out a work cycle, returns to the charging base and remains
there until the next manual start.
In order to use the machine in this mode, it is still however necessary to programme the virtual perimeters,
transition routes and areas to be avoided. (See par. 4.6).
Procedure:
1. Put the robot on the charging base in the installation perimeter, or in any case inside the installation
perimeter.
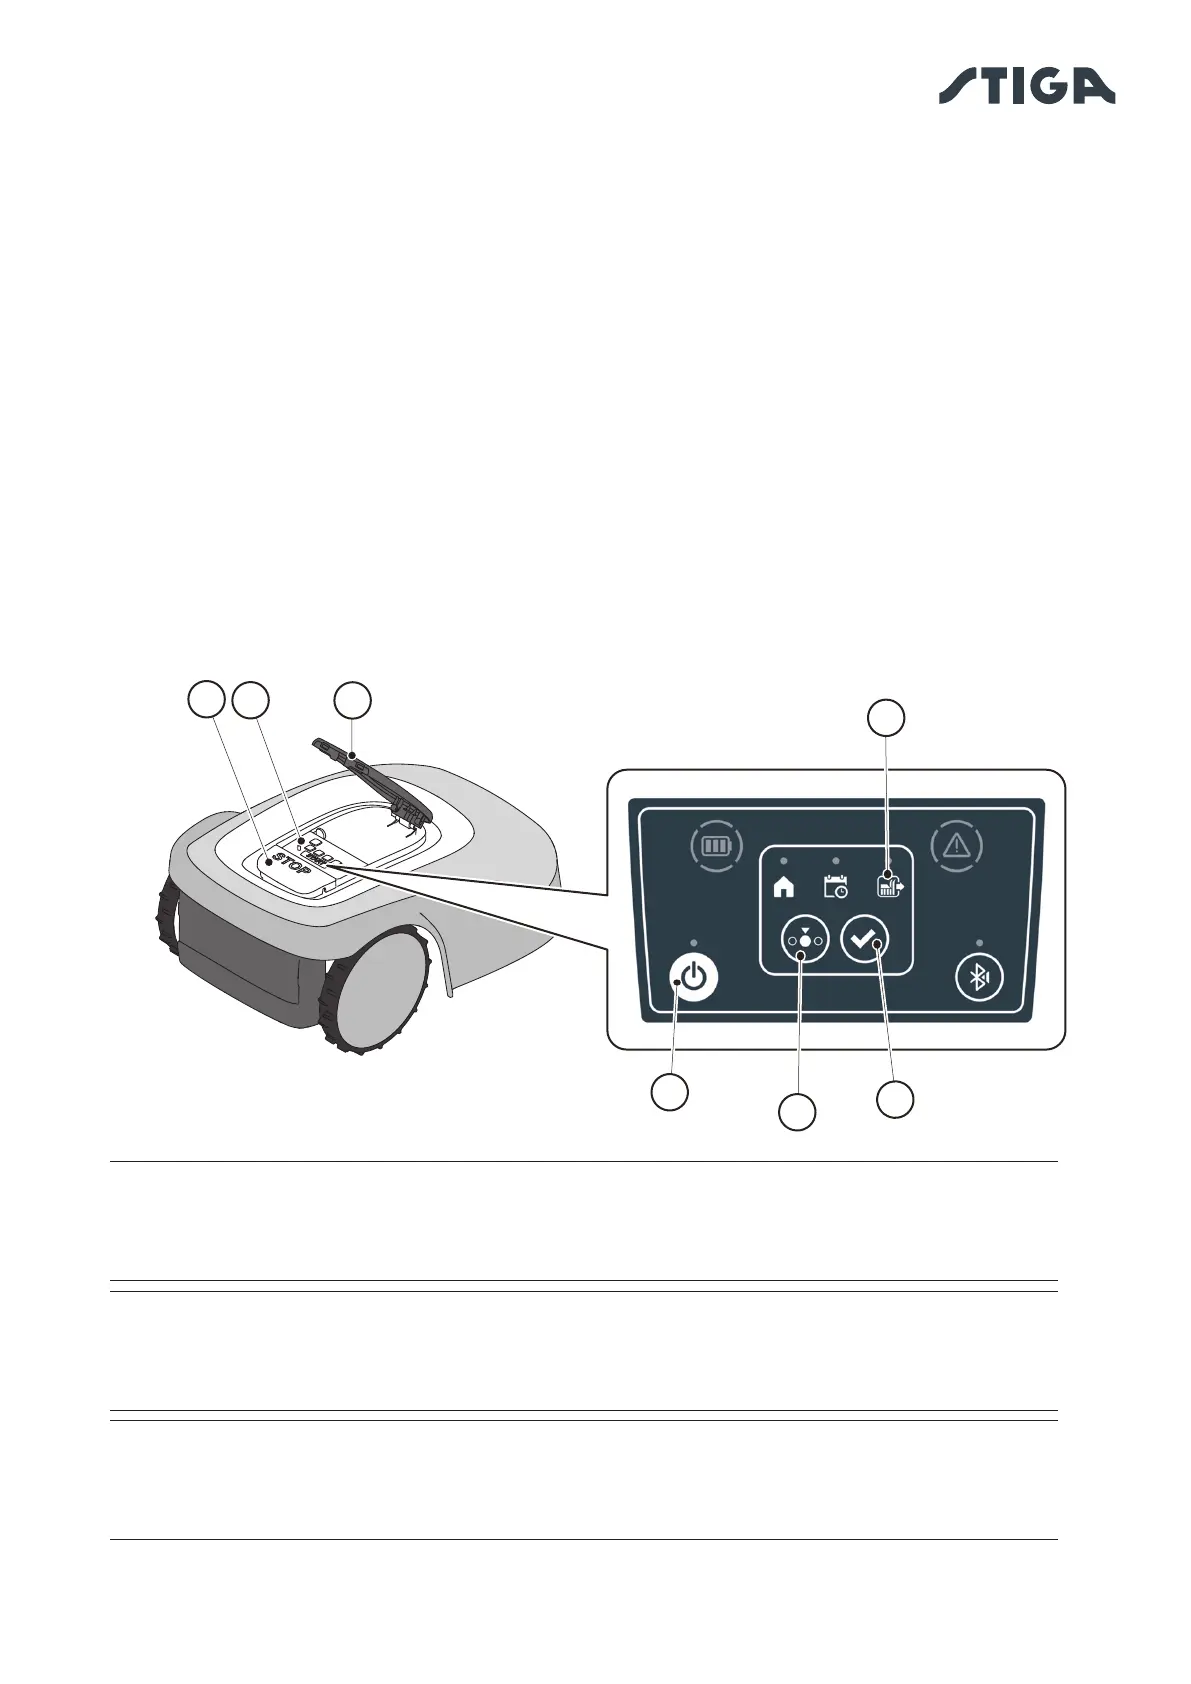
2. Press the “STOP” button (A) to open the cover (B) and access the control console (C).
3. Press the “SELECT MODE” button (F) until only the icon (L) ashes.
4. Press the “CONFIRM” push button (G). The icon (L) lights up with a steady light to conrm the
operation.
5. Close the cover (B).
6. The robot lawn mower will start operating.
B
C
A
L
E
G
 Loading...