..
-.
•
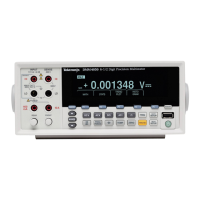
DMM4040 and 4050
Safety and Installation Instructions
~
~
•
Connecting
to
Line Power
I
~
•
&&
Warning
To avoid shock hazard, connect the factory supplied three-
~
•
conductor line power cord to a properly grounded power outlet.
I
Do not use a two-conductor adapter or extension cord, as this
~
•
will break the protective ground connection. If a two-conductor
I
power cord must be used, a protective grounding wire must be
e
•
connected between the ground terminal and earth ground
I
before connecting the power cord or operating the Meter.
e
•
I. Verify that the line voltage selector block is set to the
correct
setting.
I
~
•
2.
Verify that the correct fuse for the line voltage
is
installed.
I
~
I
3.
Connect
the
power
cord to a properly
grounded
three-prong outlet. Refer to
Table
2 for descriptions
of
the
line-power
cord types available from Tektronix.
I
~
I
I
~
I
Table
2.
Line-Power Cord Types Available from Tektronix
I
~
Type
Voltage
I Current
Tektronix Part Number
North America
120 V
/15
A 161-0066-00
North America
250V/10A
161-0066-12
Universal Euro
250 V
/10
A
1 61-0066-09
United Kingdom
250 V
/10
A
161-0066-10
Switzerland
250 V
/10
A 161-0154-00
Australia
250 V
/10
A
161-0066-13
Japan
125V 17A
161-0298-00
China
250V / 10A
161-0304-00
@I
~
~
~
~
~
~
•
Turning
Power
On
~
I.
If
required, connect the
Meter
to line power.
~
2.
Toggle
the
power
switch on the rear panel
so
the
"I"
side
of
the switch
is
~
depressed. The
Meter
will
tum
on and briefly illuminate all
LCD
segments.
,
Note
To
save on power consumption,
th
e Meter can be set to a standby mode by
•
pressing @
on
the front panel. Press it again
to
bring the Meter up
to
full
power.
•
~
14
 Loading...
