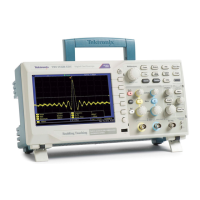
Connecting to a PC
After you install the software on your PC, you can connect the oscilloscope to the
PC.
NOTE. You must install the software before you connect the oscilloscope to the
PC. See Installing the PC communications software on a PC on page 68.
To connect the oscilloscope to the PC, follow these steps:
1. Power on the oscilloscope.
2. Insert one end of a USB cable into the USB Device port on the back of the
oscilloscope.
3. Power on the PC.
4. Insert the other end of the cable into the desired USB port on a PC.
5. If a Found New Hardware message appears, follow the on-screen directions
for the Found New Hardware wizard.
Do NOT search for the hardware to install on the web.
6. For a Windows XP systems, follow these steps:
a. When prompted, select the option that tells Windows NOT to connect to
Windows Update, and click Next.
b. In the next window, you should see that you are installing software for a
USB Test and Measurement Device. If you do not see USB Test and
Measurement Device software, the OpenChoice Desktop software is not
properly installed.
c. Select the option that installs the software automatically (the
recommended option) and click Next.
Windows will install the driver for your oscilloscope.
d. If you do not see the USB Test and Measurement Device in step c, or if
Windows cannot find the software driver, the OpenChoice Desktop
software is not properly installed.
In these situations, click Cancel to exit the Found New Hardware wizard.
Do NOT allow the wizard to finish.
Unplug the USB cable from your oscilloscope and install the
OpenChoice Desktop software.
Reconnect your oscilloscope to the PC and follow steps 6a, 6b, 6c, and
6d.
e. Click Finish.
f. If a dialog labeled Test and Measurement Device appears, select what
you would like Windows to do, and click OK.
USB flash drive and device ports
TBS1000B and TBS1000B-EDU Series Oscilloscopes User Manual 69
 Loading...


