Installation
Connecting Power and Powering On/Off
AC Power Requirements
The instrument operates from an AC line frequency of 50 or 60 H z, over the range of 100-240 Volts, without the need for
configuratio
n, except the power cord. (See page 2, International Power Plugs.) The typical power draw is 22 Watts. Refer
to the S pecifi cations and Performance Verification document on the Product Documentation CD for additional information
on power and environmental requirements.
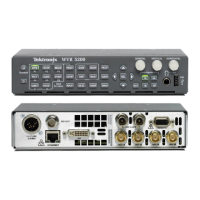
Connect the supplied power cord to the AC adapter and then connect it to the rear panel power connector. After you connect
the power su
pply to your power source, the instrument will not turn on until you perform the following procedure.
Powering On/Off the instrument
The Power button performs the following functions when connected to a 12 V DC input.
Press the Pow er buttontoturnontheinstrument.
Press the Power button again to turn off the instrument.
Battery Power
This instrument can be powered by a 12 V DC input or by a 14.4 V standard camera battery. If you are using a battery
with this instrument, read the following battery safety notices. This instrument was designed to be used with an Anton
Bauer ba
ttery. It can also be used with a Sony IDX battery.
CAUTION. Before using the Anton Bauer Power Tap feature, refer to the product information included with the battery. If that
information is not available, contact the battery manufacturer for information.
WARNING. Fire
can cause personal injury and/or property damage. To prevent risk of fire, when using a 12 V DC source
other than the provided AC adapter, ensure that it has a current limiting device (such as a fuse) below 50 Amps.
WARNING. Risk of personal injury and/or property damage from falling instrument. This instrument was not designed to be
used with batteries
of a different shape or weight than the battery available for this product from Tektronix. Other batteries
may make the unit too heavy in the back, causing the instrument to tip backward.
WFM4000 and WFM5000 Waveform Monitors User Manual 3

 Loading...


