Getting Acquain
tedWithYourInstrument
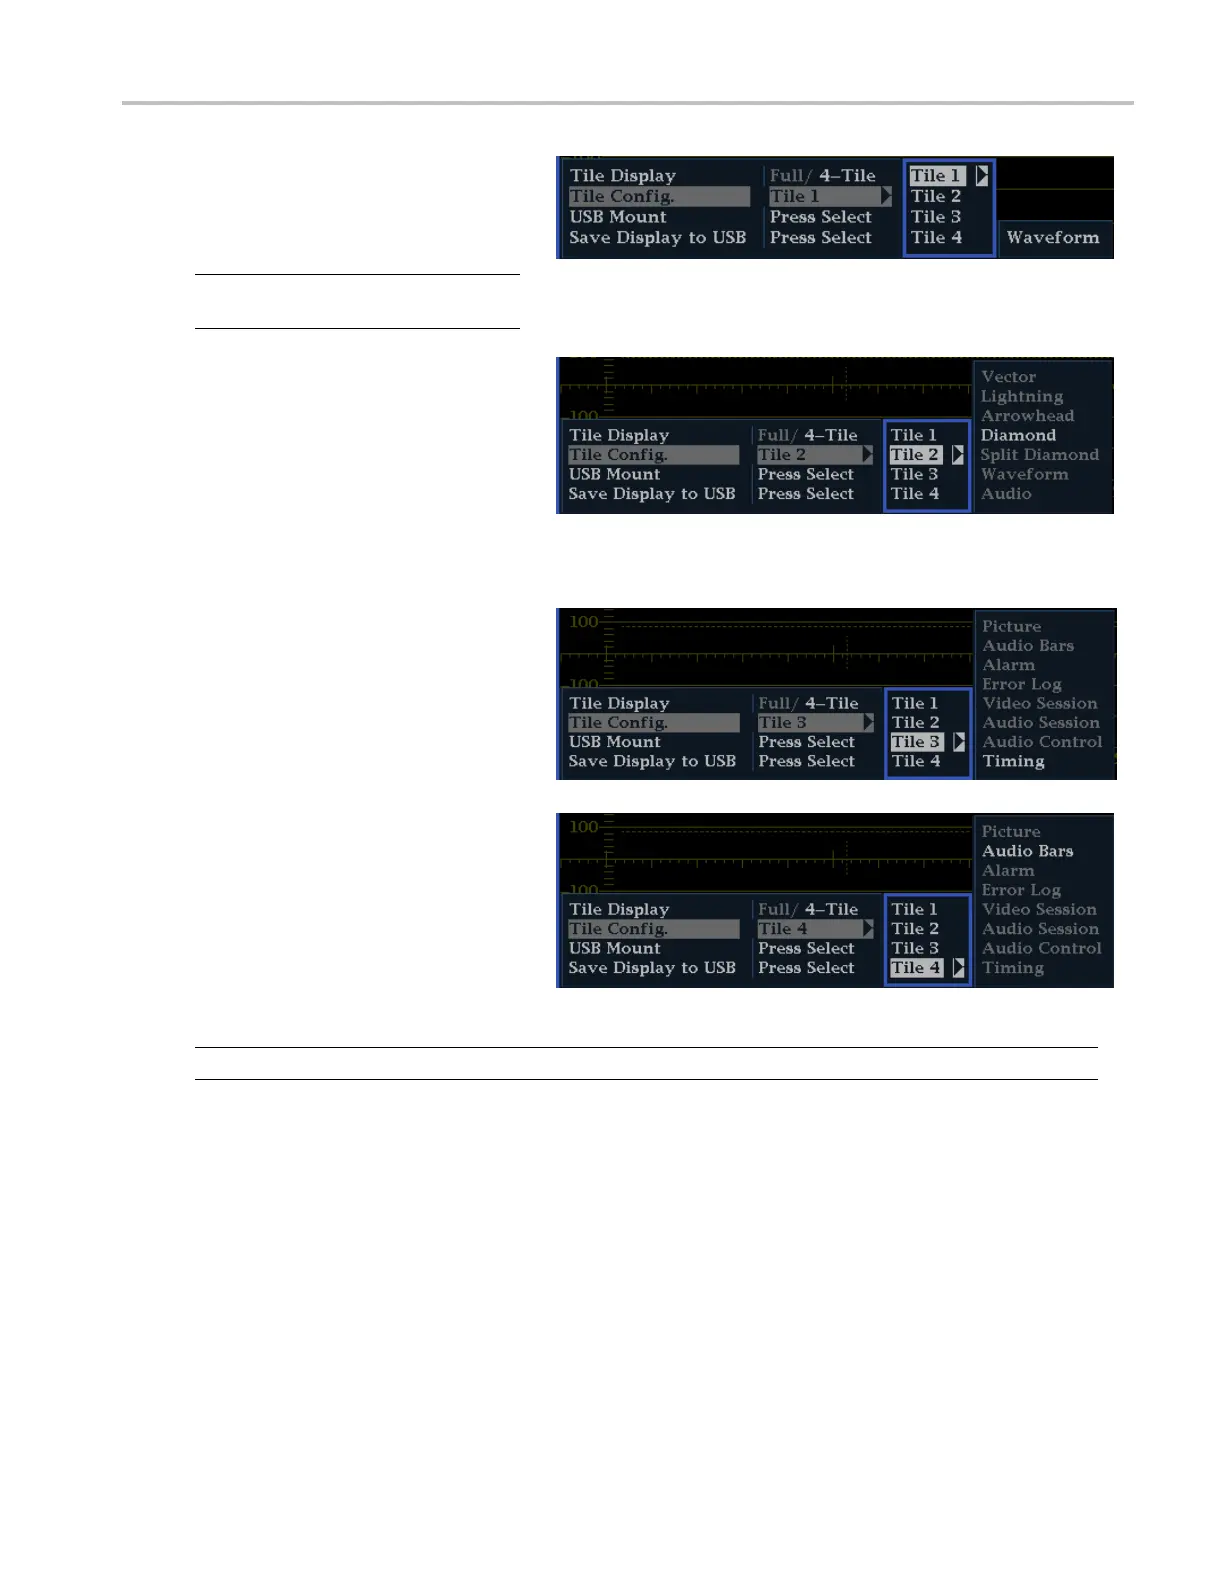
3. Press the down a
rrow key to highlight
Tile C onfig., and then press the right
arrow key to select Tile 1.Onlya
waveform (WFM
button) display can be
viewed in this tile.
NOTE. The Tile Config. menu option is
only availab
le when 4-Tile mode is selected.
4. Press the down arrow key to highlight
Tile 2, and t
hen press the right arrow
key to navigate to the submenu. The
available displays will be shown in the
submenu. S
elect the one you want to
display in tile 2 using the up and down
arrow keys.
5. Press the left arrow key to return to the
tile selec
tion menu.
6. Press the down arrow key to highlight
Tile 3,an
d then press the right arrow
key to navigate to the submenu. The
available displays will be shown in the
submenu
. Select the one you want to
display in tile 3 using the up and down
arrow keys.
7. Press the down arrow key to highlight
Tile 4,
and then press the right arrow
key to navigate to the submenu. The
available displays will be shown in the
subme
nu. Select the one you want to
display in tile 4 using the arrow keys.
NOTE. Switch between Full-Tile and 4-Tile mode by pressing the MAIN button.
Navigating Between Tiles
Once you have configured the four tiles in your instrument, you can navigate between tiles by pressing the measurement
button related to the type of display in the tile. You can configure the display of any active tile by pressing and holding the
rel
ated measurement button to bring up its pop-up menu.
Navigating between tiles of different display types. If you have a waveform display in tile 1, press the WFM button,
and tile 1 will be outlined by a blue line. This indicates that the tile is active. If you then want to activate another display in a
different tile, press the related front panel button. For example, if you have a vector display in tile 2, pressing the VECTOR
button will activate tile 2. The blue line will move from tile1totile2,indicatingthattile2isnowtheactivetile.
WFM4000 and WFM5000 Waveform Monitors User Manual 17
 Loading...