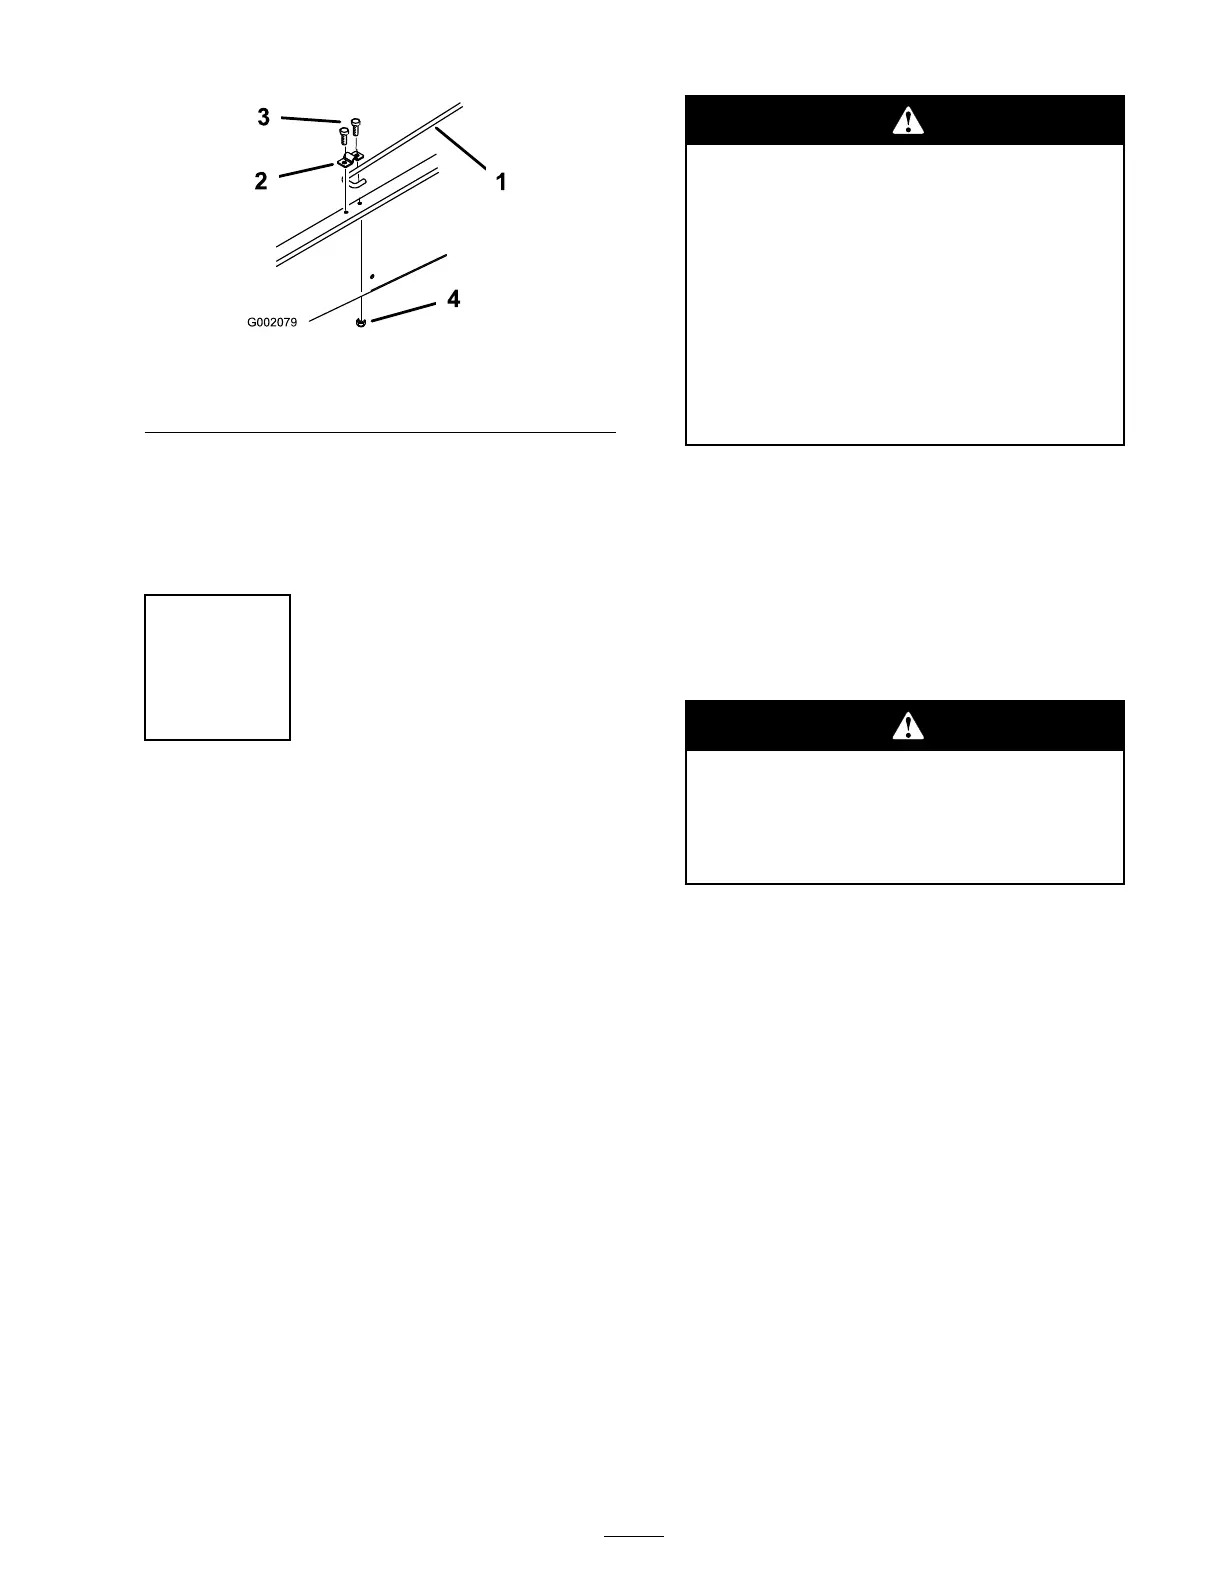
Figure 10
1. Prop rod
3. Bolt (5/16 x 3/4 inch)
2. Prop rod clip
4. Flange nut (5/16 inch)
7. Tighten the bolt and secure the other side of
the clip with a new bolt (5/16 x 3/4 inc h) and
flang e n ut (5/16 inc h) ( Figure 10 ).
8. Lo w er the carg o bo x.
Step
7
Activating the Battery
No Parts Required
Procedure
None
Note: T his procedure is only needed for Model
No . 07264TC .
If the batter y is not filled with electrolyte or
acti v ated, it m ust be remo v ed from the v ehicle ,
filled with electrolyte , and c harg ed. Bulk electrolyte
with 1.260 specific g ra vity m ust be purc hased from
a local batter y supply outlet.
1. R emo v e the batter y hold-do wn and lift the
batter y out of the batter y base .
Batter y electr ol yte contains sulfuric acid
which is a deadl y poison and causes
sev er e bur ns.
• Do not drink electr ol yte or allo w it to
contact y our skin, ey es or clothing .
W ear safety g lasses to shield y our
ey es and r ub ber g lo v es to pr otect y our
hands.
• Fill the batter y wher e clean w ater is
al w ays a v aila ble f or flushing the skin.
2. R emo v e the filler caps from the batter y and
slo wly fill eac h cell until electrolyte is just abo v e
the plates .
3. R e place the filler caps and connect a 3 to
4 amp . batter y c harg er to the batter y posts .
Charg e the batter y at a rate of 3 to 4 amperes
for 4 to 8 hours (12 v olts). Do not o v erc harg e
the batter y .
Charging the batter y pr oduces gasses
that can explode.
Nev er smok e near the batter y and k eep
spar ks and flames a w ay fr om batter y .
4. W hen the batter y is c harg ed, disconnect the
c harg er from the electrical outlet and batter y
posts .
5. R emo v e the filler caps . Slo wly add electrolyte
to eac h cell until electrolyte is up to the fill line .
Install the filler caps .
Important: Do not o v erfill the batter y .
Electr ol yte will o v erflo w onto other par ts
of the v ehicle and sev er e cor r osion and
deterioration will r esult.
6. Install the batter y; refer to Installing the
Batter y , Electrical System Maintenance ,
pag e 34 .
15
 Loading...