Step
1
Installing the Anti-siphon
Fill Receptacle
Parts needed for this step:
1
90 degree tting
1
Quick coupler
1
Hose adapter
1
Fill receptacle bracket
1
Flange-head bolt, 5/16 x 3/4 inch
1
Anti-siphon hose
Procedure
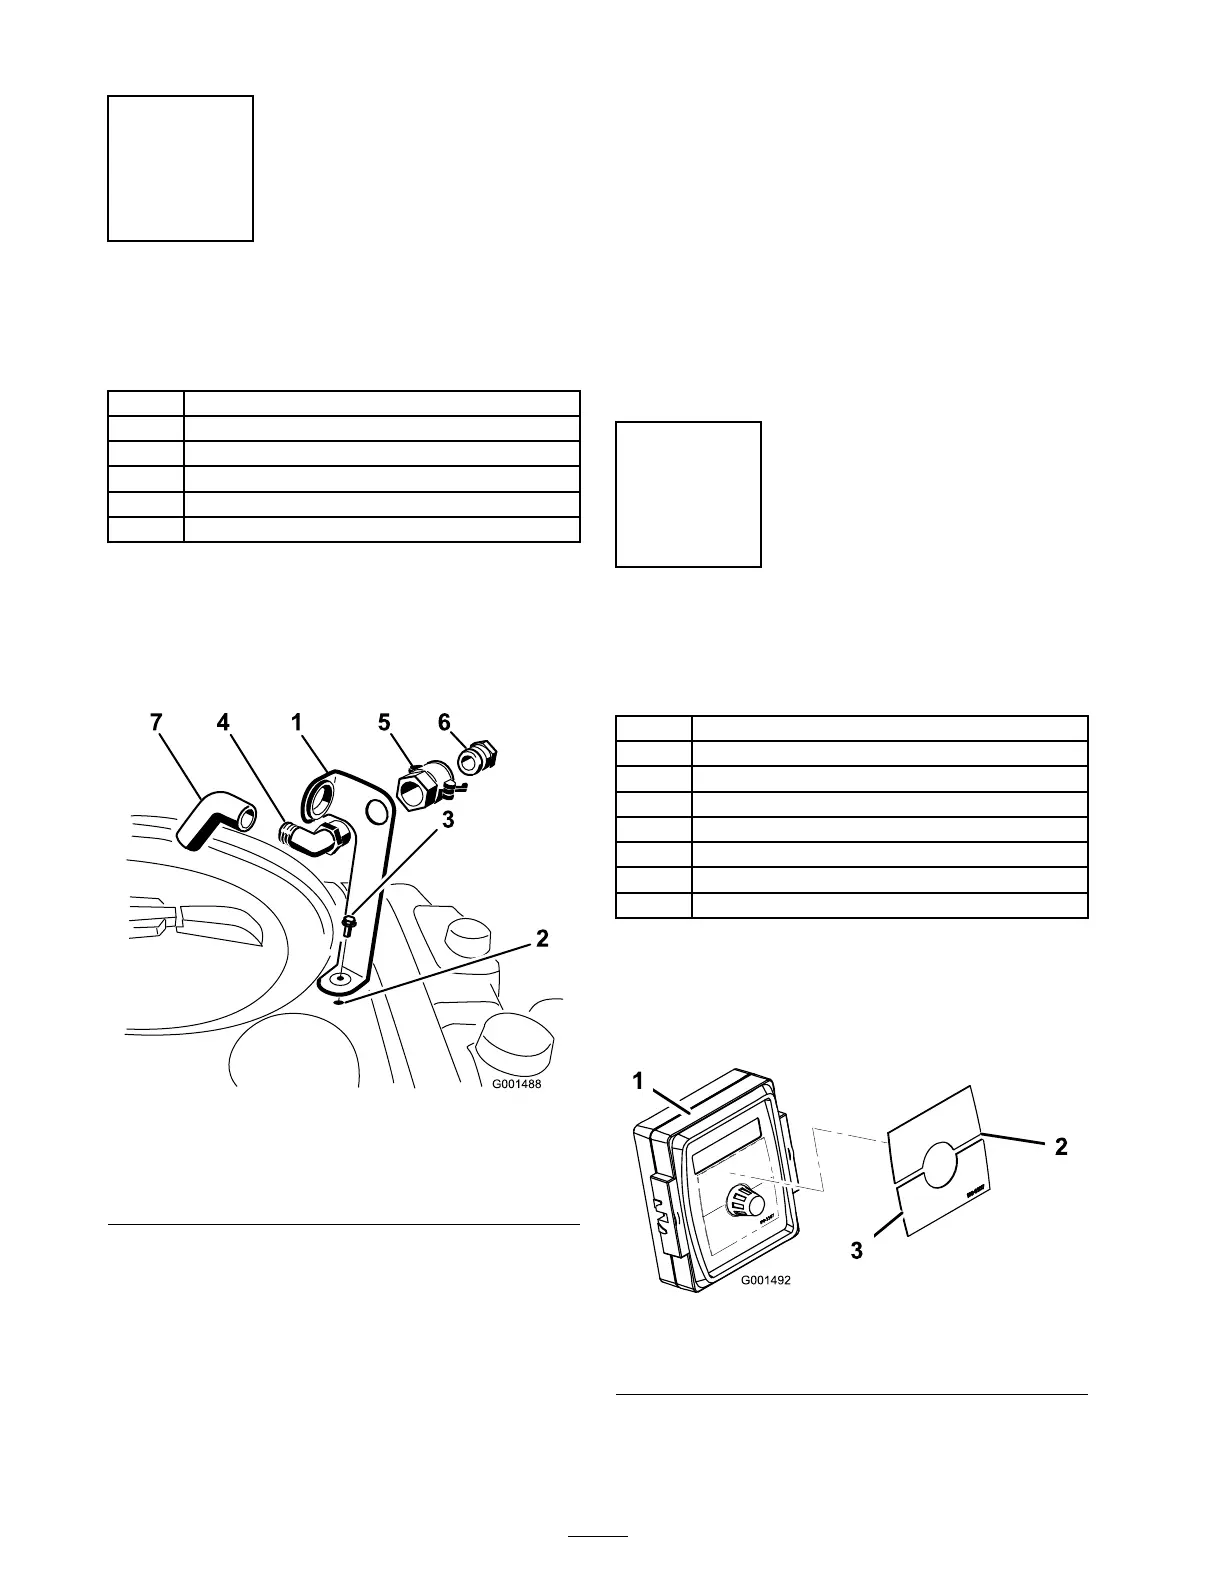
1. Place the fill rece ptacle brac k et o v er the
threaded hole in the tank and secure it with a
flang e-head bolt (5/16 x 3/4 inc h) ( Figure 3 ).
Figure 3
1. Fill receptacle bracket 5. Quick coupler
2. Threaded hole in the tank 6. Hose adapter
3. Flange bolt, 5/16 x 3/4 inch 7. Anti-siphon hose
4. 90 degree elbow tting
2. Place the threaded end of the 90 deg ree elbo w
fitting through the brac k et and thread the
quic k coupler onto it, securing it to the brac k et
( Figure 3 ).
Note: Install the fitting with the open end
pointing to w ard the larg e opening in the
brac k et and to w ard the tank opening so the
w ater will arc into the tank when y ou fill it.
3. Install the hose adapter into the quic k coupler
( Figure 3 ).
4. Loc k the adapter into place b y swinging the
lev ers to w ard the adapter and then secure them
with the hair pin cotters ( Figure 3 ).
5. Install the anti-siphon hose through the larg e
opening on the brac k et and onto the barbed
end of the 90 deg ree elbo w fitting ( Figure 3 ).
Important: Do not lengthen the hose to
allo w contact with the tank fluids.
Step
2
Installing the Spray Pro
Monitor
Parts needed for this step:
1
Spray Pro Monitor
1
Spray Pro Decal
1
Bracket
2
Flange-head bolt, 3/4 inch
2
Flange nut, 1/4 inch
2
Knob
2
Washer
2
Carriage bolt
Procedure
1. Install the Spra y Pro Decal to the monitor
( Figure 4 ).
Figure 4
1. Spray pro monitor
3. Decal, Lower half
2. Decal, Upper half
Note: Be sure to orient the decal as sho wn
in Figure 20 .
14

 Loading...