themachine,usegenuineTororeplacementblades.
Replacementbladesmadebyothermanufacturersmay
resultinnon-conformancewithsafetystandards.
1.Holdthebladeendusingaragorthickly-padded
glove.
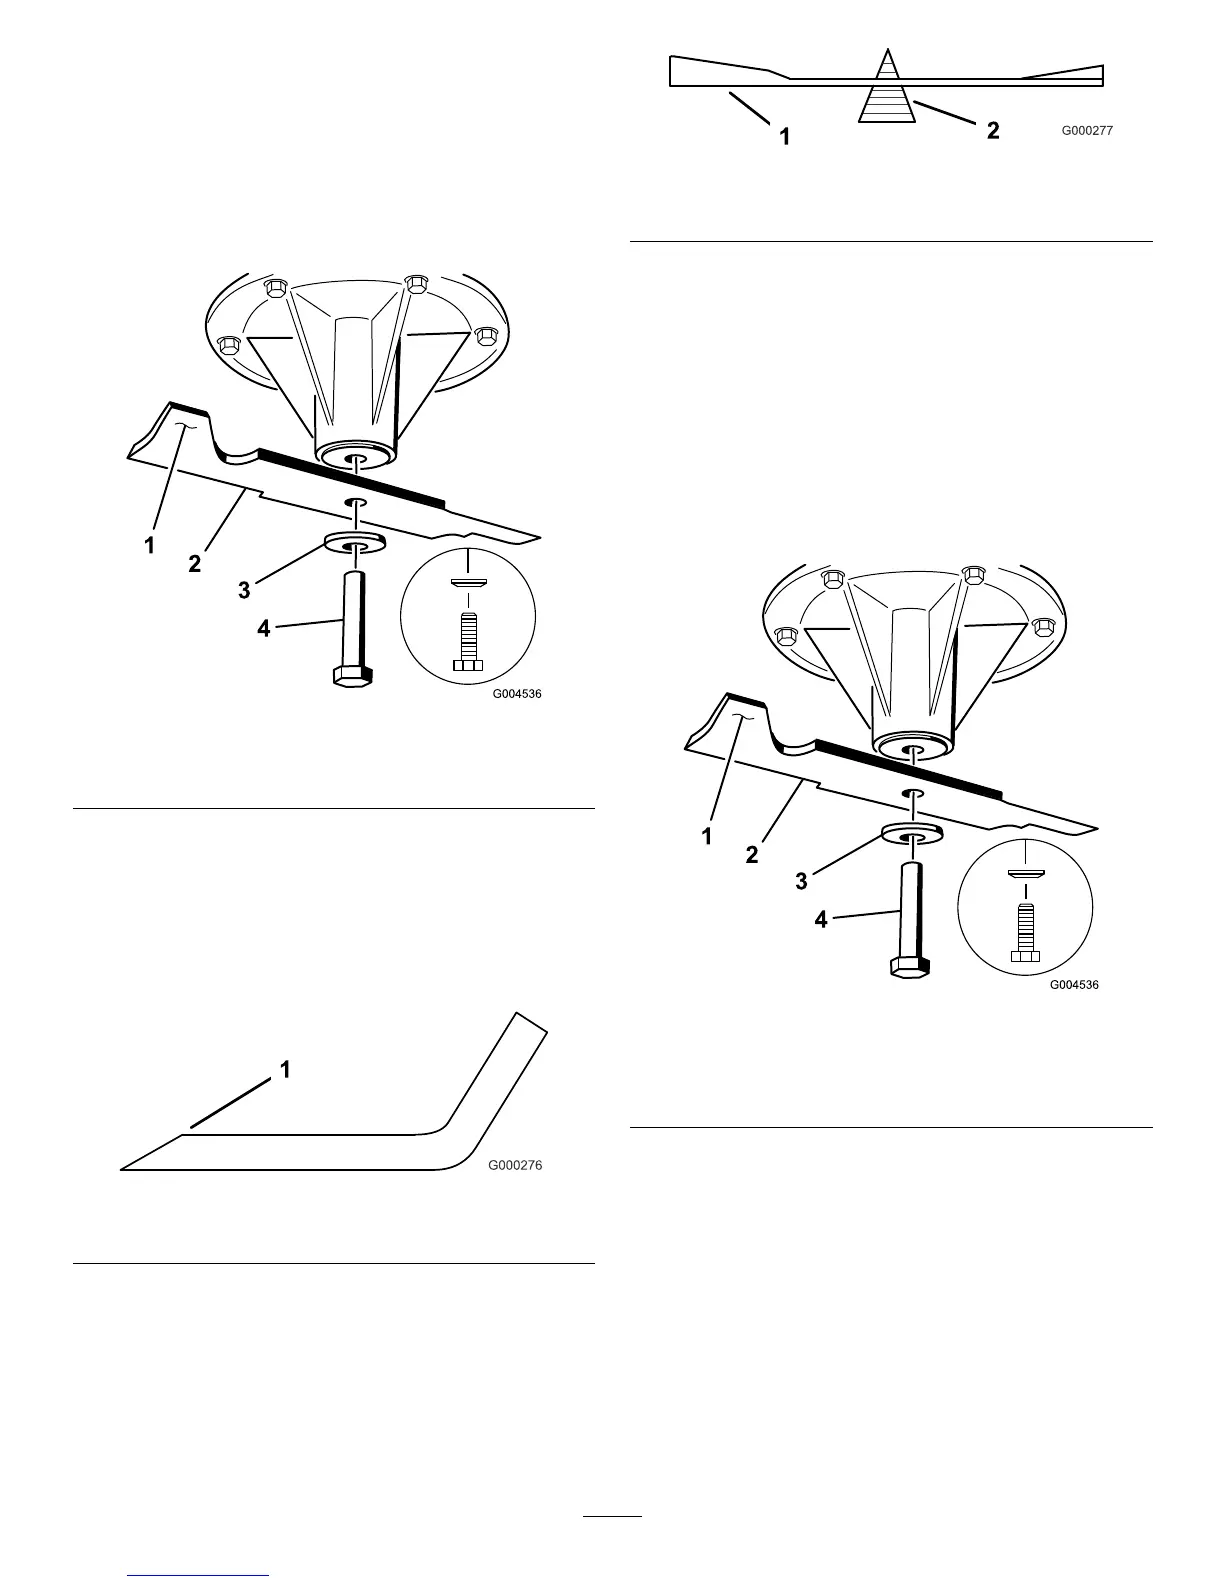
2.Removethebladebolt,curvedwasher,andblade
fromthespindleshaft(
Figure80).
Figure80
1.SailAreaofBlade3.Curvedwasher
2.Blade4.BladeBolt
SharpeningtheBlades
1.Usealetosharpenthecuttingedgeatbothends
oftheblade(Figure81).Maintaintheoriginalangle.
Thebladeretainsitsbalanceifthesameamountof
materialisremovedfrombothcuttingedges.
Figure81
1.Sharpenatoriginalangle
2.Checkthebalanceofthebladebyputtingitona
bladebalancer(Figure82).Ifthebladestaysina
horizontalposition,thebladeisbalancedandcanbe
used.Ifthebladeisnotbalanced,lesomemetaloff
theendofthesailareaonly(Figure80).Repeatthis
procedureuntilthebladeisbalanced.
Figure82
1.Blade2.Balancer
InstallingtheBlades
1.Installthebladeontothespindleshaft(Figure83).
Important:Thecurvedpartoftheblademust
bepointingupwardtowardtheinsideofthe
mowertoensurepropercutting.
2.Installthespringdiskandbladebolt.Thespring
diskconemustbeinstalledtowardthebolthead
(
Figure83).Torquethebladeboltto85-110ft-lb
(115-150N-m).
Figure83
1.SailAreaofBlade
4.BladeBolt
2.Blade
5.ConeT owardsBoltHead
3.SpringDisk
LevelingtheMower
PreparingtheMachine
1.Positionmoweronaatsurface.
2.DisengagethePTO,movethemotioncontrollevers
totheneutrallockedpositionandsettheparking
brake.
3.Stoptheengine,removethekey,andwaitforall
movingpartstostopbeforeleavingtheoperating
position.
56

 Loading...