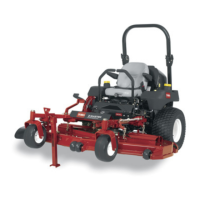
Figure 53
1. Clutch 4. Belt guide
2. Mower belt 5. Mower spindle pulley
3. 1/4 turn belt twist 6. Mower idler pulley
6. Adjust the belt tension, refer to Adjusting the
Mo w er Belt T ension.
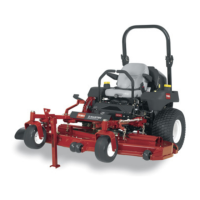
7. Install the belt co v ers and close the latc hes
( Figure 54 ).
Figure 54
1. Belt cover 3. Insert slot into the tab
2. Latch
Adjusting the Mower Belt
Tension
1. Diseng ag e the PTO , mo v e the motion control
lev ers to the neutral loc k ed position and set
the parking brak e .
2. Stop the engine , remo v e the k ey , and w ait for
all mo ving par ts to stop before lea ving the
operating position.
3. Raise the mo w er to the transpor t position.
Important: Check the amount of twist
in the belt betw een the pulleys. Mak e sur e
it is onl y what is specified in Figur e 53 .
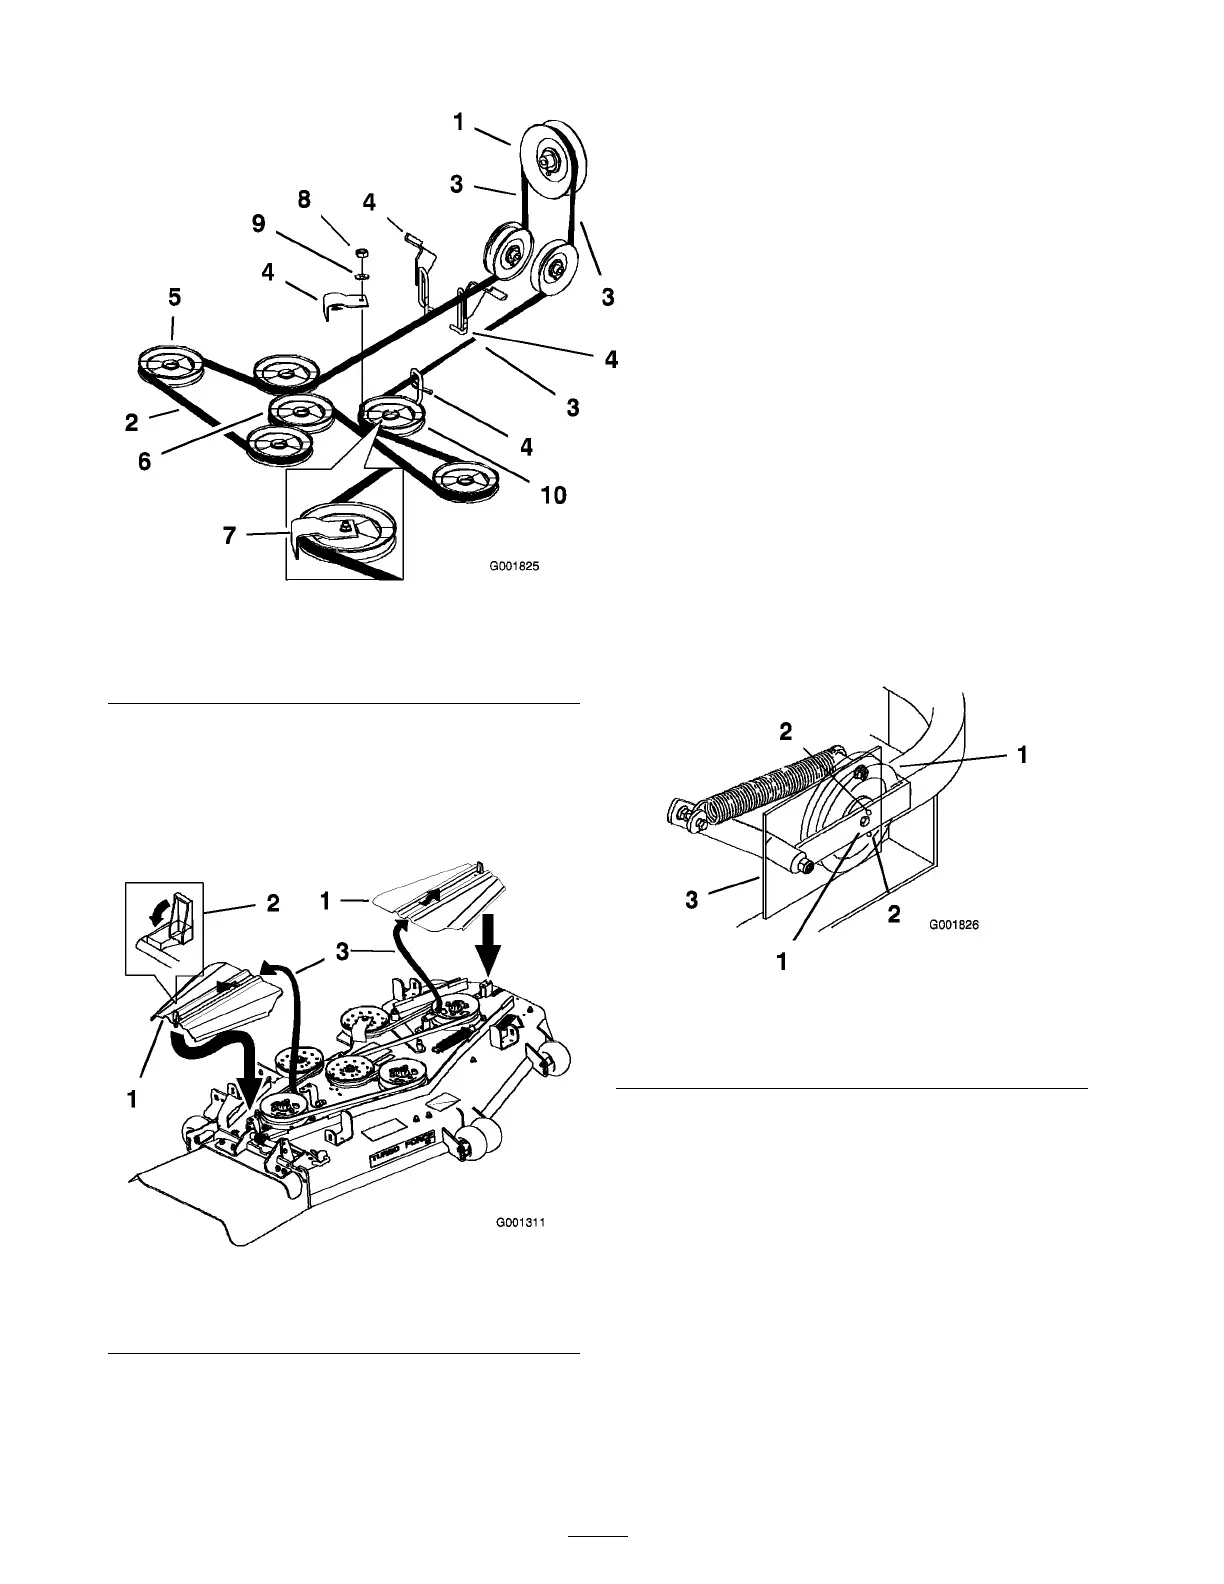
Important: Check and mak e sur e the
belt is installed into both the fr ont and r ear
belt guides ( Figur e 55 ).
4. Chec k the belt tension. T he spring loaded idler
center bolt needs to be near the top alignment
hole in left suppor t plate ( Figure 55 ).
Figure 55
1. Center bolt 3. Left support plate
2. Alignment hole 4. Spring loaded idler
5. If adjustment is required, loosen the mo w er
idler plate and adjust it ( Figure 56 ).
44
 Loading...