2060, 2860/70 ADJUSTMENT 1 - 22 Dec. 1996 © TOSHIBA CORP.
(2)
1.4.3 Automatic adjustment of automatic
exposure
Note: Before proceeding to the following automatic ad-
justment, be sure to finish the adjustment of the
manual exposure.
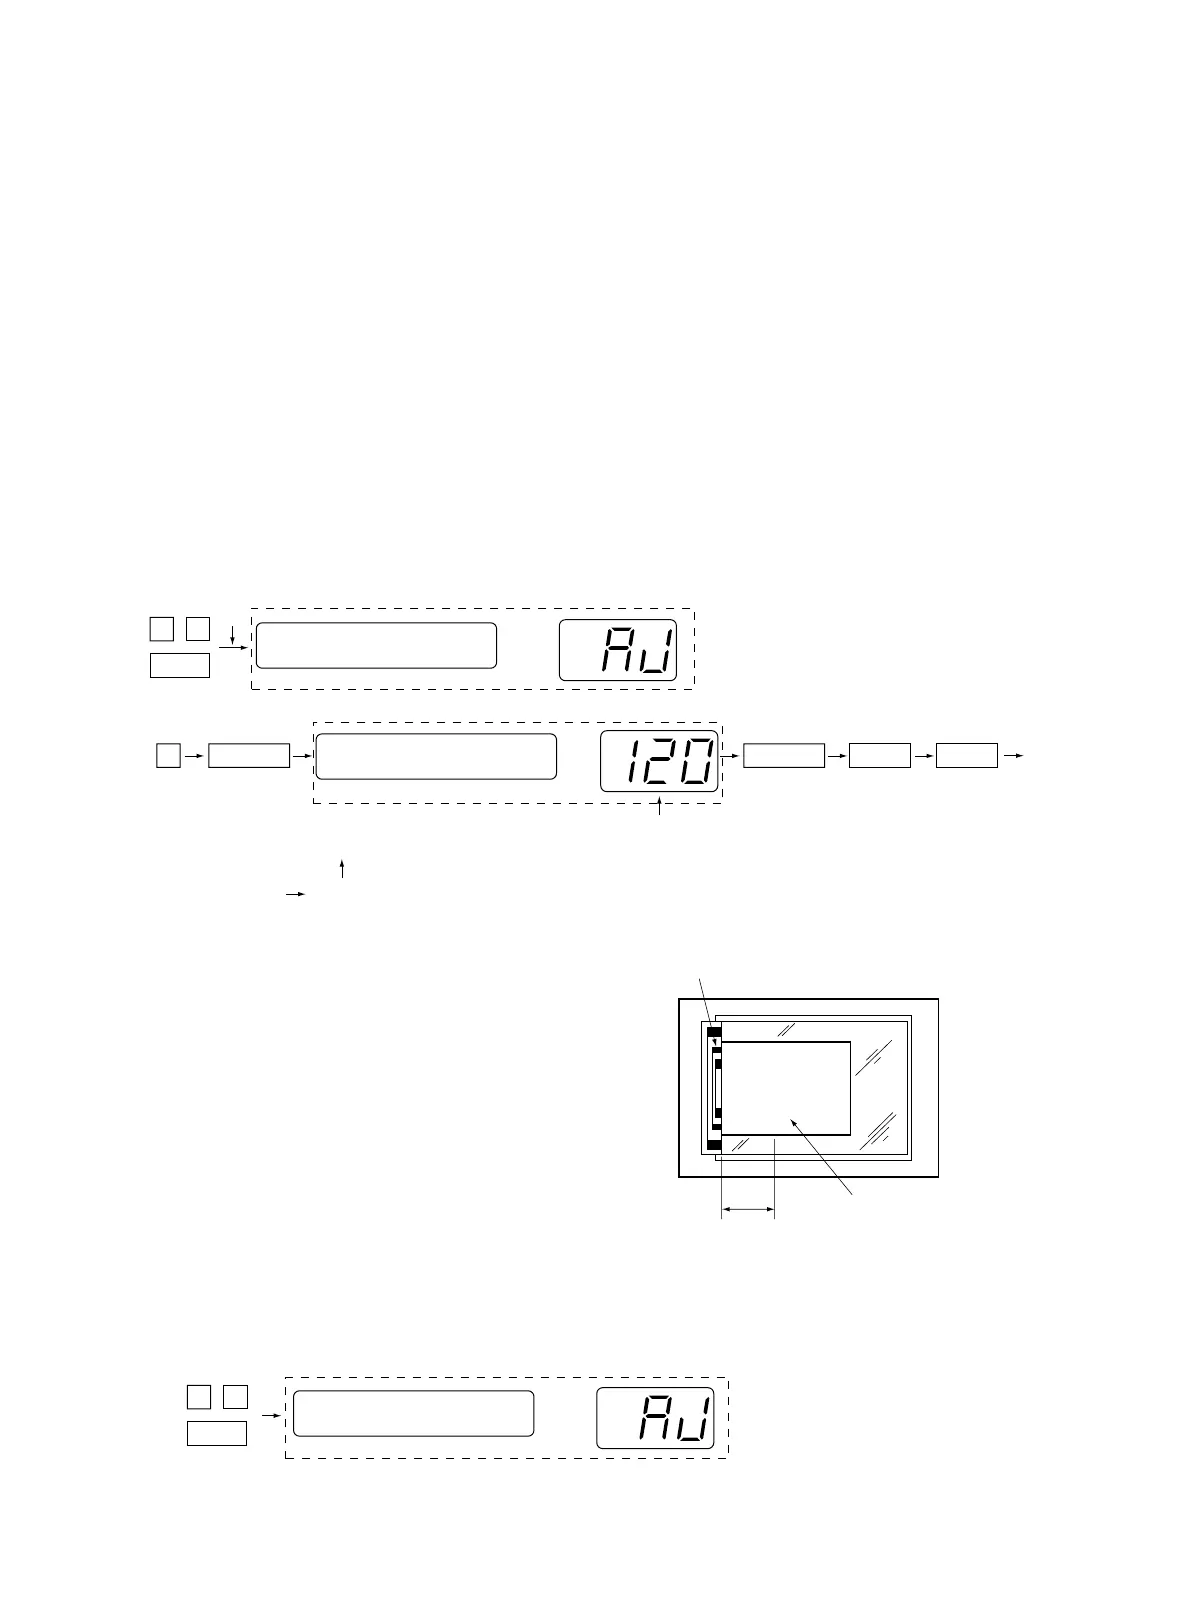
(1) Place a blank sheet of Ledger or A3 paper on
the glass. Align the sheet with the original scale
and close the original cover.
(2) While pressing the keys “0” and “5” at the
same, turn on the power switch. The follow-
ing display appears indicating that the adjust-
ment mode has been entered.
Original scale
Blank white A3 or Ledger
size paper
Automatic adjustment
80 mm from the
leading edge
PWR
100%
TEST MODE
1 Input the code “1” using the digital keys and press the PRINT key.
2 [When the density is high]
Input a larger numerical value using the ZOOM UP or digital keys.
[When the density is low]
Input a smaller numerical value using the ZOOM DOWN or digital keys.
3 Press the INTERRUPT key to store the numerical value.
4 Press the ENERGY SAVER key to make a test copy.
5 If the image density of the test copy is not satisfactory, repeat the operations 1 through 4.
Notes: 1. The numerical value in A has a one-to-one correspondence to the angle set for the conventional internal
VR. Pressing the ZOOM keys causes the value to increase or decrease in increments of one.
2. As adjustment of 154%, 50% and 200% manual exposure has already been performed, readjustment is
not required. However, if individual adjustment of manual or automatic exposure is requested by the user,
conduct the relevant adjustment.
Note: The * mark shows the values changed in accordance with the exposure status and reproduction ratio.
PWR
TEST MODE
100%
0 5
D
0 5
1
*
D
C
C
(Example)
PRINT
A
(Adjustment)
(Memory)
(Test copy)
EXPOSURE
100%
ZOOM INT E/S
Test copy
 Loading...