OX Amp Top Box Quick Start 9
Quick Start
Caution: To avoid equipment damage, read the Critical Operation Notes before
connecting or using OX!
This chapter provides brief instructions to help you get started with OX. For complete
details about every knob, switch, and jack, see Controls & Connectors.
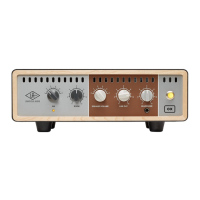
Important Setup Steps
Follow these steps to properly connect and power OX and your tube amp. For visual
references, see the Amp & Speaker Connections and Output Connections diagrams on
the following pages.
Caution: Always POWER OFF the tube amp before connecting or
disconnecting its speaker output!
1. POWER OFF the tube amplifier.
2. Connect OX’s included power supply to an AC outlet and the power input jack on
OX’s rear panel.
3. Set OX's rear panel IMPEDANCE knob to match the tube amp’s speaker output
impedance. If the amp’s speaker output impedance cannot be determined, set
this knob to 8 ohms.
4. Connect a 1⁄4” speaker cable between the tube amp’s speaker output and the red
FROM AMPLIFIER input jack on OX’s rear panel.
5. Set OX’s SPEAKER VOLUME, LINE OUT, and HEADPHONE knobs to position 0.
6. Connect OX's outputs as desired (see Output Connections).
7. Power on OX with its rear panel POWER switch, then power on the tube amp.
After following the important setup steps, OX is ready for use. Adjust the tube amp and
OX controls as desired.
Important: If your amp doesn't seem loud enough or the SPEAKER VOLUME knob
behaves unexpectedly (for example, it changes line/mon output levels or OX app
signal levels, or speaker volume levels are not smoothly stepped), confirm the tube
amp's speaker output is connected to OX's red FROM AMPLIFIER input jack, not
OX's TO SPEAKER output jack.
Setup Notes
• To download the full-color Quick Start Guide and Rig Control Cab & Mic Presets
reference sheets included in the OX retail package, click here.
• Remember to connect OX to AC power. OX requires the included external power
supply to be operated.
 Loading...