All rights reserved 12 Servicemanual_UR3_en_rev3.1.2
3.1.4 General guidance to separate joint from counterpart
Disassemble:
1. Check if you have the necessary tools before you start to repair the robot.
1.1. Service kit with torque tools, ESD Wristband, etc.
1.2. If you have to disassemble the robot arm you need: new flat rings, M3 and M4 tap tool for
threads, pre coated screws or Loctite and normal.
1.3. Check the guide in this manual in details before you continue.
2. Move the robot to a comfortable position for disassembly or if necessary dismount entire robot arm
from work cell and place on a solid surface.
3. Shut down the controller.
4. Remove blue lid.
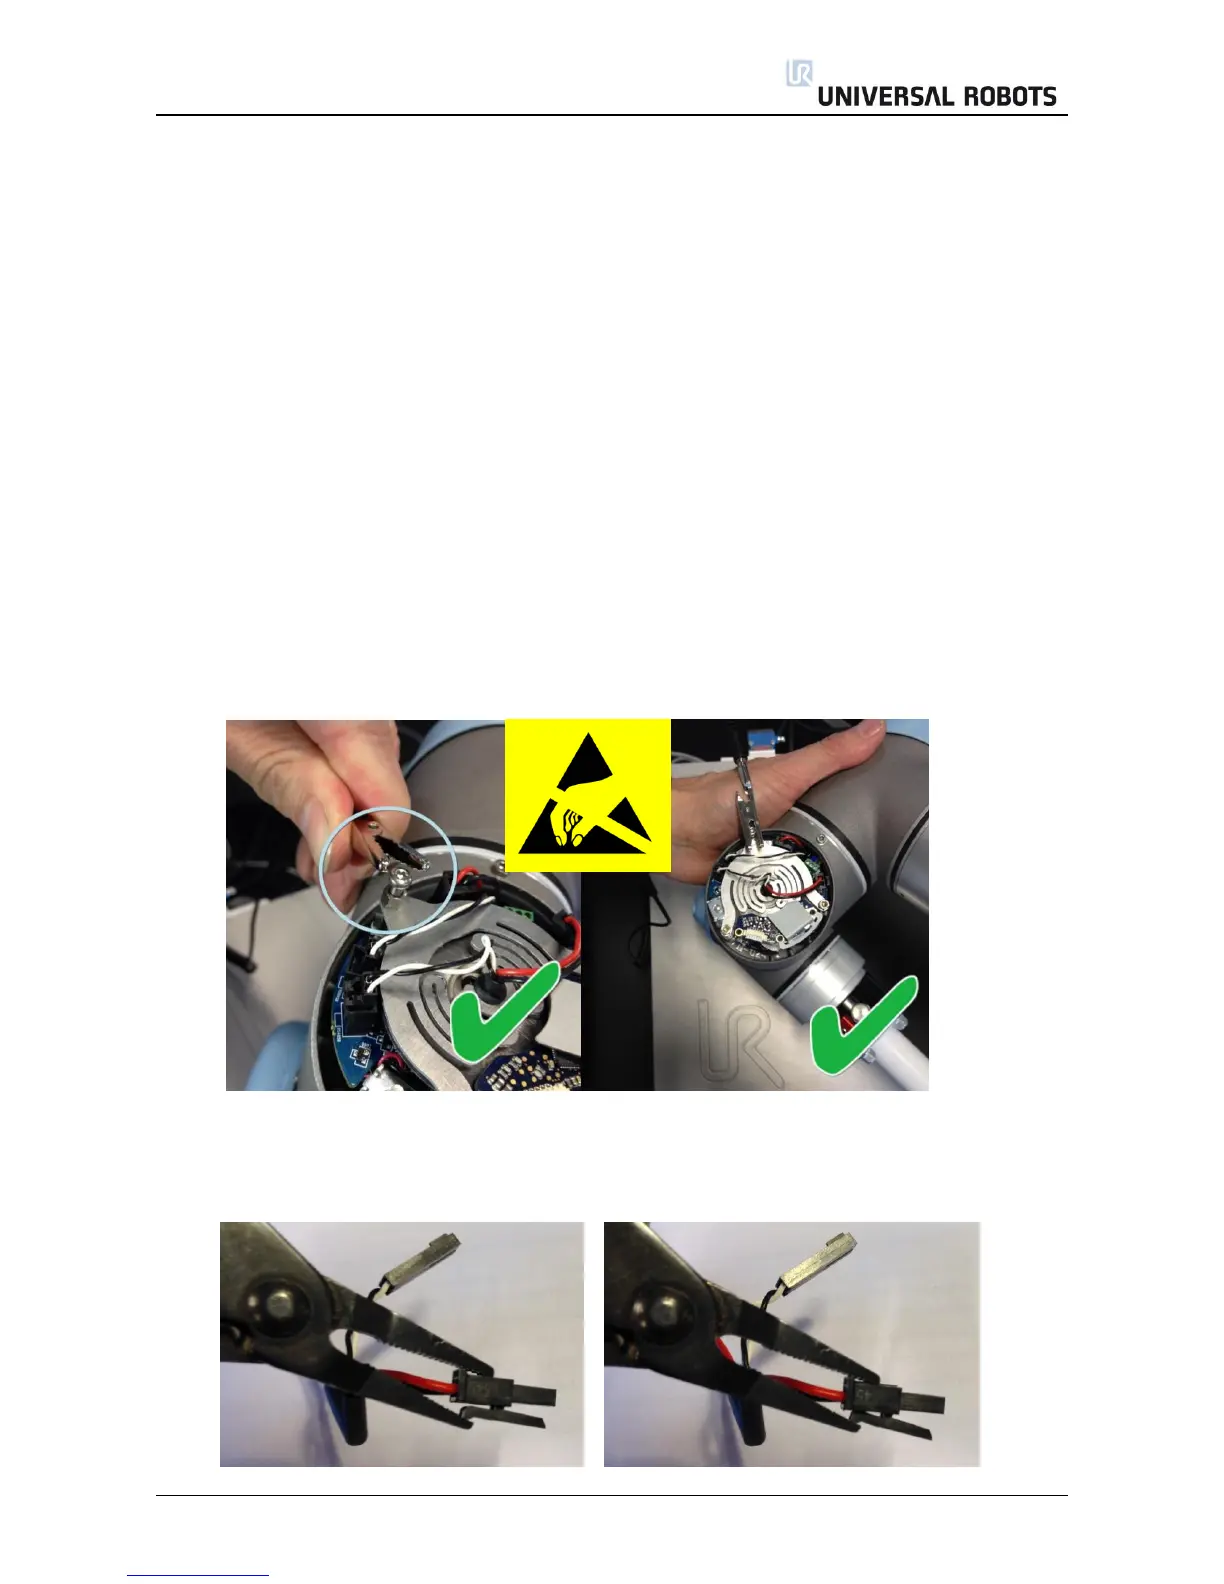
5. Now reattach one of the screws for the blue lids to connect an alligator Clip on your ESD wristband as
shown below.
6. Gently unplug the cable connectors without bending the printed circuit board.
The power supply connector for the size 0 and the size 1 has a lock that has to be engaged before it
is pulled out of the printed circuit board.

 Loading...


