_________________________________________________________________________________________________________________________________________________________
The pictures may differ depending on the type of PersonalScope
13
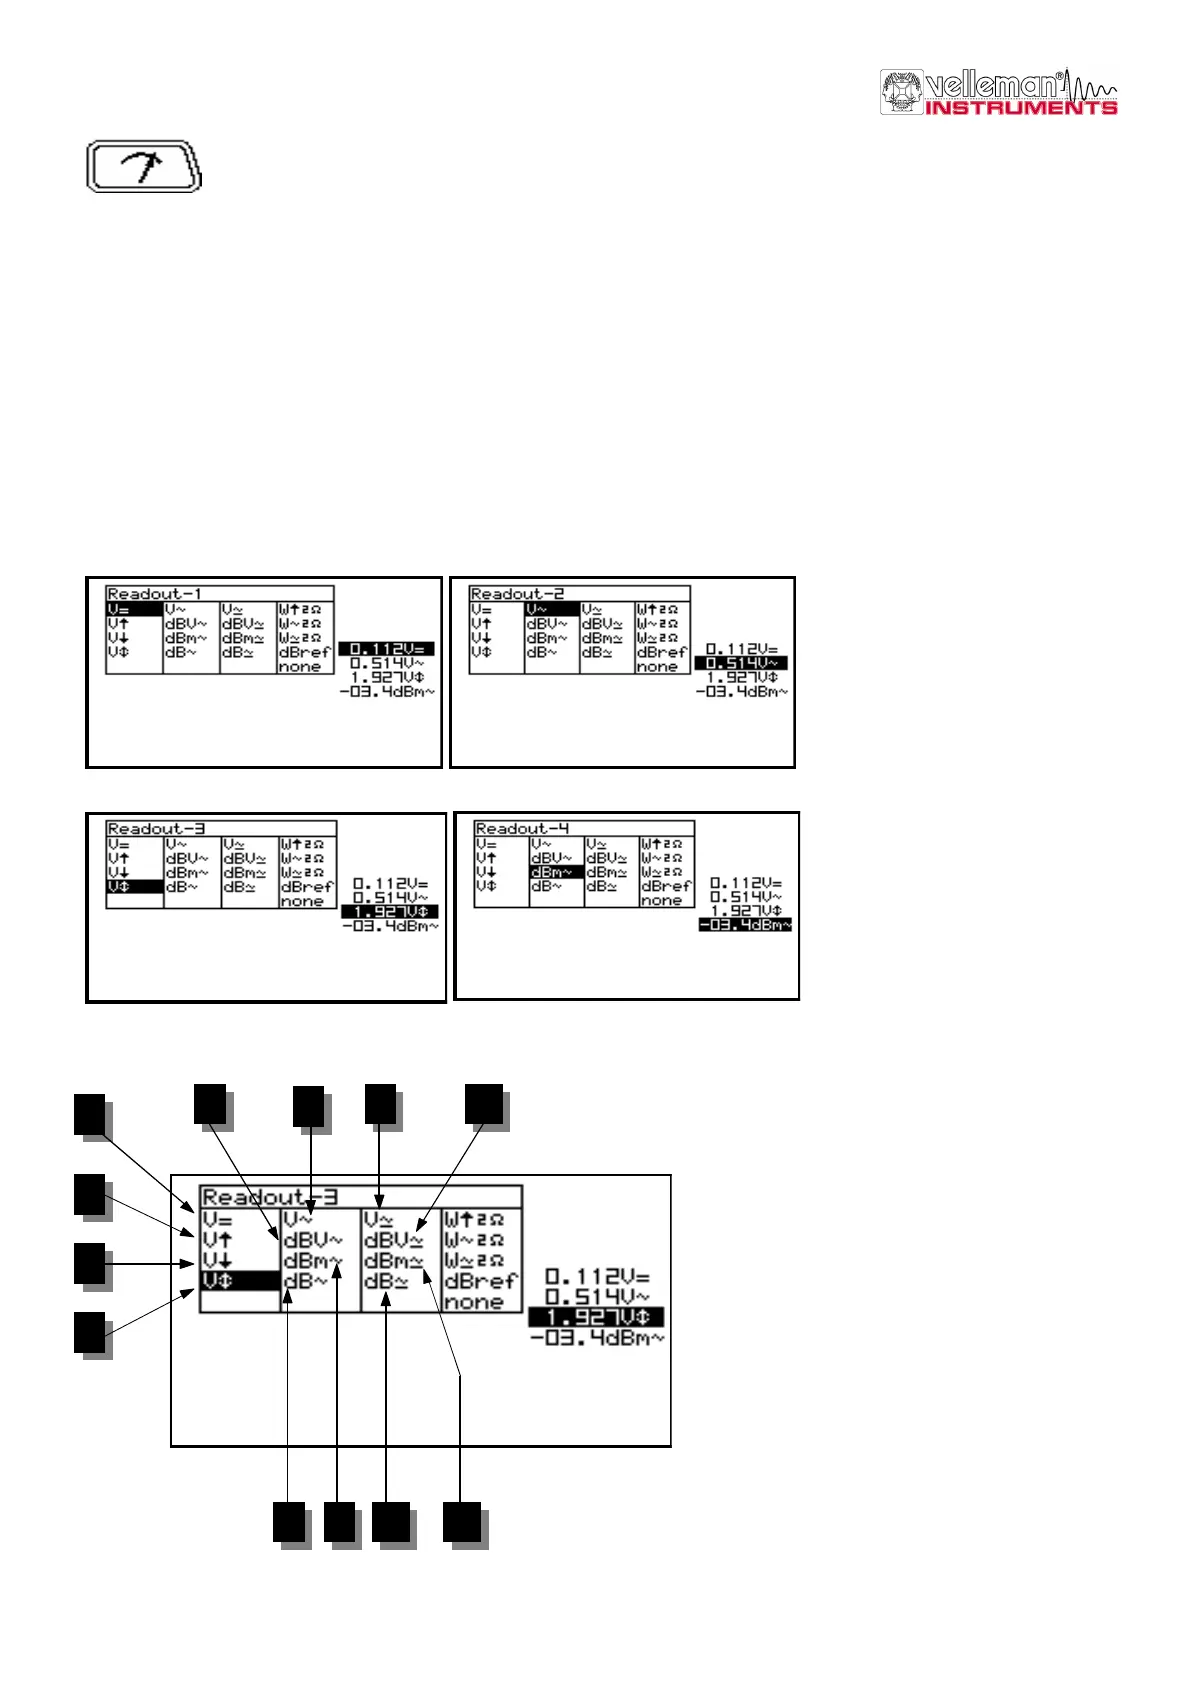
READOUT SET-UP
Press to call the meter 1 to 4 selection menu. Make use of the cursorkeys to set readout for up to 4
meters
Setting up the measurement readouts:
1. Pressing the ‘meter’-key selects the first readout location.
2. Press the cursorkeys to highlight the desired readout function for meter1 readout. (Fig. 17)
3. Pressing the ‘meter’-key selects the second readout location
4. Press the cursorkeys to highlight the desired readout function for meter2 readout. (Fig. 18)
5. Pressing the ‘meter’-key selects the third readout location
6. Press the cursorkeys to highlight the desired readout function for meter3 readout. (Fig. 19)
7. Pressing the ‘meter’-key selects the fourth readout location.
8. Press the cursorkeys to highlight the desired readout function for meter4 readout. (Fig. 20)
9. Pressing the ‘meter’-key returns to scope mode.
The Personal Scope offers many measuring possibilities.
Fig 17
Fig 18
Fig 19
Fig 20
1. DC voltage measurement (V=).
This function enables the user to measure DC
voltages (only for DC input coupling)
F Useful tip for measuring DC voltages: The
readout can be set at zero (reference) for
any position on the screen by keeping the
AC/DC key pressed down. Always use the
"run" trigger mode for DC voltage
measurement.
2. Maximum voltage (Vmax.).
The signal's positive peak voltage
(difference between zero and highest value)
is displayed.
Fig 21
2
3
4
5
9 10 6
8 7 12 11
1
 Loading...