_________________________________________________________________________________________________________________________________________________________
The pictures may differ depending on the type of PersonalScope
19
Fig 39
G Note:
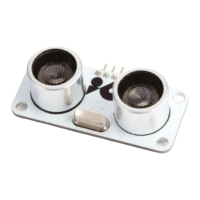
• Changing the timebase or sensitivity switches the auto range mode immediately off. (Fig 36)
• The timebase or sensitivity cannot be changed into hold mode.
• Pressing the ‘t-V/div’’ key into hold mode toggles the screen between the two stored waveforms.
• At higher timebase (1µs and faster, 2µs for HPS10) the scope uses Oversampling mode, only repetitive signals
are correctly displayed.
• Use the minimum time base (250ns) as a starting point when measuring a signal and select longer time bases
until the signal is displayed properly. Otherwise the display may not correctly reflect the signal under measurement
due to aliasing.
THE TRIGGER SETUP
• First press the „trigger“-key.
• Use the left cursor key to change the triggermode (norm, run, once or roll).
• Use the right cursor key to toggle the trigger slope.
• Use the up/down cursorkeys to shift the vertical trigger position (1).
Trigger modes
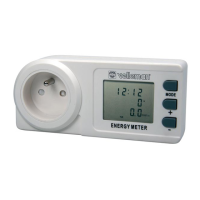
”norm” = Normal trigger: A triggering (or manual trigger) must occur before
the sample memory is filled. Use this mode when you want to start
displaying the signal when it reaches a preset threshold value. (Fig 37)
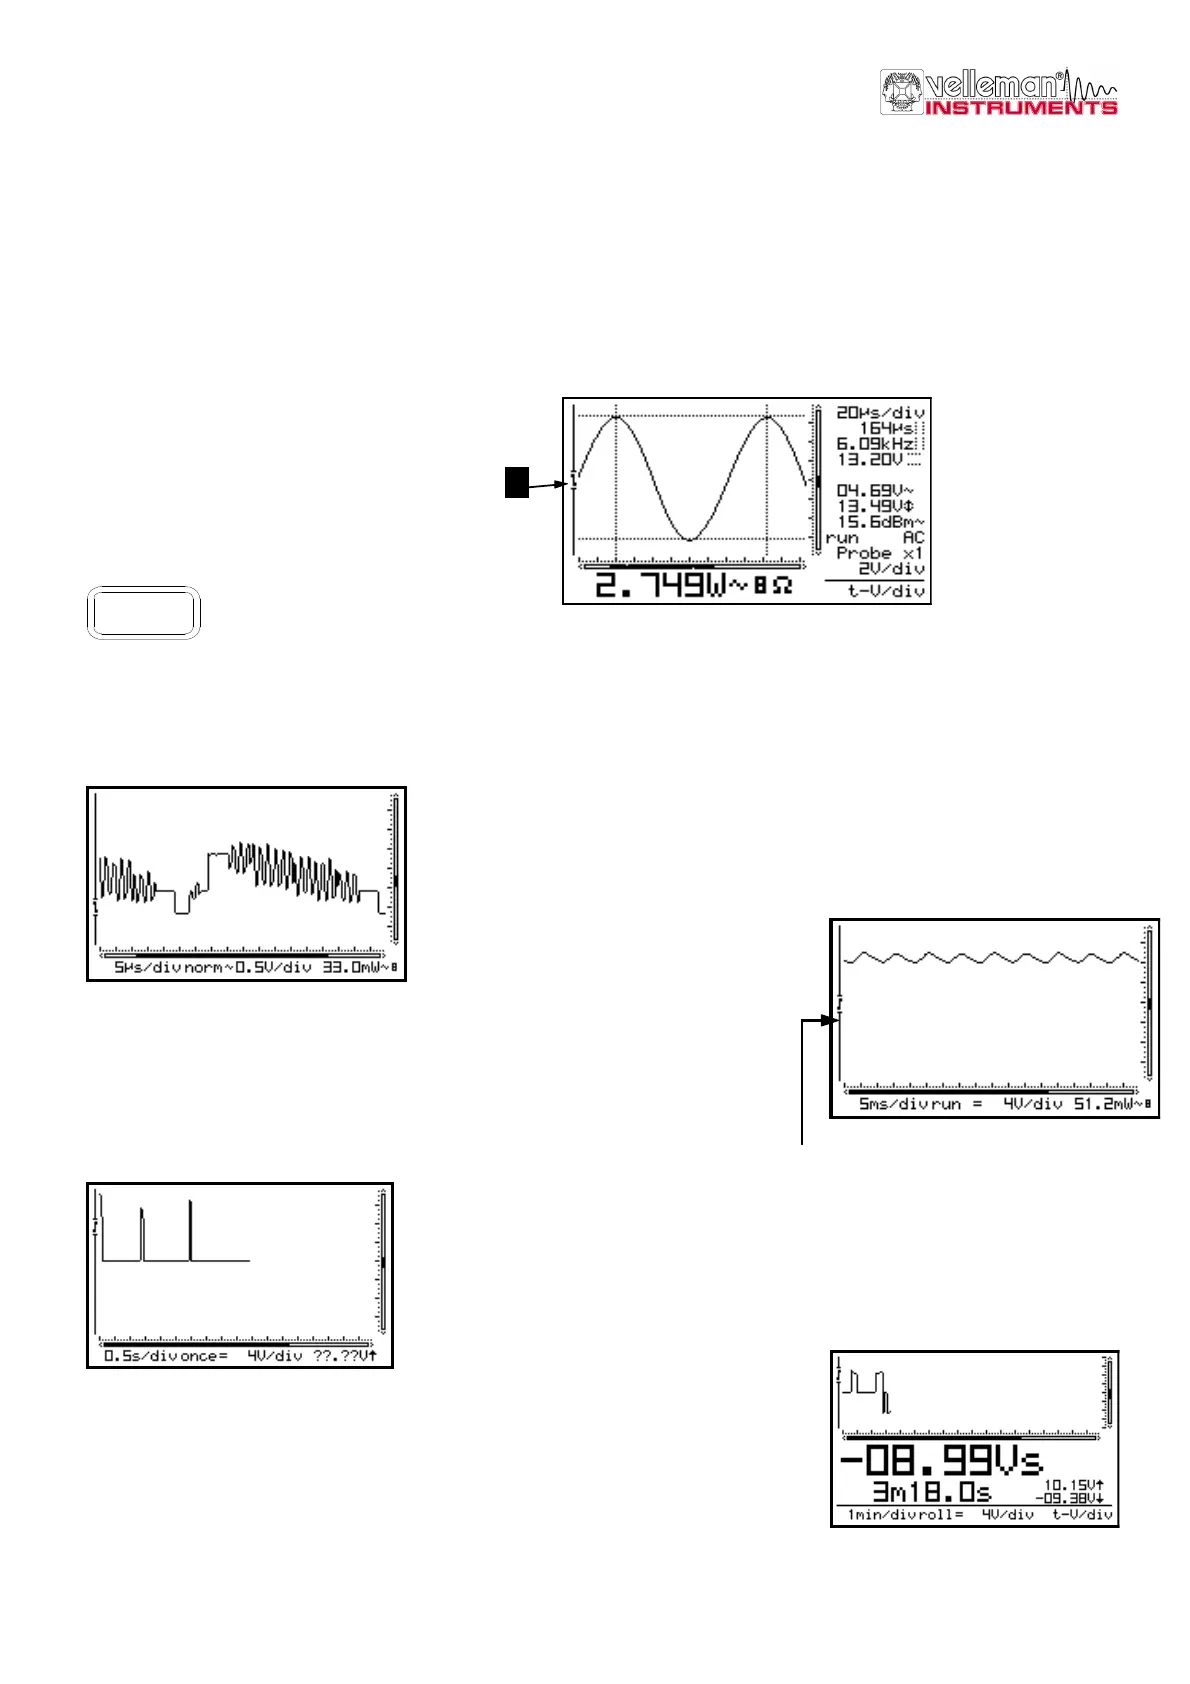
“Run” = Auto-trigger mode, the scope automatically triggers if no
triggering occurs for a fixed period of time. This position is used most
frequently and should always be used for measuring DC voltages in
particular. (Fig 38)
Trigger gab
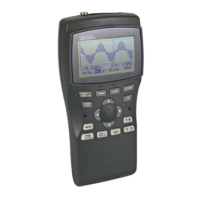
“Once”= Sampling starts after a trigger. Afterwards, the scope switches
to ‘HOLD’-mode. Use this mode to detect e.g. a short, once-only voltage
peak. (Fig 39)
“Roll” = Roll-mode is available for timebases of 1s/div or slower.
Sampling is continuous and the screen starts rolling as soon as it is full.
Use this position for “recording” slow moving signals. (Fig 40)
Fig 36
1
trig
Fig 37
Fig 40
 Loading...