FORWARD
This SERVICE MANUAL provides technical assistance to Welch Allyn repair technicians
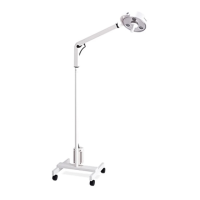
for diagnosing, repairing, and testing the WELCH ALLYN LS200 PROCEDURE LIGHT. The
manual’s main content areas cover: troubleshooting, step by step repair, adjustment, and re-test
procedures. The repair ‘TASK’ procedures (R & R .. Removal and Replacement) are written to
provide quick and easy reference for repair technicians of different experience levels. Required
specifications and materials are listed at each step where applicable. When reading this manual for
the first time, have an LS200 readily available for reference and practice. Read each complete repair
step on what to do (task statement), plus how to do it (technique statement) before starting the repair
or practice.
Training for the LS200 should consist of detailed demonstrations of required repair tasks,
practice on LS200’S using repair tooling and materials. Assess skill development through
observation of trainee practice on actual equipment. Set up sessions to allow the trainee to practice
the use of the diagnostic, repair, adjustment, and re-testing procedures found in this manual. The
ability of the technician to develop and retain new skills is in great part dependent on well prepared
training exercises. Each trainee must have the opportunity to practice the procedure(s) after it has
been demonstrated by the instructor.
More detailed background product information is found in the APPENDIX section and as such will
be a critical element in a comprehensive service training program for technicians.
I M P O R T A N T :
Welch Allyn part numbers and ‘M’ (material) numbers appearing in this manual are for the
purpose of familiarizing new technicians with Welch Allyn documentation conventions. Order
replacement parts, as always, by referencing your latest bill of materials, parts catalog and assembly
drawings. Part number changes, product updates, or new test procedures should be noted on the
appropriate page of this manual by the manual owner. Notices announcing these changes should be
attached to PRODUCT UPDATES APPENDIX.
3

 Loading...