11
Owner’s Manual EN
Wed.03/21 12:14
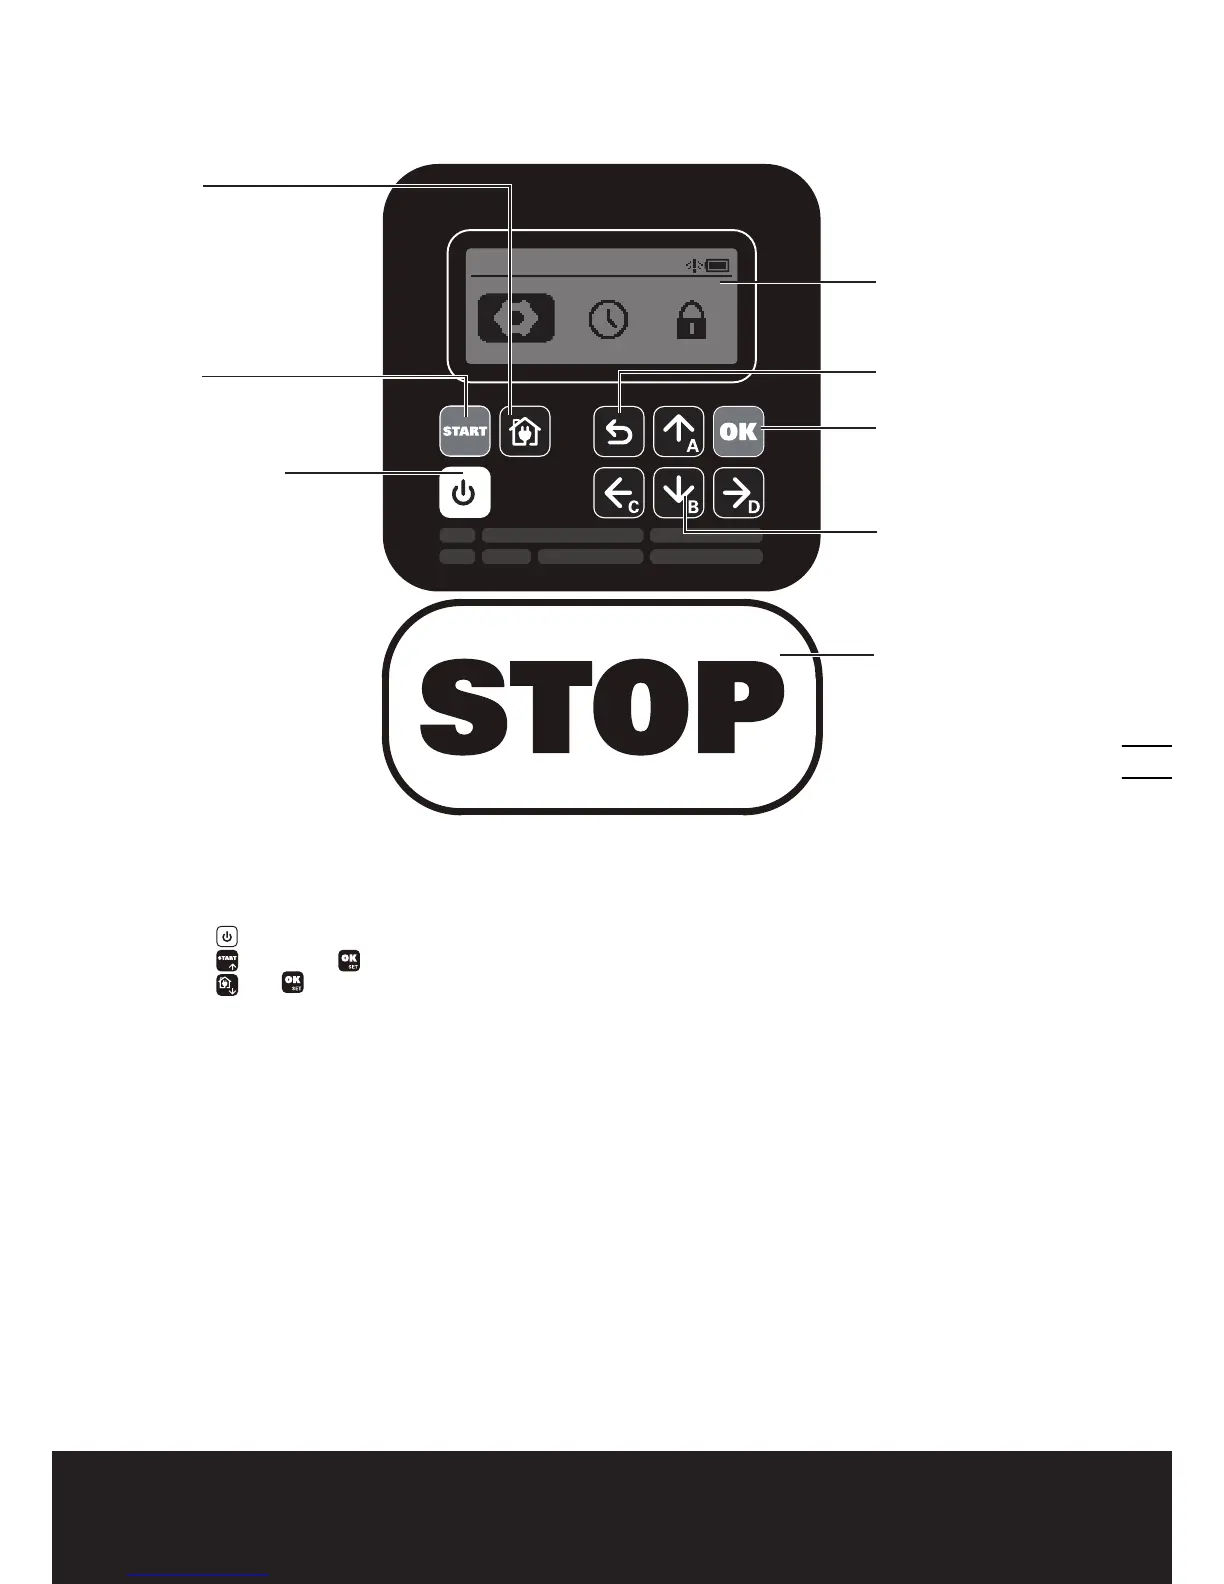
4. Control panel
Start
1) After the boundary wire installation, you can start using the Landroid
®
(Please refer to Installation Guide for boundary
wire installation).
2) Press
until Landroid
®
turns on, then input the default PIN AAAA.
3) Press
, then press to start mowing.
4) Press
then to make Landroid
®
go to the charging base.
Landroid
®
will work continuously until reaching low battery power level and then it will return to the charging base. Once
charging is complete, Landroid
®
will automatically resume mowing or stay in the charging base according to the mowing
schedule.
START
Starts mowing/Corrects
the problem
POWER ON/OFF
Turns Landroid
®
on and off
OK
Confirms any setting/
Enters Wi-Fi connection
mode
HOMEPAGE
Displays the state of your
setting
RETURN
Back to proceeding menu
STOP
Stops Landroid
®
during
operation
HOME
Sends Landroid
®
to its
charging base during
operation and activates
charging
Selects up/down/left/right
Inputs PIN code

 Loading...