17
Owner’s Manual EN
area exactly. Your Landroid
®
will become confused by extra bends or coils of boundary wire that are not part of its
mowing area (See Fig. I). If there is excess boundary wire after the mowing area has been outlined, cut it off and store this
additional wire in a separate location. It is important to leave the necessary length where it connects to the charging base
so it can be connected and still remain buried.
7.2 Burying the Boundary Wire
If you are planning to bury the boundary wire, it is recommended to first peg it down. This allows you to easily change the layout if
necessary before burying the wire. When the boundary wire installation is complete, have Landroid
®
follow and check the path by
pressing and . This allows your Landroid
®
to adjust to its new environment.
While observing Landroid
®
you can easily make alterations to the boundary wire to ensure Landroid
®
's trouble-free tracking when
locating the charging station. Confirm that Landroid
®
docks in the charging station successfully, and bury the wire if desired.
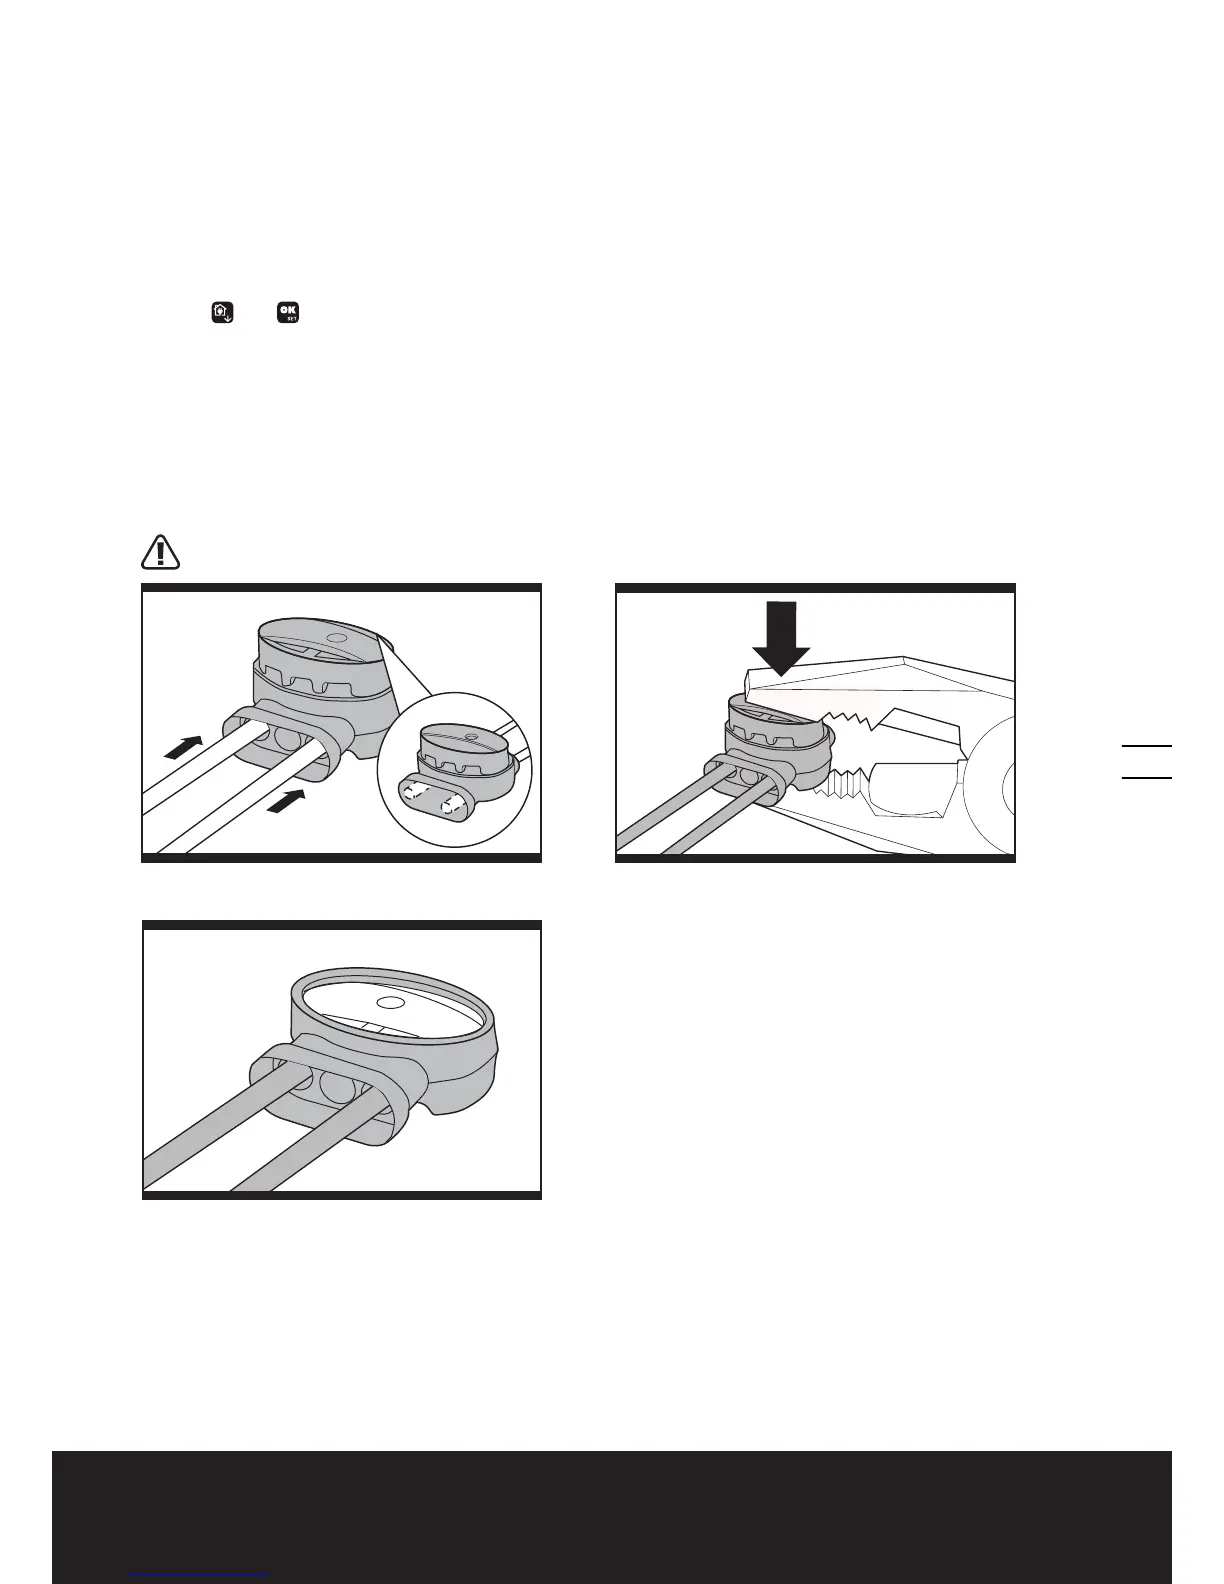
7.3 Joining the boundary wire
If you want to extend and splice the boundary wire, use a connector. The connector is waterproof and provides optimal
connection.
Insert both wire ends in any two of the three holes of the connector. Insert the wires fully until both wire ends are visible
on the other side of the connector. (See Fig. J1) Press the connector together by using a pair of pliers. (See Fig. J2, J3)
WARNING! It is not recommended to simply splice the boundary wire with insulating tape or use a screw terminal
block for connection. A broken circuit may occur after a period of time as soil moisture can oxidize the wire.
8. Software update
The software can be updated when new versions become available. The latest software can be downloaded from our
website www.worx.com. There are two methods to update software.
Method 1: Update via USB. See below for download and installation instructions:
J1
J2
J3

 Loading...