18
Owner’s Manual EN
(1) Locate the latest software version at: www.worx.com. Save the file to an empty FAT32 formatted USB (flash drive).
Delete any other files on the drive and check the format. If the drive is not formatted in FAT32, please reformat the
drive.
NOTE: the software update is downloaded as a zipped file. You will need to unzip or extract it before proceeding.
(2) Place Landroid
®
on a secure and level surface. Press to turn off your Landroid
®
.
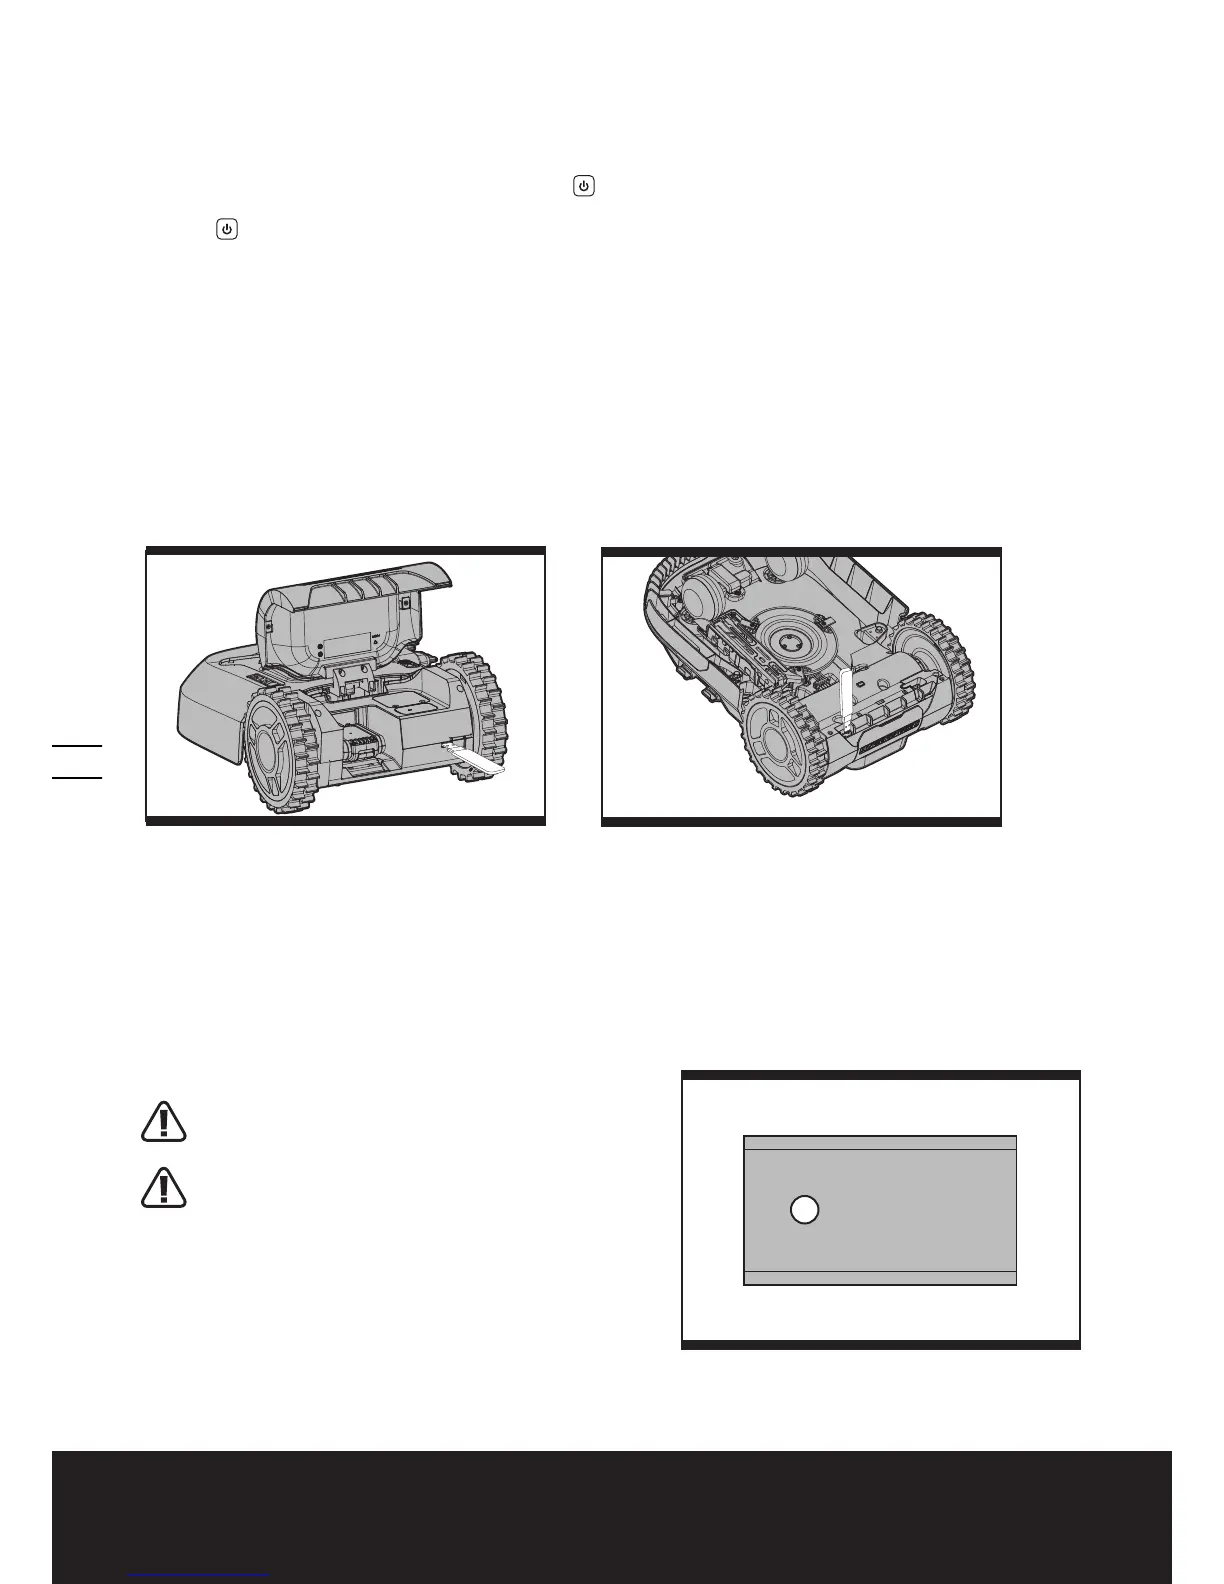
(3) Insert the USB drive (flash drive) in the port. (See Fig. K1, K2)
(4) Press
to turn on your Landroid
®
.
(5) Without lifting the Landroid
®
, remove the USB drive (flash drive) according to the screen tips.
(6) The update will begin automatically and may take several minutes.
Landroid
®
will restart automatically after the update is completed.
NOTE: If the Landroid
®
is not inside the boundary wire, the message “Outside working area! Press “START” to reset”
will be displayed. Please refer to the manual for more information.
(7) Be sure to tightly and completely close the rubber protective USB port cover.
Method 2: Update via your smartphone.
If your Landroid
®
is connected to your smartphone via the Landroid
®
App, you can check the software version. The App will also
notify you when new software version is available.
The manual included with your Landroid
®
is based on the default software at the time of production. Some new features/
functions in the new version may not exist in the manual. If you found some settings not in the manual, please visit www.worx.
com to download the latest manual.
9. Maintenance
Your Landroid
®
works hard and needs to be cleaned and checked from time to time. Some parts will require replacement
as they become worn. Never use your Landroid
®
with defective on/off switch.
Switch off the machine before carrying out any service or maintenance.
Here's how to take care of your Landroid
®
.
9.1 Keep it sharp
WARNING: Before cleaning, adjusting, or
replacing the blades, turn your Landroid
®
OFF and
put on protective gloves.
WARNING: When fitting new blades, make sure
you replace ALL the blades. Always use new
screws when fitting blades. This is important to ensure
blade retention and balance the blade turning disc.
Failure to use new screws could cause serious injury.
The Landroid
®
does not cut grass like other mowers. Its cutting
blades are razor sharp on 2 edges and rotate in both directions
for maximum cutting capacity (See Fig. L). Each blade of your
Landroid
®
has 2 cutting edges. The blade turning disc will make
forward and reverse rotation at random to use both cutting
K2
K1
WR142E
WR143E
WR145E
WR146E
WR153E
WR154E
WR155E
WR156E
1
2
L

 Loading...